
Contextualizing the Hadoop connection parameters
Before you begin
-
Ensure that the client machine on which Talend Studio is installed can recognize the host names of the nodes of the Hadoop cluster to be used. For this purpose, add the IP address/hostname mapping entries for the services of that Hadoop cluster in the hosts file of the client machine.
For example, if the host name of the Hadoop Namenode server is talend-cdh550.weave.local, and its IP address is 192.168.x.x, the mapping entry reads 192.168.x.x talend-cdh550.weave.local.
-
The Hadoop cluster to be used has been properly configured and is running.
-
A Hadoop connection has been properly set up following the explanations in Setting up the Hadoop connection.
-
The Integration perspective is active.
-
Cloudera is the example distribution of the current article. If you are using a different distribution, you may need to bear in mind the particular prerequisites explained as follows:
-
If you need to connect to MapR from the Studio, ensure that you have installed the MapR client in the machine where the Studio is, and added the MapR client library to the PATH variable of that machine. According to the MapR documentation, the library or libraries of a MapR client corresponding to each OS version can be found under MAPR_INSTALL\/hadoop\hadoop-VERSION/lib/native. For example, the library for Windows is \lib\native\MapRClient.dll in the MapR client jar file. For further information, see MapR documentation.
-
If you need to connect to a Google Dataproc cluster, set the path to the Google credentials file associated with the service account to be used in the environment variables of your local machine, so that the Check service feature of the metadata wizard can properly verify your configuration.
For further information how to set the environment variable, see Getting Started with Authentication of Google documentation.
-
Procedure
-
Enter a name for the context group, for example smart_connection, and click Next.
A read-only view of this context group is created and automatically filled with the parameters of the given Hadoop connection you defined in Setting up the Hadoop connection.
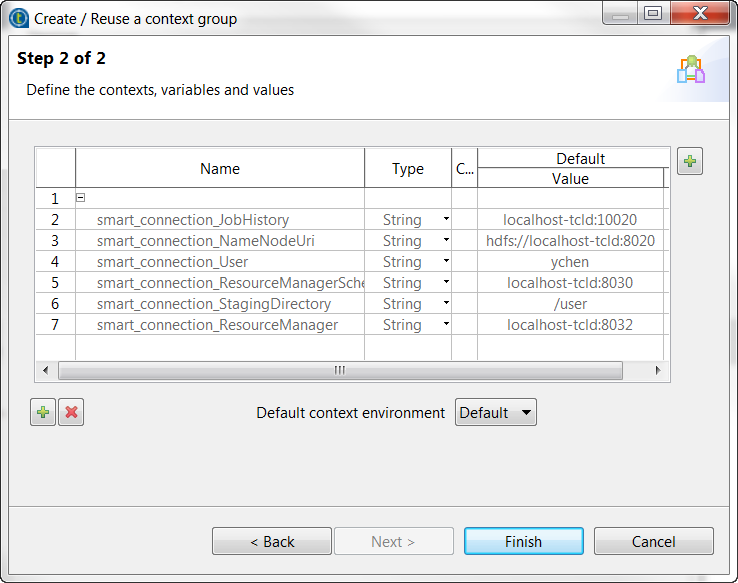
You may also notice that not all of the connection parameters are added to the context group, meaning that they are not all contextualized, as expected.
-
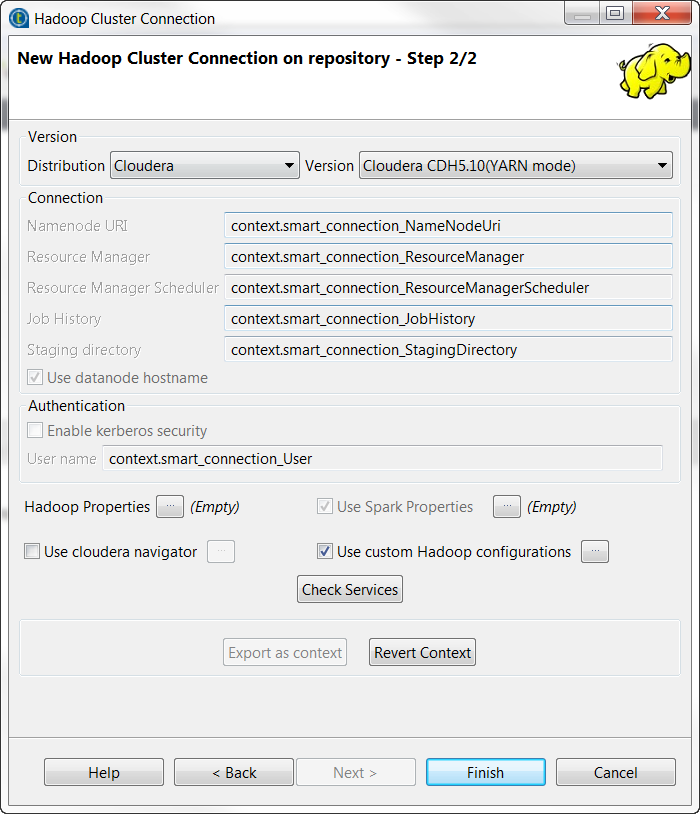
Click Finish to validate the creation and switch back to
the step 2 window of the Hadoop connection wizard.
The connection parameters have been automatically set to use the context variables and become read-only.
-
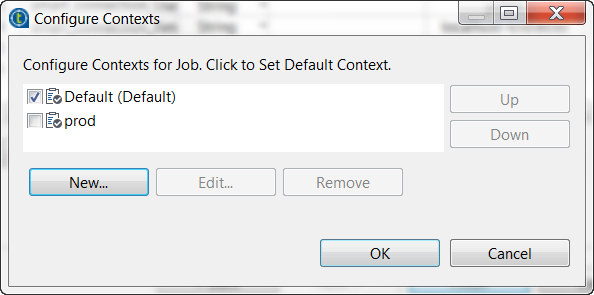
Click OK to validate the changes and close the New context wizard. The new context is added to the context list.
-
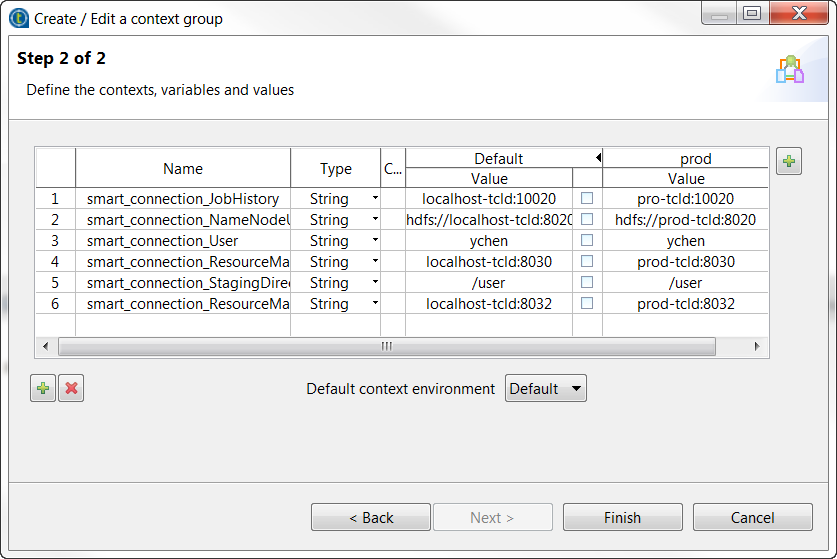
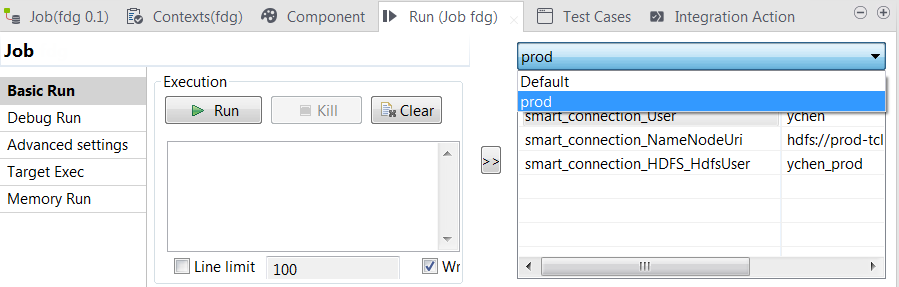
Define the new context to contain the connection parameter values for a different Hadoop cluster, for example, your production one.
-
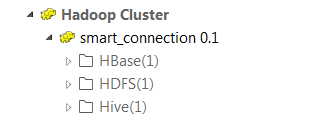
The Hadoop connection is now contextualized and you can
continue to create child connections to its elements such as HBase, HDFS and
Hive etc. based on this connection. Each connection wizard contains the
Export as context button that you
can use to contextualize each connection.
Results
When you reuse these connections via the Property type list in a given component in your Jobs, these contexts are listed in the Run view of the Job at your disposal.
Did this page help you?
If you find any issues with this page or its content – a typo, a missing step, or a technical error – let us know how we can improve!