
Creating a SpagoBI server entry
About this task
Beforehand, you need to set up your single or multiple SpagoBI server details in Talend Studio.
Procedure
-
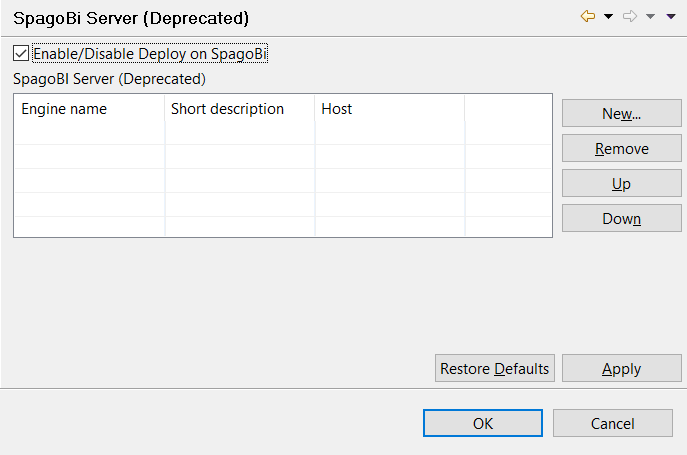
Expand the
Talend
> Import/Export nodes in succession and
select SpagoBI Server (Deprecated) to display the
relevant view.
-
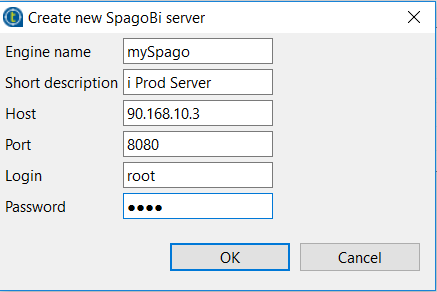
Click New to open the Create new SpagoBi
server dialog box and add a new server to the list.
-
Click OK to validate the details of the new server entry
and close the dialog box.
 The newly created entry is added to the table of available servers. You can add as many SpagoBI entries as you need.
Did this page help you?
If you find any issues with this page or its content – a typo, a missing step, or a technical error – let us know how we can improve!