Configuring the test case - Cloud - 7.3

Talend Studio User Guide

Version
Cloud
7.3
Language
English
Product
Talend Big Data
Talend Big Data Platform
Talend Cloud
Talend Data Fabric
Talend Data Integration
Talend Data Management Platform
Talend Data Services Platform
Talend ESB
Talend MDM Platform
Talend Real-Time Big Data Platform
Module
Talend Studio
Content
Design and Development
Last publication date
2024-02-13
Available in...

Cloud API Services Platform

Cloud Data Fabric

Data Fabric

Data Services Platform

ESB

MDM Platform

Real-Time Big Data Platform

Procedure

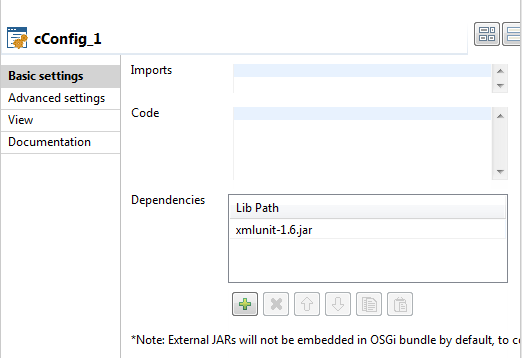
  1. Double-click the cConfig component to open its Basic settings view in the Component tab.
  2. In the Dependencies list, add the xmlunit-1.6.jar, which can be obtained from the XMLUnit website. Note that you need to add this dependency when testing XML messages. It helps to validate the content of the XML messages against the schema.
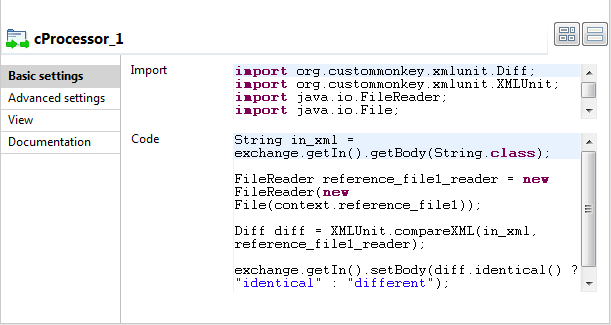
  3. Double-click the cProcessor component to open its Basic settings view in the Component tab.
  4. In the Import area, enter the following code to import the external libraries:
    import org.custommonkey.xmlunit.Diff;
    import org.custommonkey.xmlunit.XMLUnit;
    import java.io.FileReader;
    import java.io.File;
    In the Code area, enter the following code to compare the received XML file and the target XML file and return identical or different as the result.
    String in_xml = exchange.getIn().getBody(String.class);
    
    FileReader reference_file1_reader = new FileReader(new File(context.reference_file1));
    
    Diff diff = XMLUnit.compareXML(in_xml, reference_file1_reader);
    
    exchange.getIn().setBody(diff.identical() ? "identical" : "different");
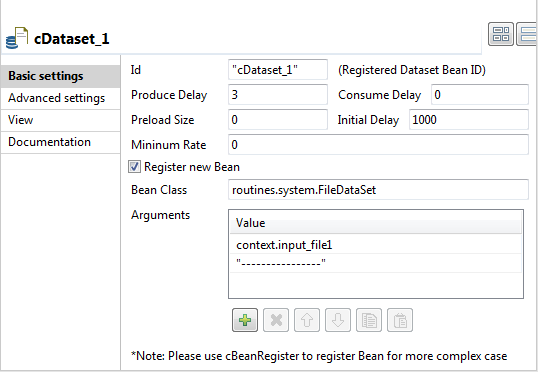
  5. Double-click the first cDataset component to open its Basic settings view in the Component tab.
  6. In the Arguments table, the row with the value context.input_file1 has been added automatically. Add another row "----------------" to treat the input as one message.
    Note that when using the cDataset as the message producer, if the input message contains multiple lines, you need to add a line separator in the Basic settings of the cDataset. The line separator must be the same as the split line in the input file so that cDataset will split each message and process testing correctly. In case there is only one multiple-line message in the input file, you still need to set the line separator in the Basic settings of the cDataset so that it can be treated as one message. If the line separator is not specified, each line from the input will be treated as one message.
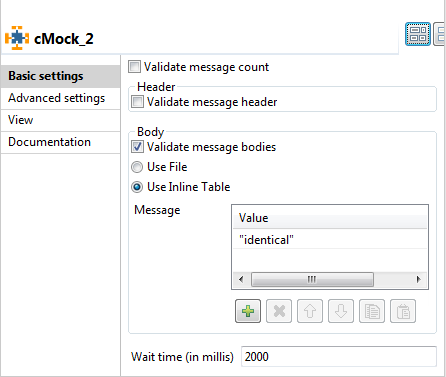
  7. Double-click the first cMock component to open its Basic settings view in the Component tab.
  8. Select the Simulate check box and select the cProcessor_1 to produce the message.
  9. Double-click the second cMock component to open its Basic settings view in the Component tab.
  10. Select the Validate message bodies check box and click the Use Inline Table option. Click [+] to add one row in the Message table and enter "identical" in the Value field.
  11. In the Test cases view, click input_file1 on the left panel and click File Browse on the right panel. Use the XML file as shown the beginning of this example here.
    For the reference_file1, browse to the XML file that contains the expected result. Here it should be:
    	<Customer>
    		<Number>1</Number>
    		<FirstName>Fred</FirstName>
    		<LastName>Landis</LastName>
    		<Address>
    			<Street>Oakstreet</Street>
    			<City>Boston</City>
    			<ZIP>23320</ZIP>
    			<State>MA</State>
    		</Address>
    	</Customer>
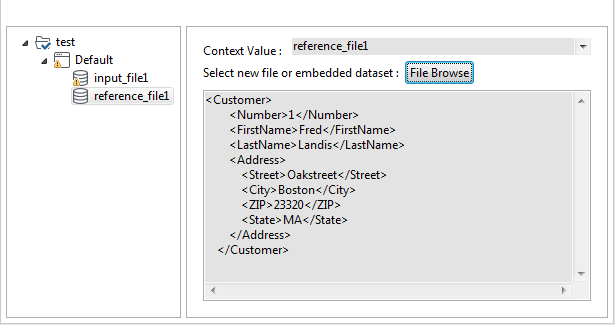