
Creating a Route test case
To create a test case for a Route, do the following:
Procedure
-
Right-click the functional part of the Route you want to test and select
Create Test Case from the contextual menu,
the cLog component in this example.

-
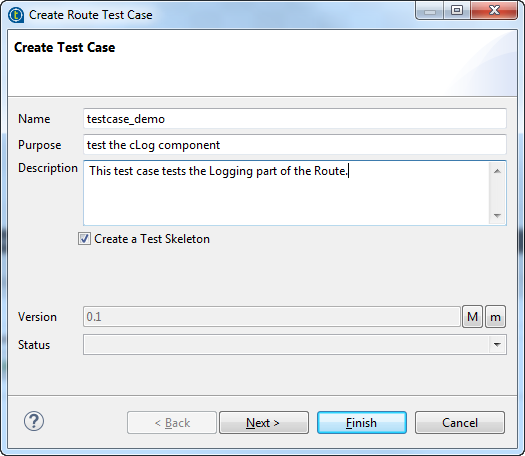
In the Create Test Case dialog box, enter
a name for the test case in the Name field, and the
optional information, if needed, such as purpose and description in the corresponding
fields.
-
The Define Test Skeleton details view of
the wizard opens, allowing you to use a cMock
or a cDataset as the message producer, and a
cMock to check the result.
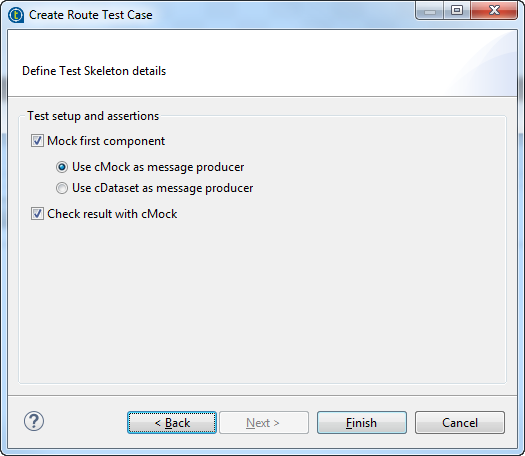 When enabling the Mock first component option and using a cMock or a cDataset as the message producer, the test case will start with the testing component cMock or a cDataset. The selected component from the Route will be added behind the testing component. If you selected a message producer in the Route, it will become a consumer in the test case.If the Route contains any standalone component, for example, the cConfig, cBean and so on, they will be shown in the Define Test Skeleton details view of the Create Route Test Case wizard. You choose to copy them into the test case.
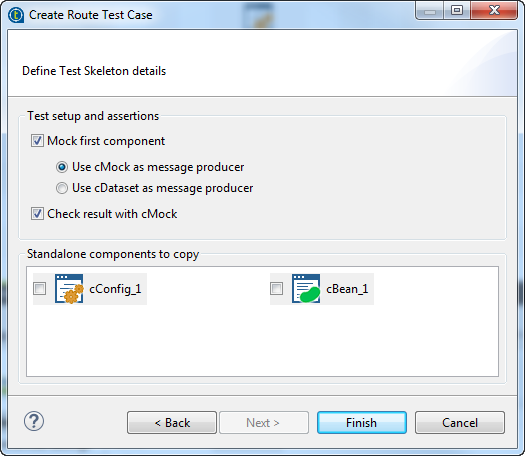 Select the component you want to use and click Finish to close the wizard. The test case is then created and opened in the design workspace, with all the required components automatically added, allowing you to test any types of input and output messages.In the Repository tree view, the newly created test case appears under your Route.
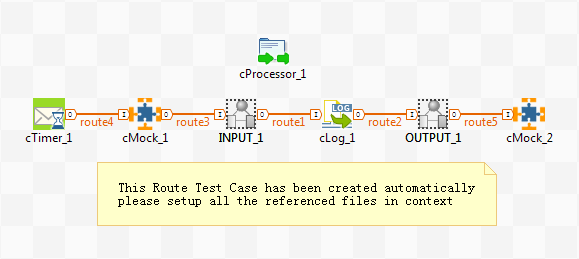 The generated skeleton depends on the component(s) selected in the Route to create the test case. Note that you should not change the components between the INPUT and OUTPUT items in the test case. In this example, the test case aims at:
-
generating test message exchanges and reading input test data (cTimer_1 and cMock_1 components),
-
transforming data with an immutable set of components (INPUT and OUTPUT items) based on the initial Route,
-
checking that messages have been routed as expected and validating the test output result (message content, count, header, and so on.) using the cMock_2 component.
Depending on the number of input and output flows, a variable number of context variables are automatically created to specify the input and reference files. -
Did this page help you?
If you find any issues with this page or its content – a typo, a missing step, or a technical error – let us know how we can improve!