
Designing a workflow from scratch
From the BPM perspective in Talend Studio, you can design a workflow graphically. This workflow is defined as a sequence of connected steps that will require human or automatic intervention. Each step in the workflow is enabled after the completion of the previous step.
When a given workflow is triggered, all tasks included in it will need to be fulfilled. Any required human intervention will be listed in Talend MDM Web UI. A workflow may require a business user or data steward to have constant interaction with master data.
About this task
Procedure
-
In the upper right corner of the Talend Studio main window, click the
 perspective, do the button to
display the Open Perspective dialog box.
perspective, do the button to
display the Open Perspective dialog box.
-
On the menu bar, click .
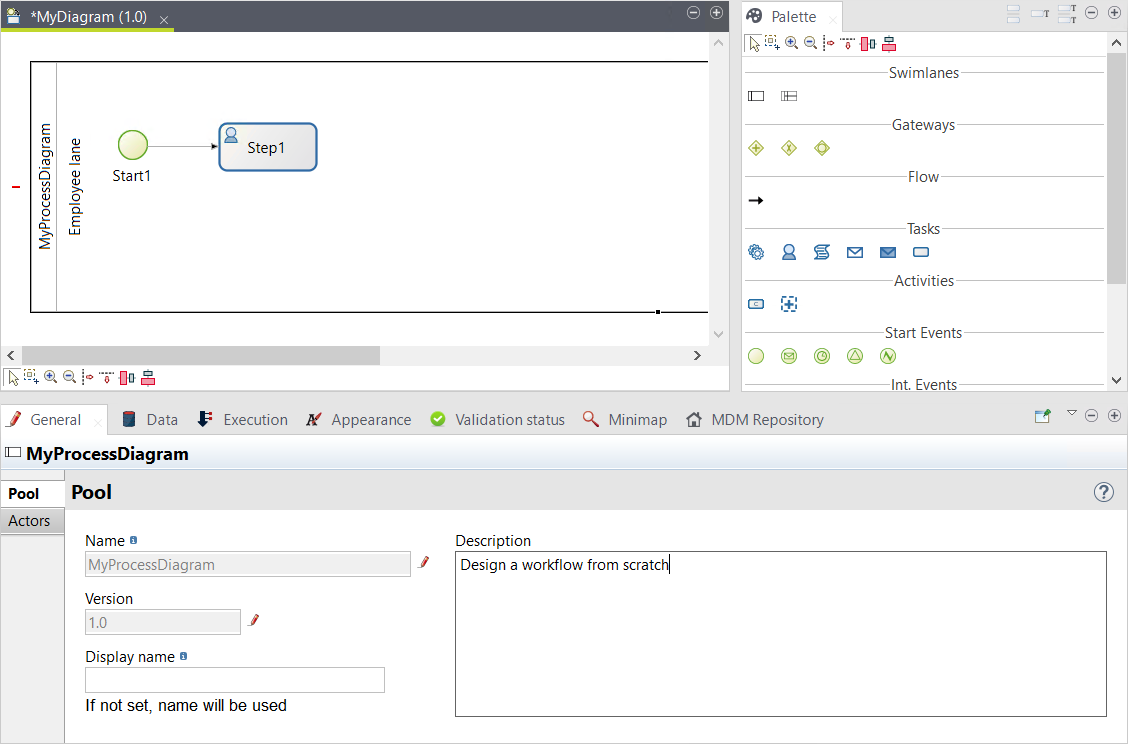
A default workflow diagram appears in the graphical perspective.
-
Draw the steps and transitions in the workflow and assign them either human or
automatic intervention.
If needed, you can always click
 to show
or hide the help information.
to show
or hide the help information.
Example
Consider an example where one or several business users can change the price of a product and this change needs to be validated by other authorized business users. In order to accomplish this process, you may want to design a Runnable Process and a workflow in Talend Studio. The Runnable Process, directly accessible through Talend MDM Web UI, will launch a workflow that will enable one data steward to change the price and another data steward to validate this change.
The workflow below graphically illustrates this example.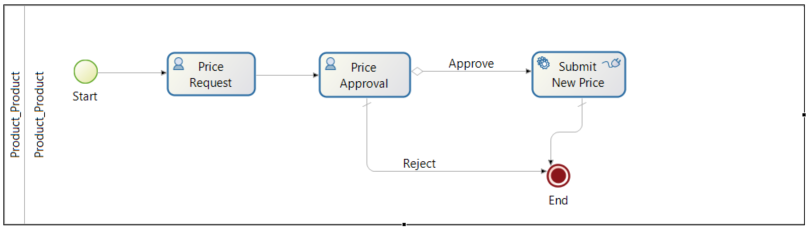
In a workflow, it is quite possible that you need to define some variables to be used for the task operations or the conditions you defined for transitions. You can define as many variables as required for the entire workflow globally or specifically for each task.
To define variables for a specific task, do the following:
- Select the specific task for which you want to define variables. In this example, it is Price Approval.
- In the Data view, click the
Local variables tab.
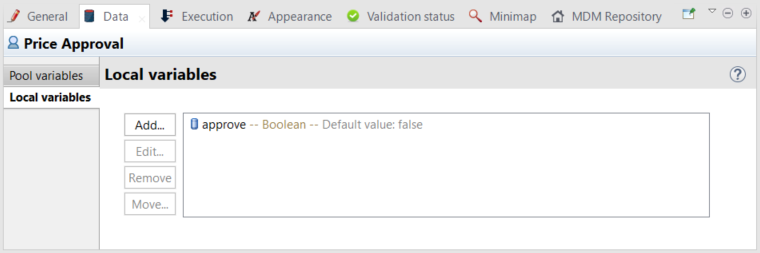
- Click the Add... button.
- In the New variable dialog box
that opens, define a name for the new variable, and then select a proper data type
for the new variable.Information noteNote: The name of the variable must be a valid Java identifier.
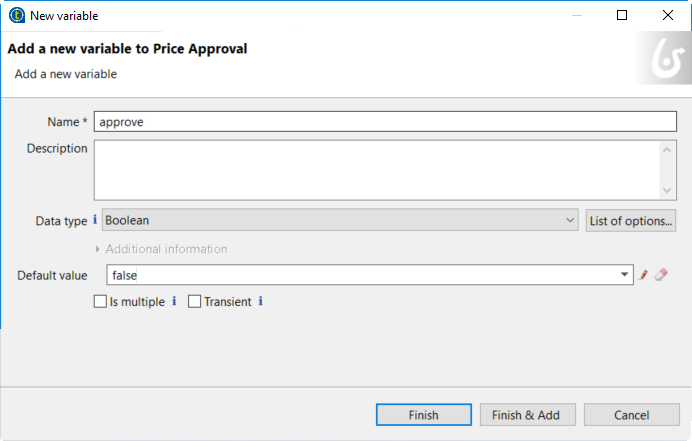
- If needed, in the Default
value field, define a default value for the new variable.Information noteWarning: If you need to read or write values of a record through the mdm_context variable when defining the default value of a local variable, you need to add some specific codes by calling the method setBypassSecurity or setUpdateUser to make it work.
- Click Finish to close the dialog box.
In a workflow, it is quite possible that you need to define some operations for a specific task.
To define an operation for a step, do the following:
- Select a specific step for which you want to define operations. In this example, it is Price Request.
- In the Execution view,
click the Operations tab.
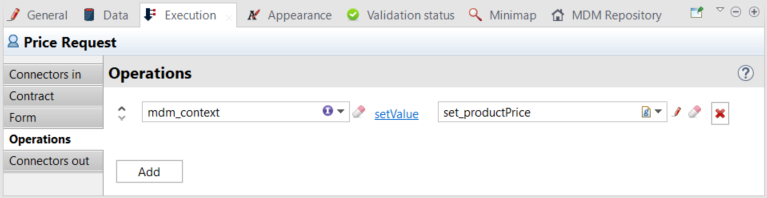
- Click the Add button.
- From the Select target field, select an appropriate variable, mdm_context in this example.
- Click the Takes value of
link to open the Select operator dialog box.
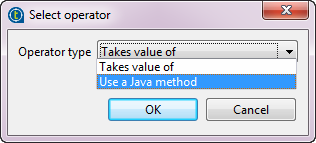
- Select an operator type from the list, Use a Java method in this example, and then select setValue from the list of methods.
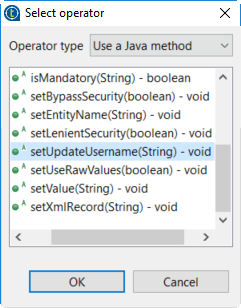
- Click OK to close the dialog box.
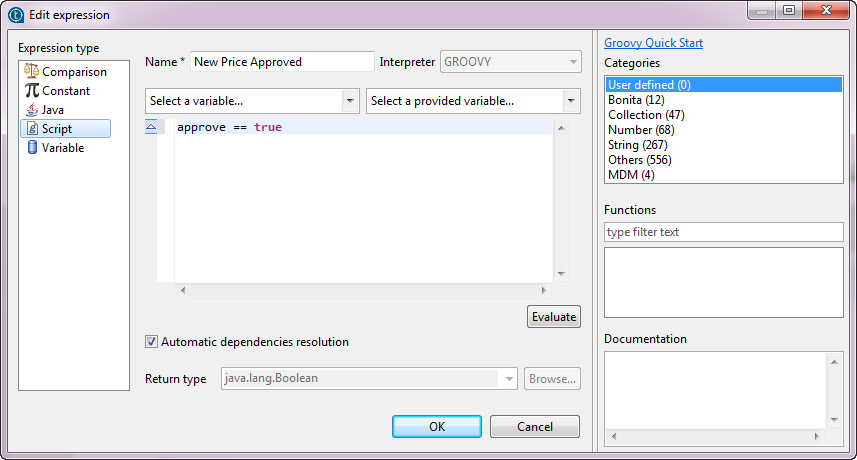
- For the second field, click the Edit button to open the Edit
expression dialog box and then edit the condition according to your
needs.
In this example, select Script as the expression type, and define a name set_productPrice for the expression.
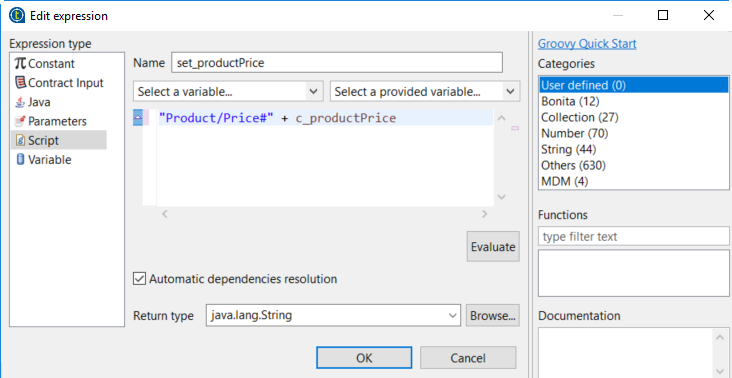
- Enter the following script in the script area to set it to
mdm_context.
"Product/Price#" + c_productPrice - Once you have finished editing the expression, click OK to close the dialog box.
Repeat the procedure above to add other operations if needed.
You must also set the link conditions in your workflow.
- Click the link between Price Approval and Submit New Price to open the General view in the lower part of the BPM perspective.
- In the Name field, enter a name for the selected link, Approve in this example.
- Use expression or use decision table to set the condition.
In this example, select Use expression, and then click the Edit button to open the Edit expression dialog box.
Once the condition is defined, click OK to close the dialog box.
Repeat the procedure above to set other link conditions.
After you finished designing a workflow, in order to be able to trigger such a workflow from the MDM perspective, you must define the following in the BPM perspective:
-
MDM connectors
-
Workflow actors
Did this page help you?
If you find any issues with this page or its content – a typo, a missing step, or a technical error – let us know how we can improve!