Skip to main content Skip to complementary content
Close announcements banner

Scheduling the Job

Procedure

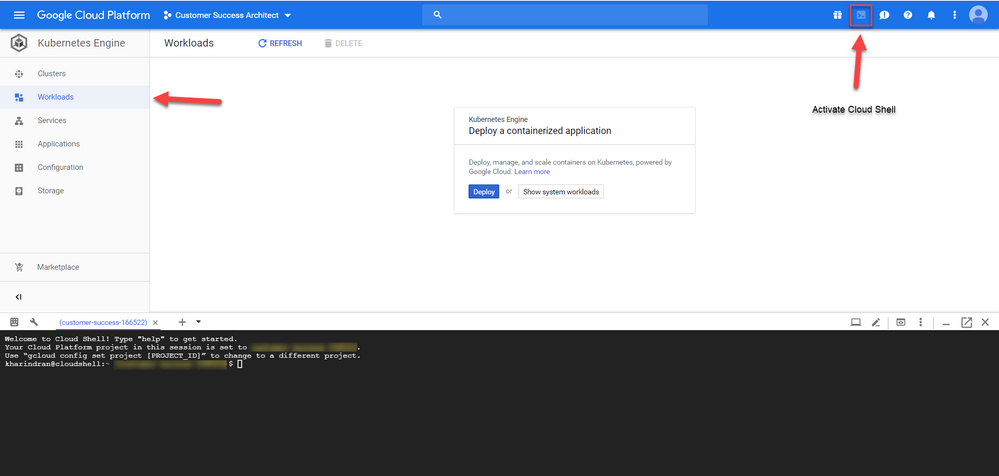
  1. Click the Workloads tab on the left side of the Kubernetes Engine page, and click the Activate Cloud Shell on the top.
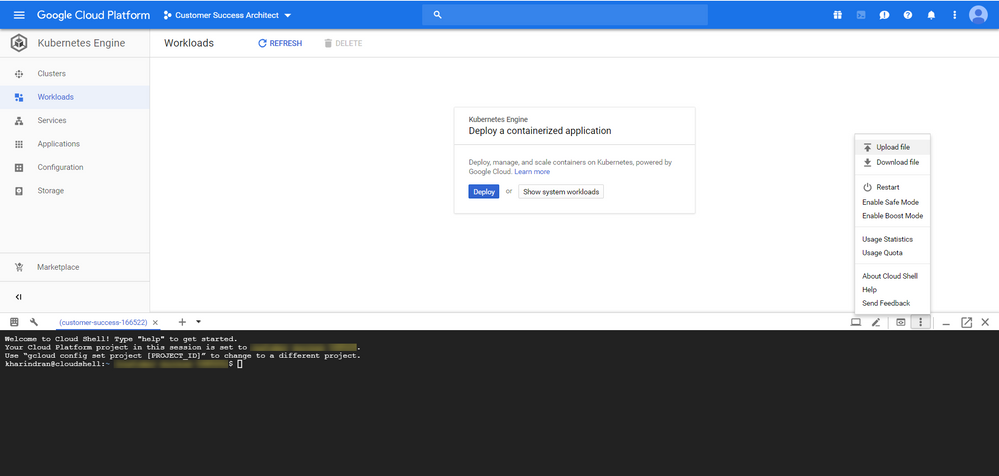
    Screenshot of the Workloads tab in Google Cloud Platform with the Cloud Shell activated.
  2. Create the Secret with the name regcred by executing the following command.
    kubectl create secret docker-registry regcred --docker-server=<docker-registry-server> --docker-username=<dockerId> --docker-password=<docker-password> --docker-email=<your-email>
    Kubernetes cluster uses the Secret feature of docker-registry type to authenticate and pull a private image. This Secret can be created in the Cloud Shell. For more information about Secret, see Pull an Image from a Private Registry.
  3. Create a config.yml file on your local workstation with the following details. Make sure you do not change the alignment for the parameters.
    apiVersion: batch/v1beta1
    kind: CronJob
    metadata:
    name: talend-standard-job
    spec:
    schedule: "*/3 * * * *"
    jobTemplate:
    spec:
    template:
    spec:
    containers:
    - name: kubernetes-job
    image: dockerId/standard_job:latest
    restartPolicy: Never
    imagePullSecrets:
    - name: regcred
    backoffLimit: 4
    The schedule parameter defines when and how often a Job runs in crontab. It follows Unix standards and all the CronJob times are in UTC. There are 5 fields in the schedule parameter. To know how to set up a schedule for the CronJob, see CronJobs.
  4. Click the Settings button for the shell window as shown below and click Upload file to choose and upload the created config.yml file.
    Screenshot of the Settings drop-down list expanded in the Workloads tab.
  5. After uploading the file, run the following command in the cloud shell.
    kubectl create -f config.yml
    This creates a Cron Job named talend-standard-job like below.
    Screenshot of the newly created talend-standard-job Cron Job.
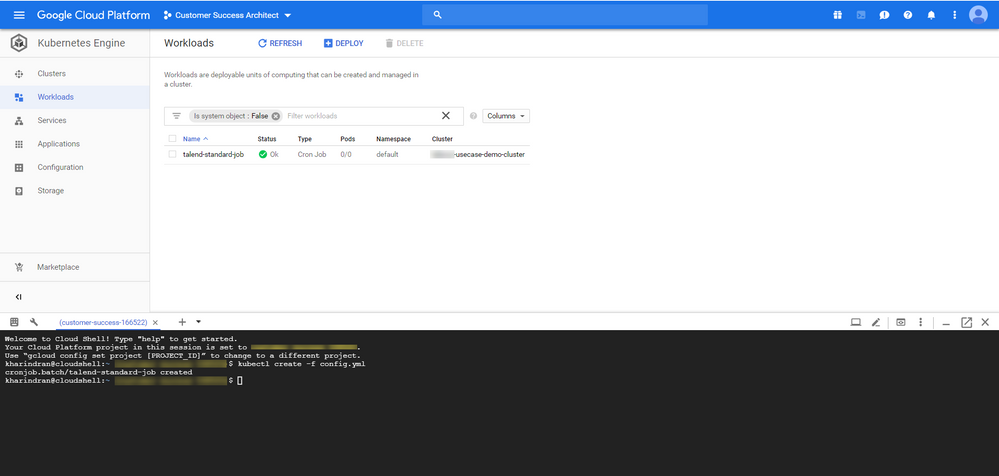
  6. Once the Cron Job is created, click it to see the following details.
    Screenshot of the Cron Job details.
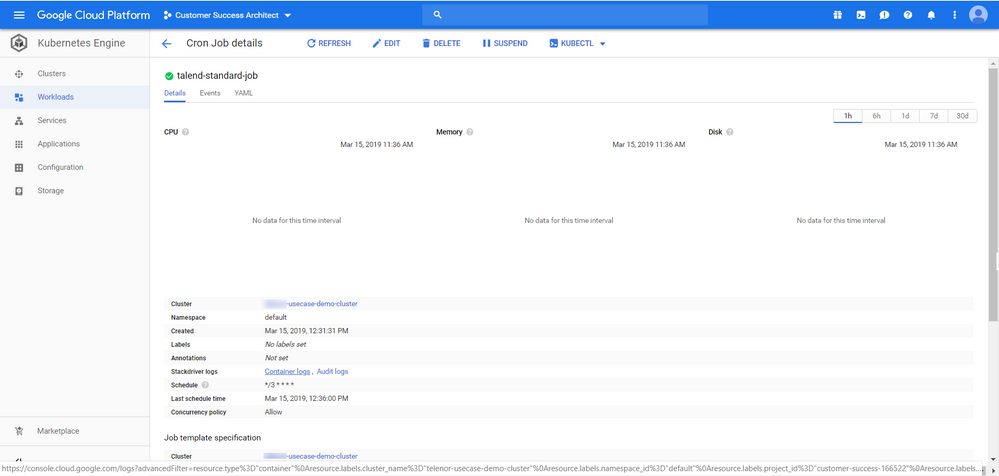
    This Job is scheduled to run every 3 minutes.
    To see the Job execution logs, click the Container logs on the Cron Job details page.
    Screenshot of the Cron Job logs.
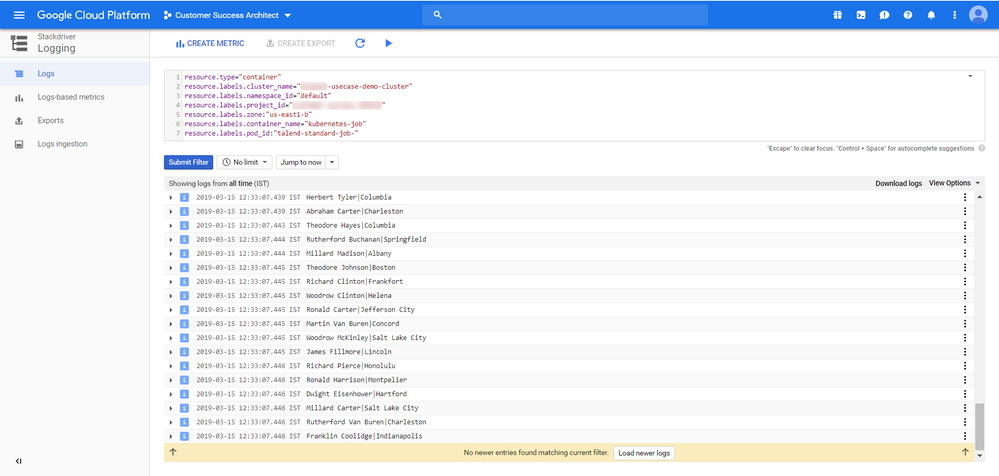
    To delete the Cron Job, click it and on the Cron Job details page, click KUBECTL > Delete. This will open a Cloud Shell with a command in it. Press Enter to delete the Job.
    Screenshot of the KUBECTL drop-down expanded with the option to delete the Cron Job.

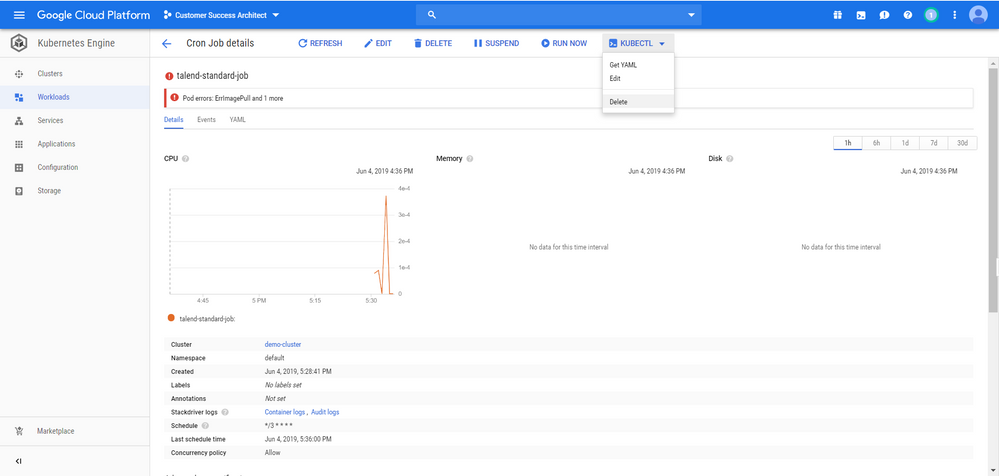
Did this page help you?

If you find any issues with this page or its content – a typo, a missing step, or a technical error – let us know how we can improve!