
Setting up the Job
Procedure
-
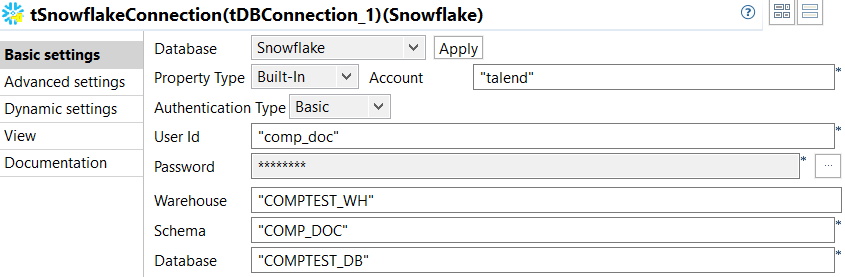
Double-click tSnowflakeConnection to open its Basic settings view and enter all the information that
is needed to establish the Snowflake connection.
-
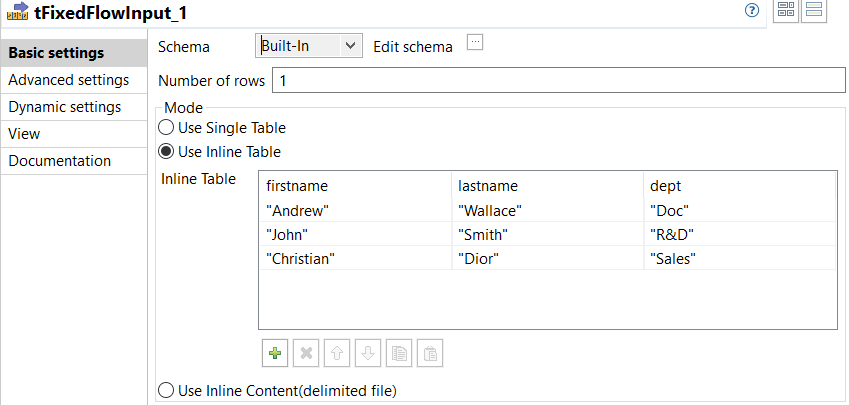
Double-click tFixedFlowInput_1 to open its Basic
settings view and do the following.
This component defines the record fields and creates three records for the scenario.
-
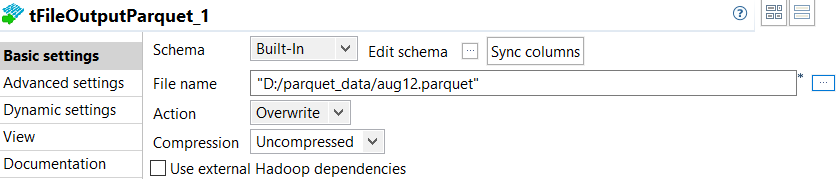
Double-click tFileOutputParquet_1 to open its
Basic settings view and do the following.
This component writes the data to a specified file.
-
Double-click tFileInputParquet_1 to open its
Basic settings view and do the following.
 This component retrieves the data from the file which the tFileOutputParquet_1 writes data into and passes the data to the subsequent component (that is, tSnowflakeOutputBulkExec).
 -
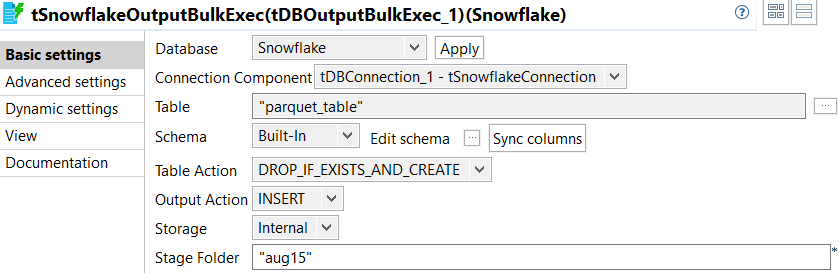
Double-click tSnowflakeOutputBulkExec to open its
Basic settings view and do the following.
This component receives data from the tFileInputParquet component and loads the data into a specified Snowflake table.
-
Double-click tSnowflakeInput to open its Basic
settings view and do the following.
- Select tDBConnection_1 - tSnowflakeConnection from the Connection Component drop-down list.
- Click the [...] button next to the Table field and select the same table as the one selected for the tSnowflakeOutputBulkExec component.
- Click the [...] button next to Edit schema to open the schema editor and add the same three columns as those of the tFileOutputParquet component.
- Leave the other options as they are.
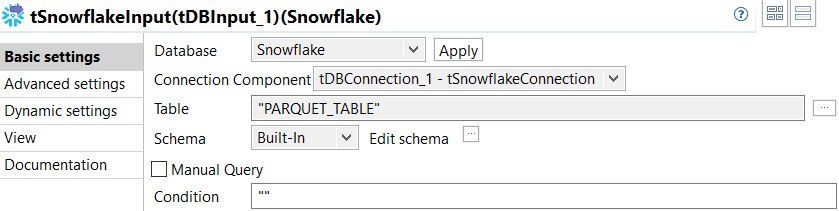 This component retrieves the data from the Snowflake table specified for the tSnowflakeOutputBulkExec component.
 -
Double-click tLogRow_1 to open its Basic
settings view and do the following.
- Click the Sync column button and then check that the component has the same columns in the schema as those of the tSnowflakeInput component.
- Select Table (print values in cells of a table).
- Leave the other options as they are.
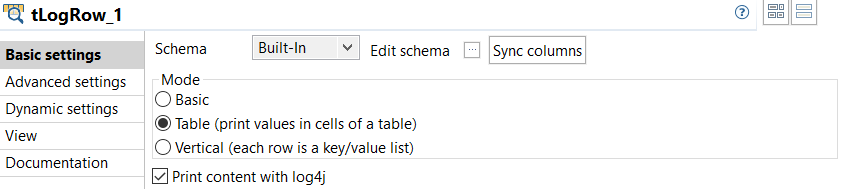 This component verifies the data that is written into the Parquet file and then loaded to the Snowflake table.
Did this page help you?
If you find any issues with this page or its content – a typo, a missing step, or a technical error – let us know how we can improve!