Skip to main content Skip to complementary content
Close announcements banner

Defining a custom role

Availability-noteDeprecated

From Talend Studio, the administrator can create as many custom roles as needed and grant specific rights and privileges on different data objects and pertaining items.

The administrator can also rename, copy, duplicate an existing custom role and edit its properties (e.g. function, purpose, version, etc.), classify a custom role into a specific category, and export/import selected custom roles.

Information noteNote: The MDM server is delivered with the following default system roles: System_Admin, System_Interactive, and System_Web. The default system roles are not displayed under the Role node in the MDM Repository and cannot be modified.

Once the custom role is created, an authorized business person can assign this role to any user through Talend MDM Web UI. For more information, see User management in MDM Web UI.

Information noteNote: You must always define access control to business entities and attributes in the data model for the role you create. This will set what type of access to business entities and attributes is attached to this role.

Before you begin

  • You have already connected to the MDM server from Talend Studio.
  • You have the appropriate user authorization to create a custom role.

About this task

To create a custom role, do the following:

Procedure

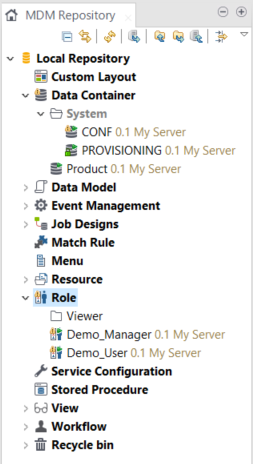
  1. In the MDM Repository tree view, expand the Role node. All custom role categories and custom roles are displayed under it.
    MDM Repository opened.
    Information noteWarning: The name of a category must not be system or any of its upper or lower case variants. Any breach of this rule will result in failure in importing the category.
  2. Right-click the Role node or a category node if you want to classify the new custom role in that category, and select New from the contextual menu. The New Role dialog box displays.

    You can also classify a custom role into a category by dragging it into that category after creation.

  3. Enter a name for the new custom role and then click Next to open the Role Type view on the dialog box.
    Information noteWarning:
    • The name of a custom role is case sensitive.
    • The name of a custom role must not start with "system_" and must not be "administration", no matter uppercase or lowercase. Any breach of this rule will result in failure in importing the custom role.
  4. Select one of the two available options according to the role type you want to create and click Finish.
  5. Double-click the newly created role, which appears under the Role node in the MDM Repository tree view.
    An editor opens in the workspace.
    Role "Order_Admin 0.1" editor opened in the workspace.
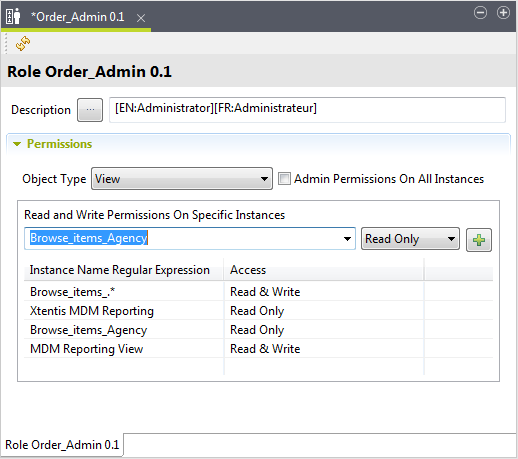
  6. Click the three-dot button next to Description to open a dialog box where you can add multilingual labels to the new role.
    "Set the Description of the Role" dialog box.
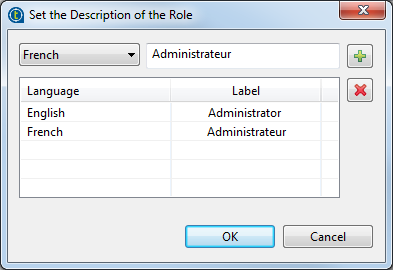
  7. From the list to the left, select a language and enter the corresponding role description in the field to the right.
    Click the Add button to add the description to the Language/Label list.

    Repeat the operation to add as many descriptions as needed and click OK to close the dialog box.

    All defined role descriptions display in the Description field.

  8. From the Object Type list, select the data object type to which you want to give a role permission.
    From this list you can give access permission to any of the data objects you can find in the MDM Repository tree view such as View, Menu, Data Container, Data Model, etc.
    Information noteNote: When giving access permission to a view, you can also set a filter for the view by using one or multiple conditions, and different filters applied to the same view in different roles can be combined. For more information, see Behaviors of filters using multiple conditions and predicates in Talend MDM.
  9. In the Read and Write Permissions on Specific Instances field, select the data object itself to which you want to give access.
    Information noteNote: The use of regular expressions is supported. For example, if you want to grant the new role an access to all views, enter "Browse_items-.*" in the field.
  10. In the field to the right, select the permission type you want to give to the new role. Read Only is the by-default type.
  11. Click the Add button to add the item to the table in the lower half of the editor.
  12. Click the save icon on the toolbar or press Ctrl+S on your keyboard to save your changes.

    The newly created custom role is listed under the Role node in the MDM Repository tree view.

Did this page help you?

If you find any issues with this page or its content – a typo, a missing step, or a technical error – let us know how we can improve!