
GIT Feature Branch Workflow
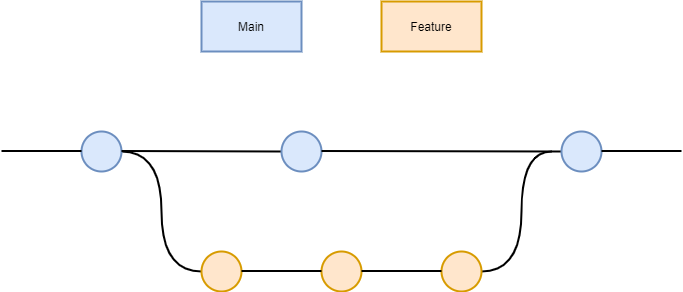
The Git feature branch workflow is an efficient way to work with the team in Talend Studio. In this workflow, all feature development takes place on dedicated branches separate from the main branch.
The feature branch workflow assumes a central repository and main represents the official project history. Each time developers start working on a new feature, they create a new branch instead of committing directly on their local main branch. Therefore, multiple developers can work on a feature or on multiple features at the same time without touching the main branch.
The following is an example of the type of scenario in which the feature branch workflow is used. This is one example of the many purposes this model can be used for.
Suppose there are two developers Andy and Lucy in a team working on the same feature talend-123.
Andy is first assigned to work on this new feature. He creates a new feature branch talend-123 based on main in Talend Studio and switches to the newly created branch.
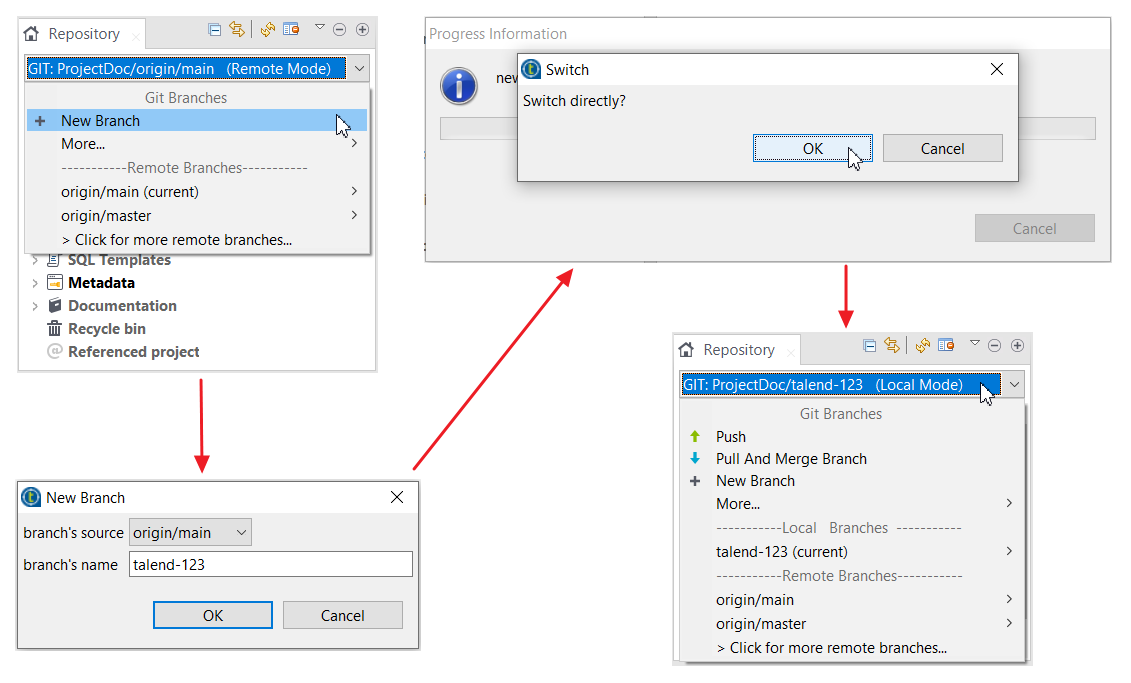
Andy is now logged into the Git local branch talend-123 in Talend Studio. At this point the branch only exists on Andy’s machine.
Andy does a push to create the feature branch on the remote Git repository using the Git push tool provided within Talend Studio.

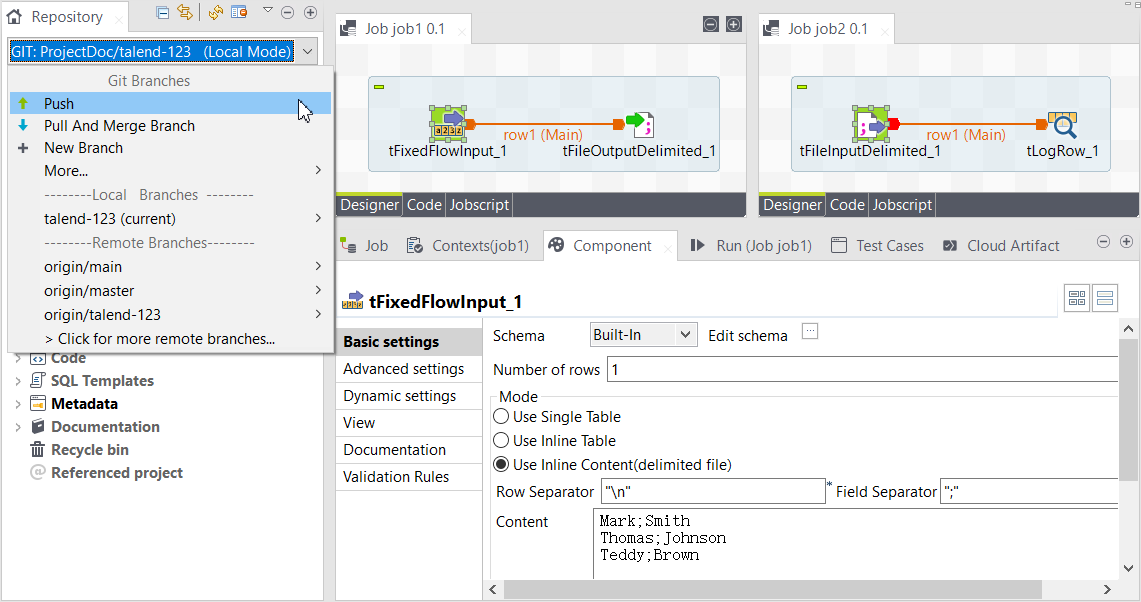
Andy creates two Jobs job1 and job2, and the changes are automatically committed to the local branch when they are saved. Then he pushes the changes onto the remote Git branch manually using the Git push tool provided within Talend Studio.
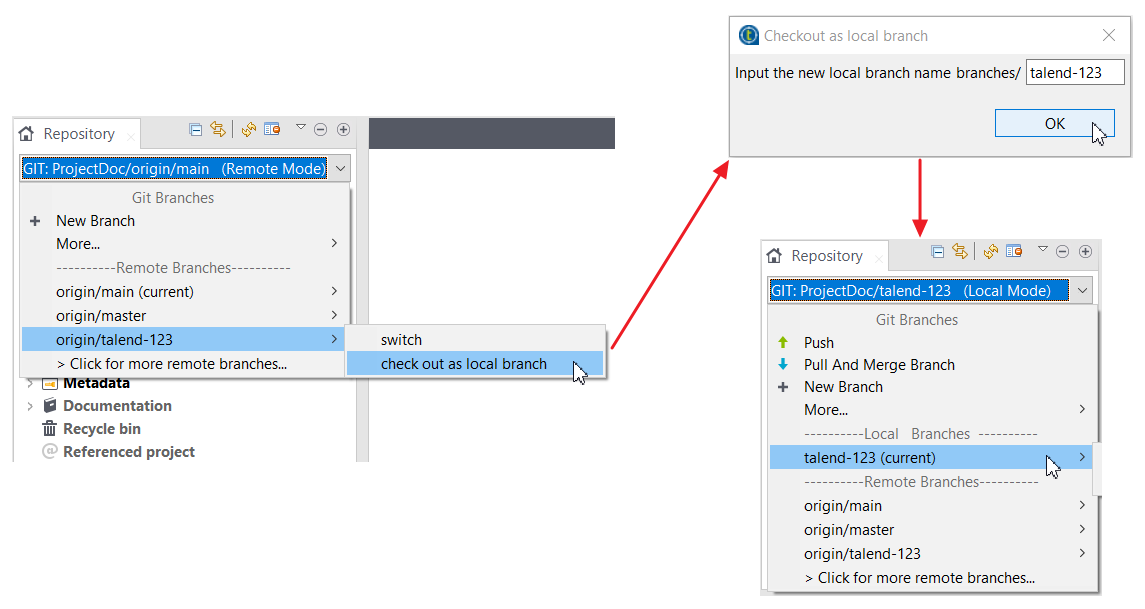
Now Lucy is also assigned to work on this feature. She checks out the remote feature branch talend-123 as a local one, then she changes the Job job1 and creates a new Job job3 on the local branch.
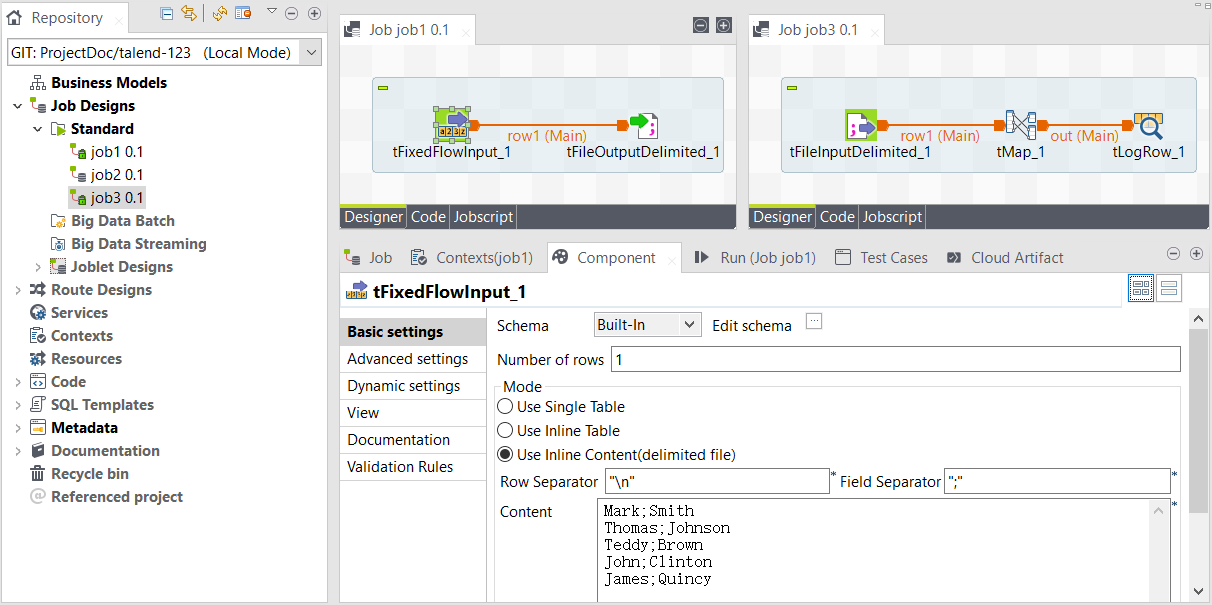
While Lucy is working on the Job job1, Andy also makes a change to the Job job1, creates a Joblet joblet1 on the local feature branch, and then pushes the changes to the remote repository.

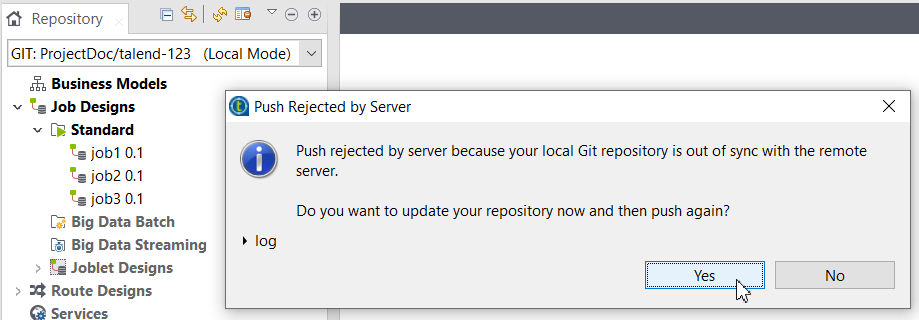
When Lucy tries to push her changes on the Job job1 and job3 to the remote branch talend-123, the push is rejected, because Andy has just pushed the changes on the Job job1 to the remote repository.
Lucy must first pull from the remote feature branch talend-123, and conflicts are found because both Andy and Lucy made changes on the Job job1.
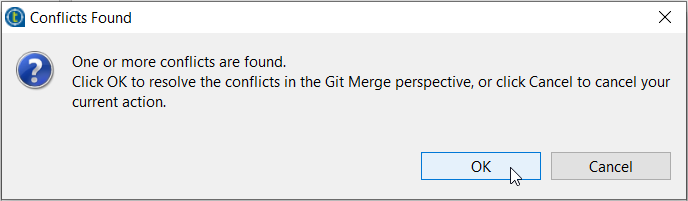
Lucy needs to resolve the conflicts. In this case, Lucy accepts all changes from Andy and marks the conflicts as resolved. Pull completes when all conflicts are resolved. Lucy pushes her changes successfully.
For more information about resolving conflicts between branches, see Resolving conflicts between branches.

Now the remote feature branch talend-123 contains changes from both developers.
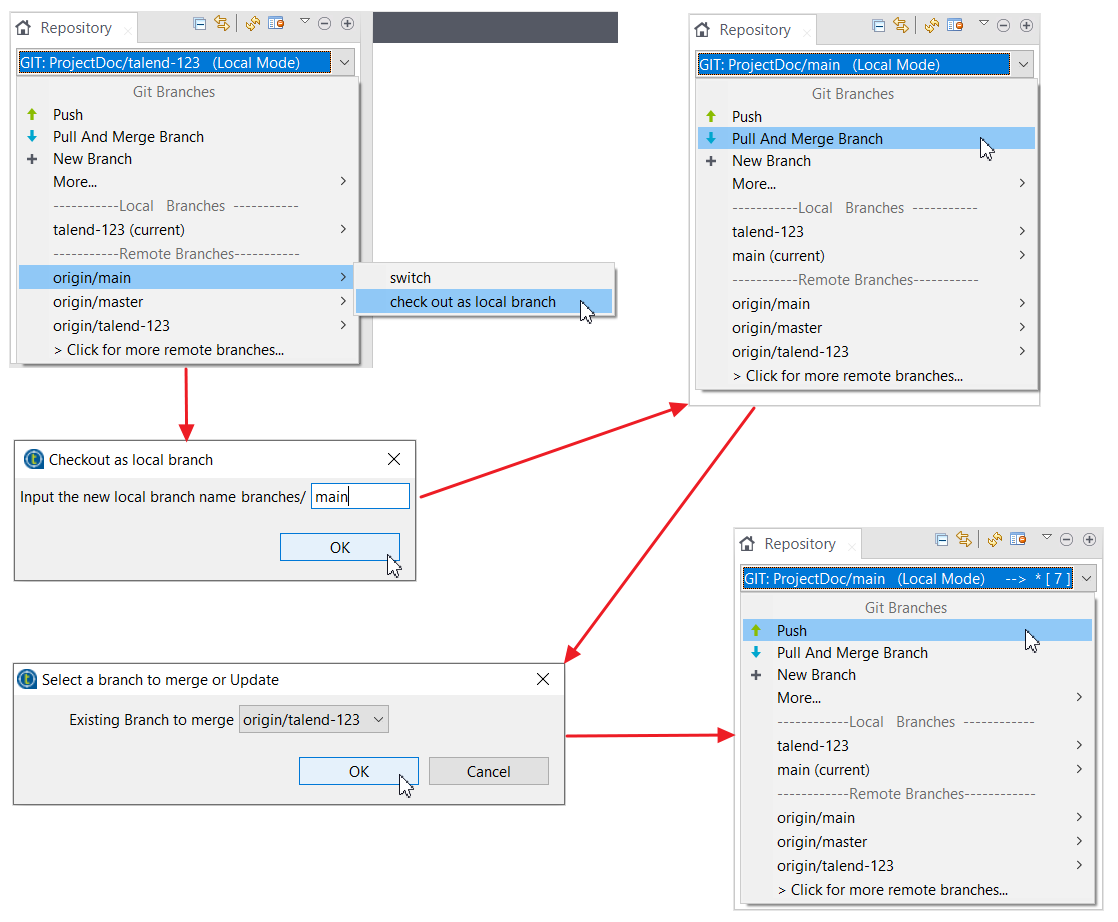
After finishing the feature development, the developer can then merge the changes on the remote feature branch talend-123 into the remote main branch by checking out the remote main branch as a local branch, executing a pull and merge request from the remote talend-123 branch, and doing a push from the local main branch to the remote main branch.
Did this page help you?
If you find any issues with this page or its content – a typo, a missing step, or a technical error – let us know how we can improve!