
Configuring the XML transformation
Procedure
-
Double-click the tXMLMap component to open its Map Editor.
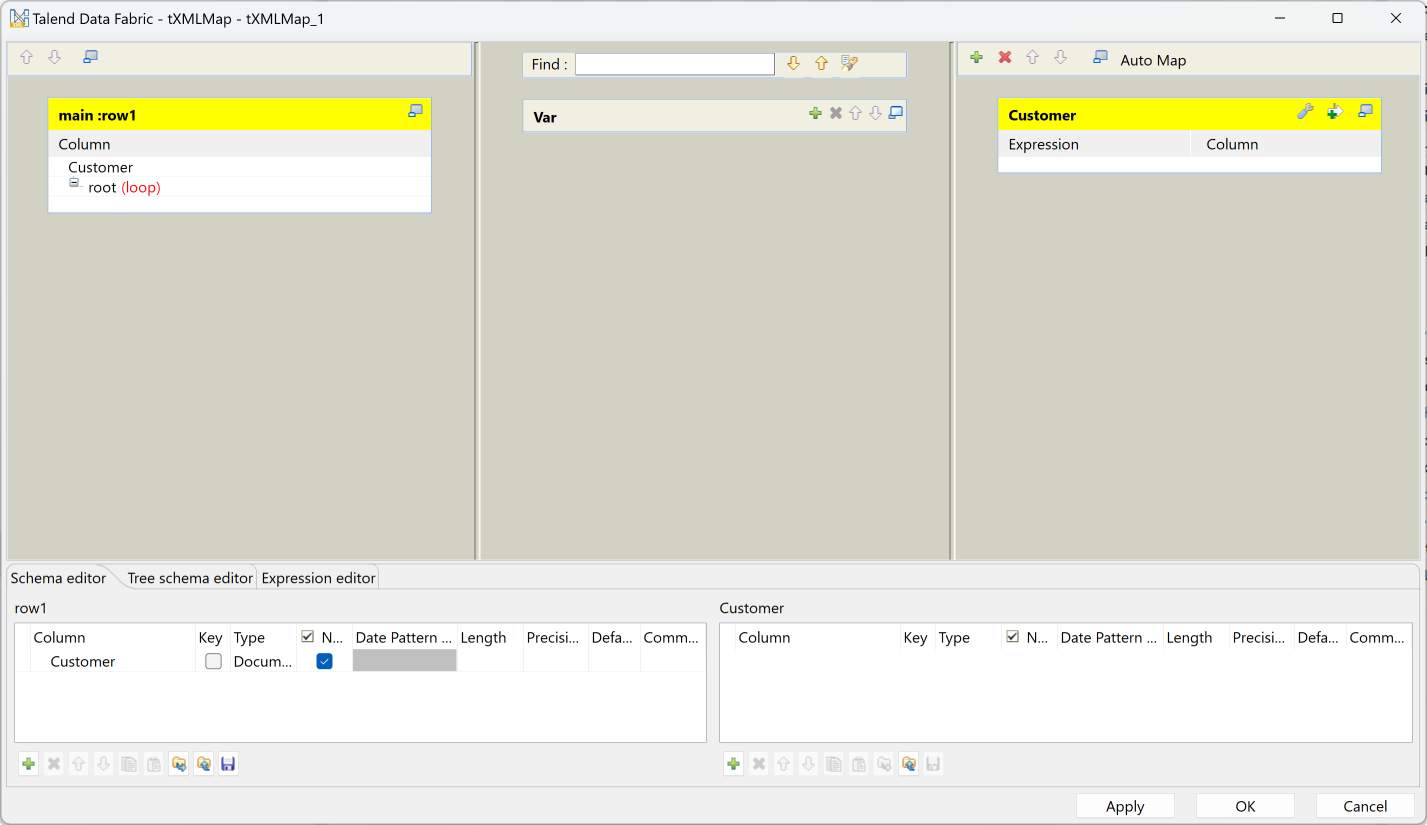 Note that the input area is already filled with the default basic XML structure and the top table is the main input table.
 -
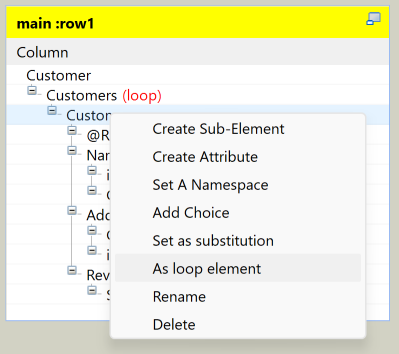
In the imported XML tree, right-click the Customer node
and from the contextual menu select As loop
element to set it as the loop element.
-
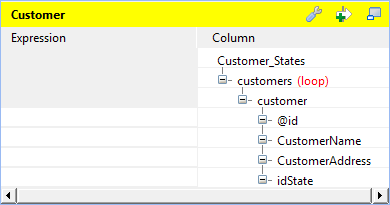
On the lower part of this map editor, click the Schema
editor tab to display the corresponding view. Then on the right
side of this view, add one column Customer_States of
Document type to the
Customer schema table. The corresponding XML root is
added automatically to the Customer output
table on the top right side which represents the output flow.

-
In the Customer output table, right-click the Customer_States node and from the contextual menu select
Import From File. In the pop-up dialog box,
browse to the XML file from which the XML tree structure is imported. In this
scenario, it is Customer_State.xml.
-
In the row1 input table, click the
id node and drop it to the Expression column in the row of the @id node in the Customer
output table.
 Do the same to map CustomerName to CustomerName, CustomerAddress to CustomerAddress, and idState to idState from the input table to the output table.
In some circumstances, you may have to keep empty elements in your output XML tree. If so, you can use tXMLMap to manage them. For further information about how to manage empty elements using tXMLMap, see Managing empty element in Map editor.
-
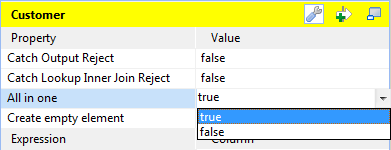
On the top of the Customer output table,
click the wrench icon and set the value of the All in
one property to true to
generate a single XML flow. For further information about the All in one feature, see Outputting elements into one document.
Did this page help you?
If you find any issues with this page or its content – a typo, a missing step, or a technical error – let us know how we can improve!