
Creating a Snowflake table and populating it with generated data
Procedure
-
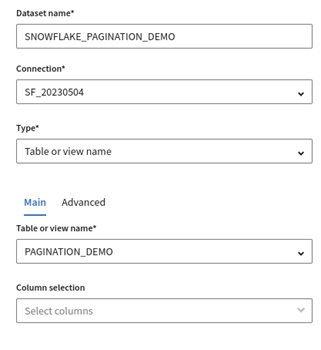
Fill in the required properties to create a Snowflake table on the fly. Enter a
table name that does not exist in the database yet:
-
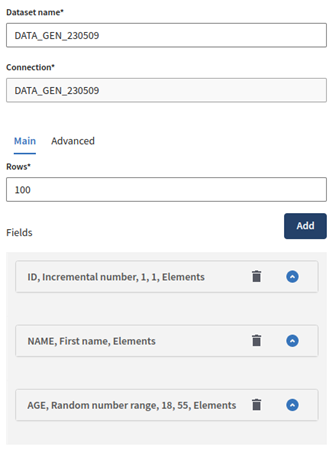
Name your dataset, and fill in the required properties to generate 100 rows with
three fields (ID, NAME, and
AGE):
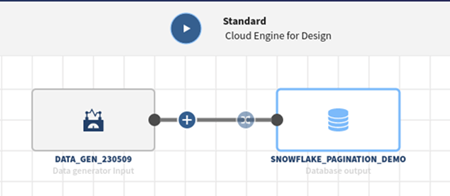
Results
Your pipeline is being executed, the Snowflake table is created on the fly, and it is populated with the 100 generated records.
What to do next
Did this page help you?
If you find any issues with this page or its content – a typo, a missing step, or a technical error – let us know how we can improve!