Before you begin
Procedure
-
Go to the following folder in the Remote Engine Gen2 installation
directory:
default if you are using the engine in the AWS USA, AWS Europe, AWS Asia-Pacific or Azure regions.
eap if you are using the engine as part of the Early Adopter Program.
-
Create a new file and name it:
docker-compose.override.yml
-
Edit this file to add the following:
version: '3.6' services: livy: volumes: component-server: volumes:
-
Add a new entry under volumes using this format :
YOUR_LOCAL_FOLDER:MOUNT_POINT_INSIDE_CONTAINER
Example
If you have some files in /home/user/my_avro_files on your machine that you would like to process with Talend Cloud Pipeline Designer you would need to add /home/user/my_avro_files:/opt/my_avro_files to the list of volumes :version: '3.6' services: livy: volumes: - /home/user/my_avro_files:/opt/my_avro_files component-server: volumes: - /home/user/my_avro_files:/opt/my_avro_files
- Save the file to take your changes into account.
-
Restart your Remote Engine Gen2.
Your folder will now be accessible from the Talend Cloud Pipeline Designer app under /opt/my_avro_files.
- Connect to Talend Cloud Pipeline Designer.
-
Go to the Connections
page and add a new HDFS connection using your engine and your local user
name.
-
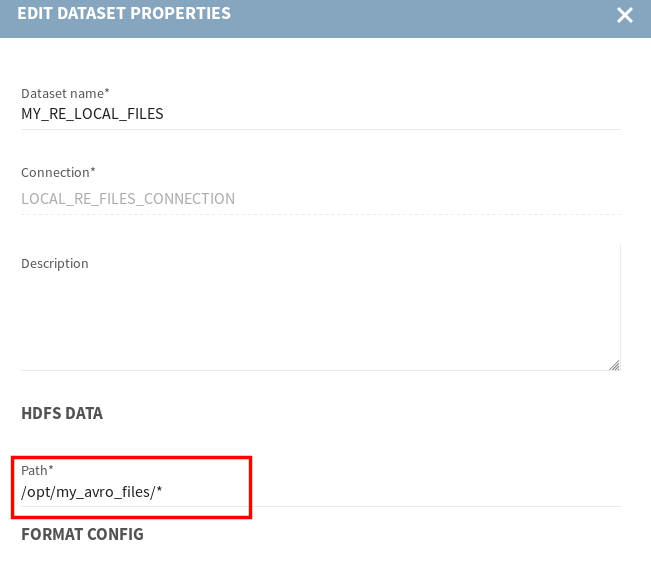
Add a new HDFS dataset using the new connection and make sure you use the mount
path as the path to your folder.
- Optional: In order to write back to your local machine, you can add another HDFS dataset using the mount path folder, for example /opt/my_avro_files/my_pipeline_output.