
Deploying your portal with AWS Amplify
Deploy your portal by connecting your repository
to AWS Amplify Console.
For more information, see the Amplify documentation.
Before you begin
- You have the relevant rights on AWS.
- You have generated your API Portal repository.
Procedure
-
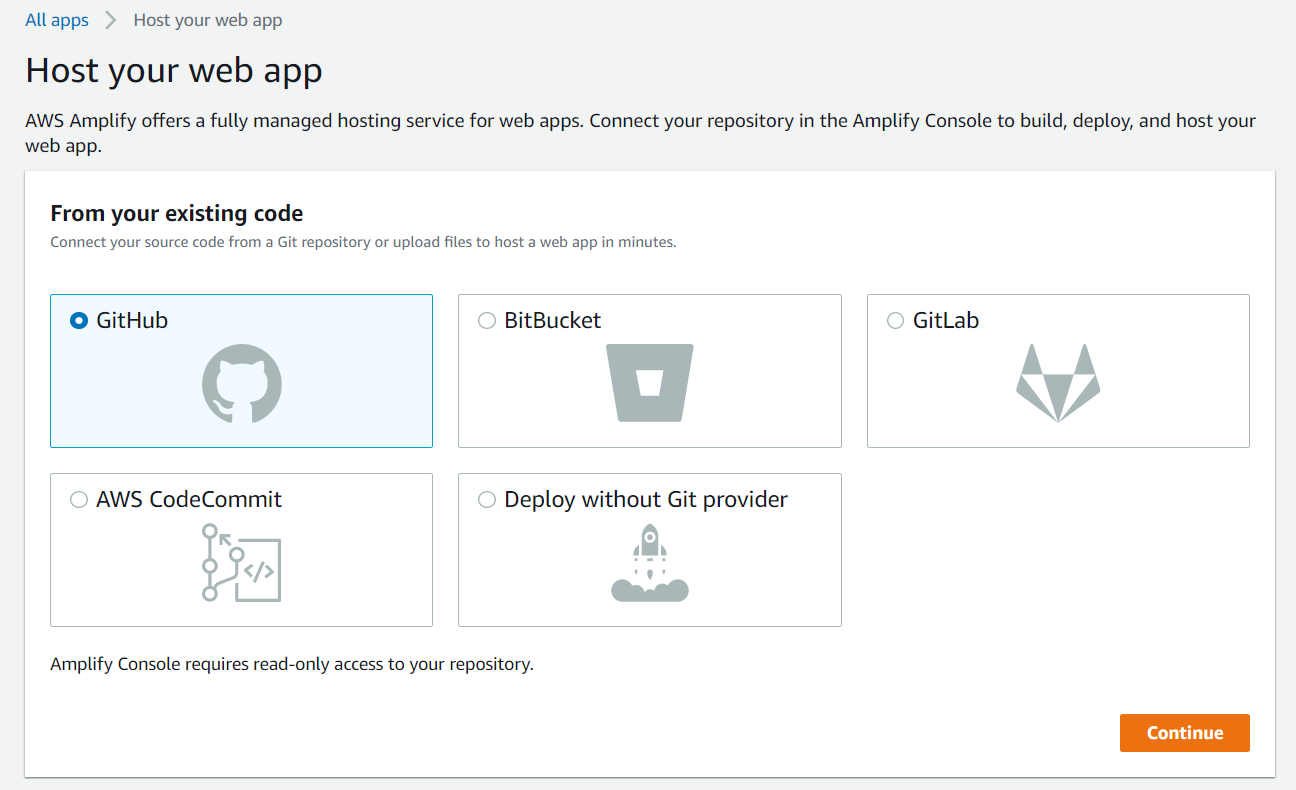
Select your Git provider as the source, and click Continue to connect your repository.
-
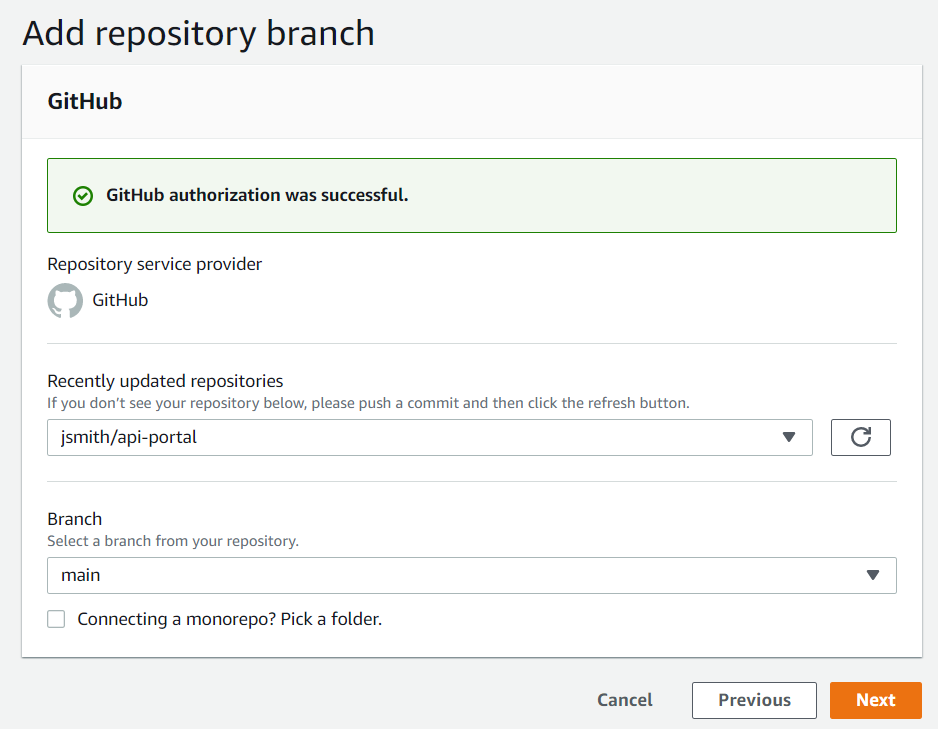
Select your repository and your branch, then click
Next.
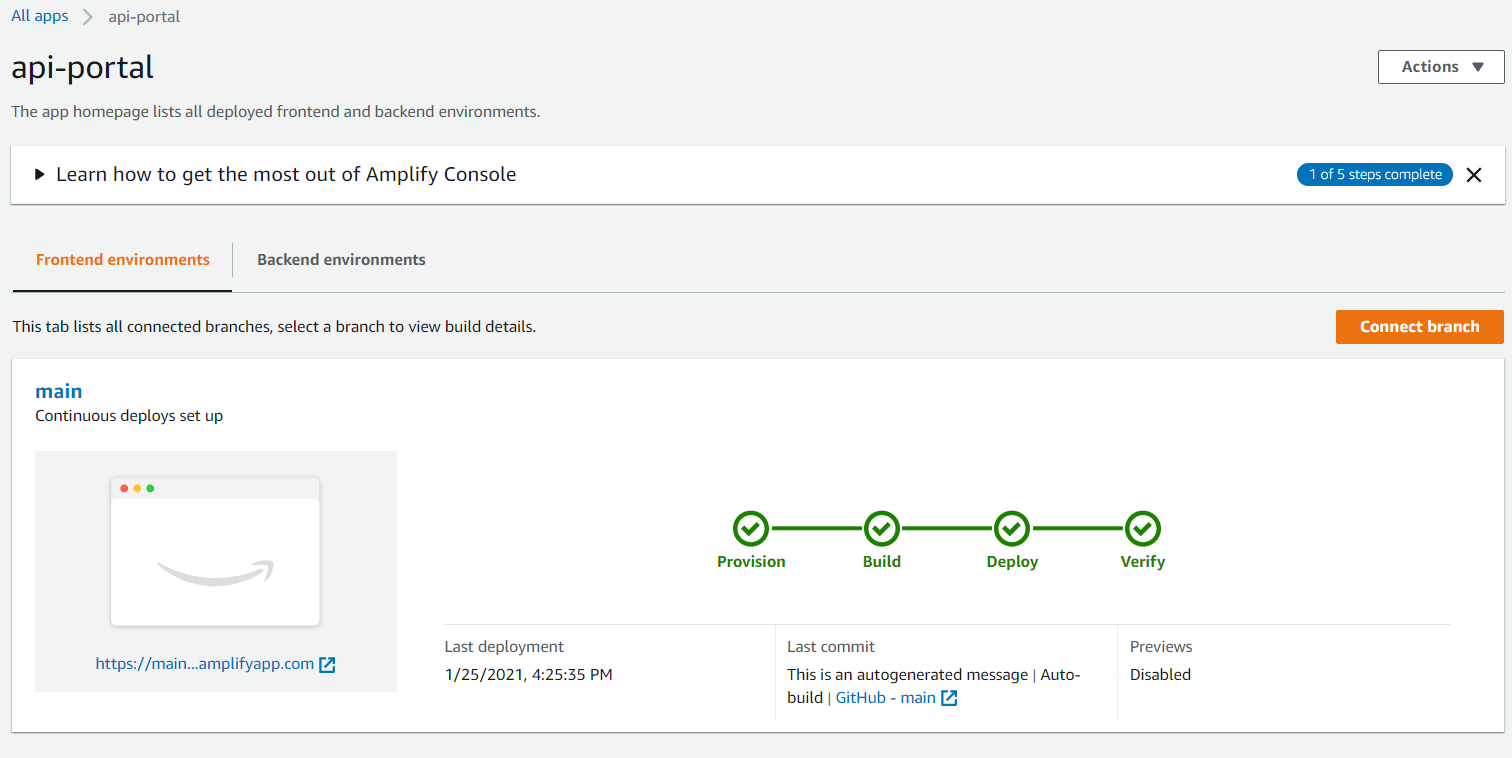
 The name of your repository is set as your app name and your build settings are automatically detected.
 -
Make sure that your configuration is correct and click Save and
deploy.

Results
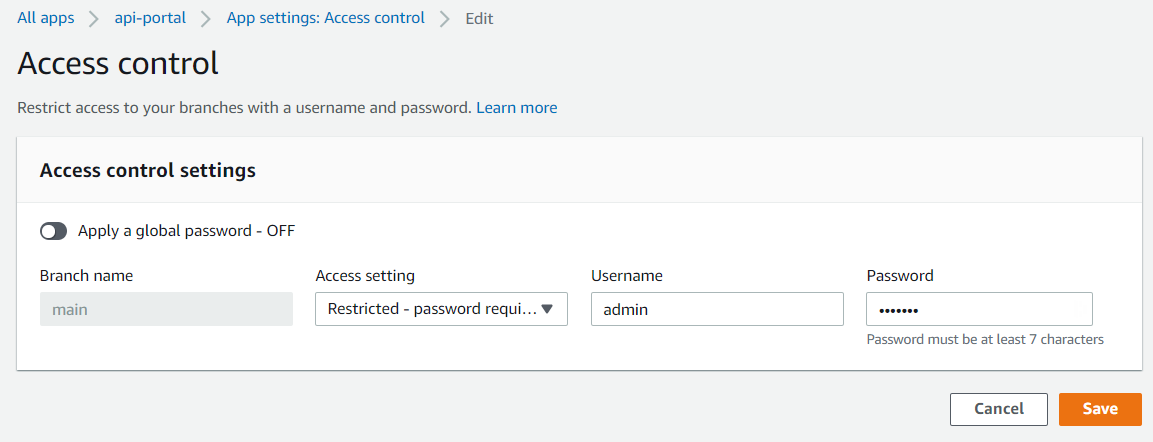
If needed, you can restrict access to your portal by adding a username and password in .
Did this page help you?
If you find any issues with this page or its content – a typo, a missing step, or a technical error – let us know how we can improve!