Skip to main content Skip to complementary content

Configuring the preparation

Availability-noteBeta

About this task

This example makes you use functions from Talend Cloud Data Preparation.

Procedure

  1. To correct the country names, use the fuzzy matching function.
    1. Select the column: delivery_country.
    2. In the right panel, select Column and start typing fuzzy matching.
    3. Select the function Standardize value (fuzzy matching).
    4. Set the Match threshold to Default (> 80%).
    5. Click Submit. The step is added to the preparation steps in the left panel and the country names are corrected. For example, United Staates is replaced by United States.
  2. To convert the country codes, use a conversion function. The delivery_country column is still selected.
    1. In the right panel, select Column and start typing convert.
    2. Select the function Convert country names and codes.
    3. Set From to ISO country code and To to English country name.
    4. Click Submit. The country names are converted. For example, CA is replaced by Canada.
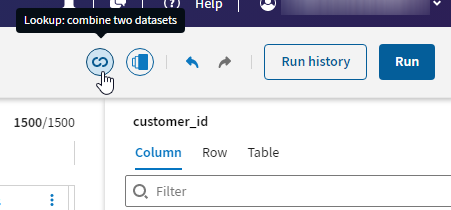
  3. To correct the TIN, use the lookup feature.
    It lets you match the data from the current preparation with a reference dataset. For more information, see the Dynamically using the data from another dataset.
    You need to associate matching columns.
    1. Select the column: customer_id. In this example, this column is the matching one.
    2. Click the lookup icon above the right panel.
      Lookup icon selected.
      The Lookup panel opens as the right panel.
    3. Click Select dataset.
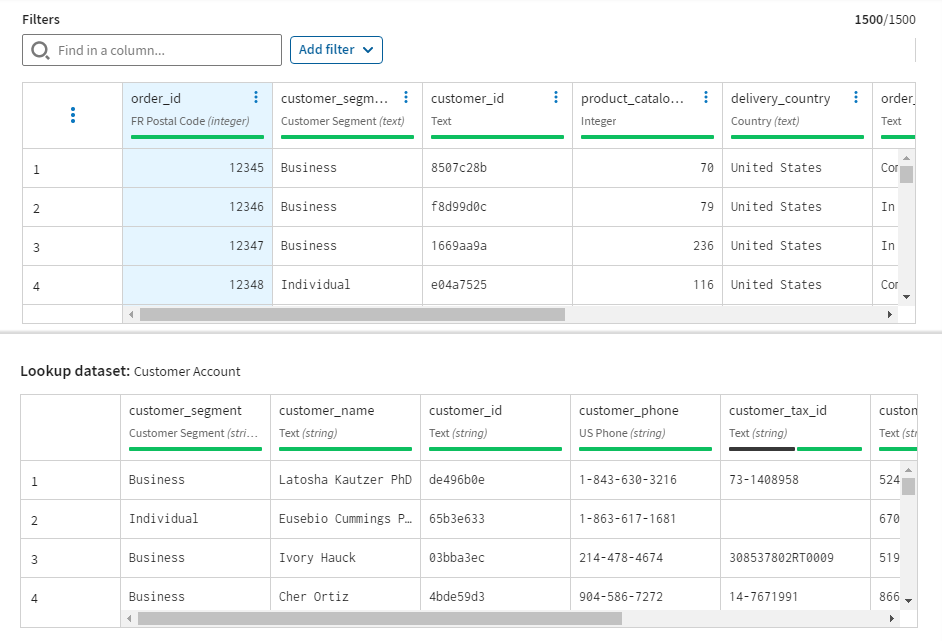
    4. Select the reference dataset and click Select. You are back to the Lookup panel and the reference dataset is displayed below the preparation.
      Lookup panel with reference dataset displayed below the preparation.
    5. In Current preparation and Lookup dataset, select customer_id.
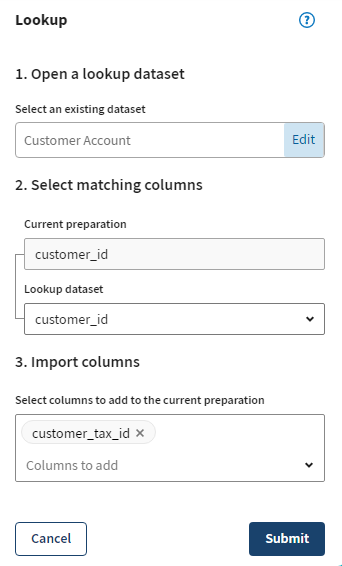
    6. Select the column from the reference dataset to be added to the preparation.
      In this example, you want to correct the TIN. You need to select customer_tax_id.
      customer_tax_id selected from the Import columns option.
    7. Click Submit. The step is added to the preparation steps in the left panel.

Did this page help you?

If you find any issues with this page or its content – a typo, a missing step, or a technical error – let us know how we can improve!