
Creating a flattening map with multiple outputs
Before you begin
- You have created a hierarchical structure.
About this task
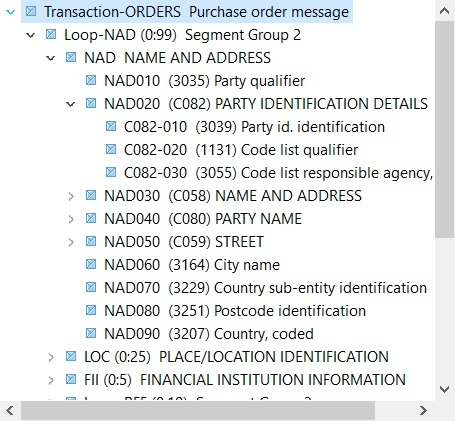
In this example, the input hierarchical structure looks like this:
Procedure
-
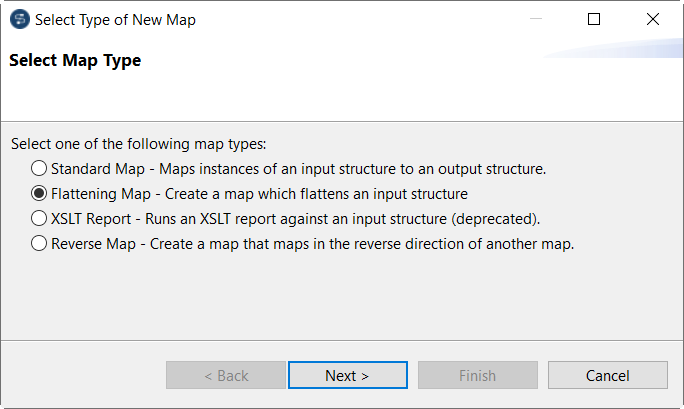
Select Flattening Map - Create a map which flattens an input
structure and click Next.
-
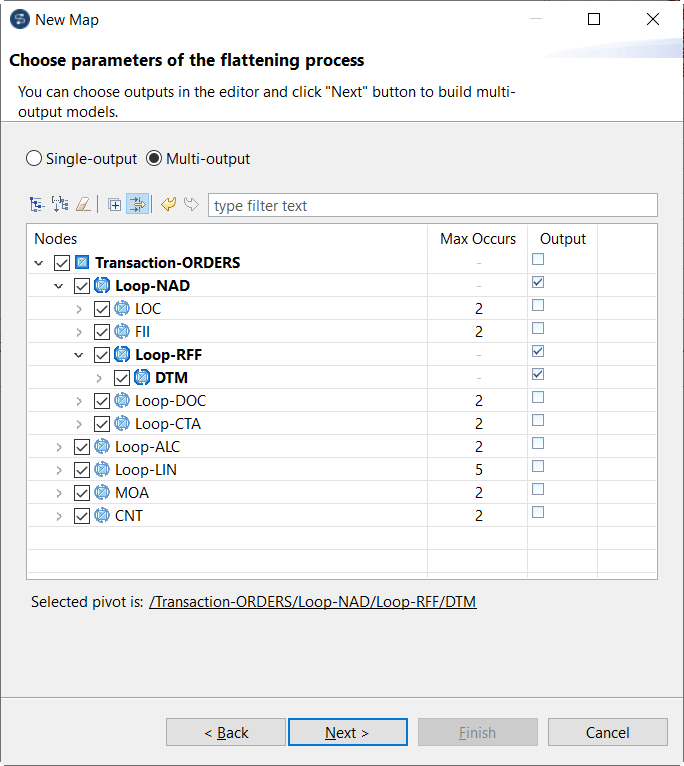
Select the Output check box for each loop that you want
to use as output, then click Next.
Each selected node will be used as the root for a new output. For example, the selection in the image below creates three outputs named Loop-NAD, Loop-RFF and DTM.
- Optional:
Change the value of
the Max Occurs attribute for elements that are not
in the pivot.
-
Click the Set Max Occurs for all repeatable
elements button to change the value for all repeatable
elements.

- Select one or several nodes and right-click them, then select Set Max Occurs and enter a number. You can select the Apply max occurs to descendant(s) check box if you want to apply this setting to all the descendants of the nodes you selected, then click OK.
-
Click the Set Max Occurs for all repeatable
elements button to change the value for all repeatable
elements.
-
Define the parameters for each output.
You can use the arrow buttons or the drop-down list to navigate between the different outputs.

-
Click the
Filter primitive fields button to disable the
filter and show all non-looping elements.
This filter is enabled by default and all primitive fields are included in the output structure. If you want to exclude some of these elements, you can disable the filter and clear the relevant check boxes.
 Information noteTip:
If several outputs contain the same primitive fields, you can use the buttons to the left of the drop-down list to easily apply the same selection to multiple outputs.
For example, if you want to remove the UNS and UNT columns from all outputs, you can clear their check boxes in the first output and click the Propagate primitive fields selection to next suitable outputs button. The same check boxes will automatically be cleared in the next outputs.
You can also use the Copy Selection States and Paste Selection States buttons to apply the selection to a specific output.
-
Click the
Filter primitive fields button to disable the
filter and show all non-looping elements.
Results
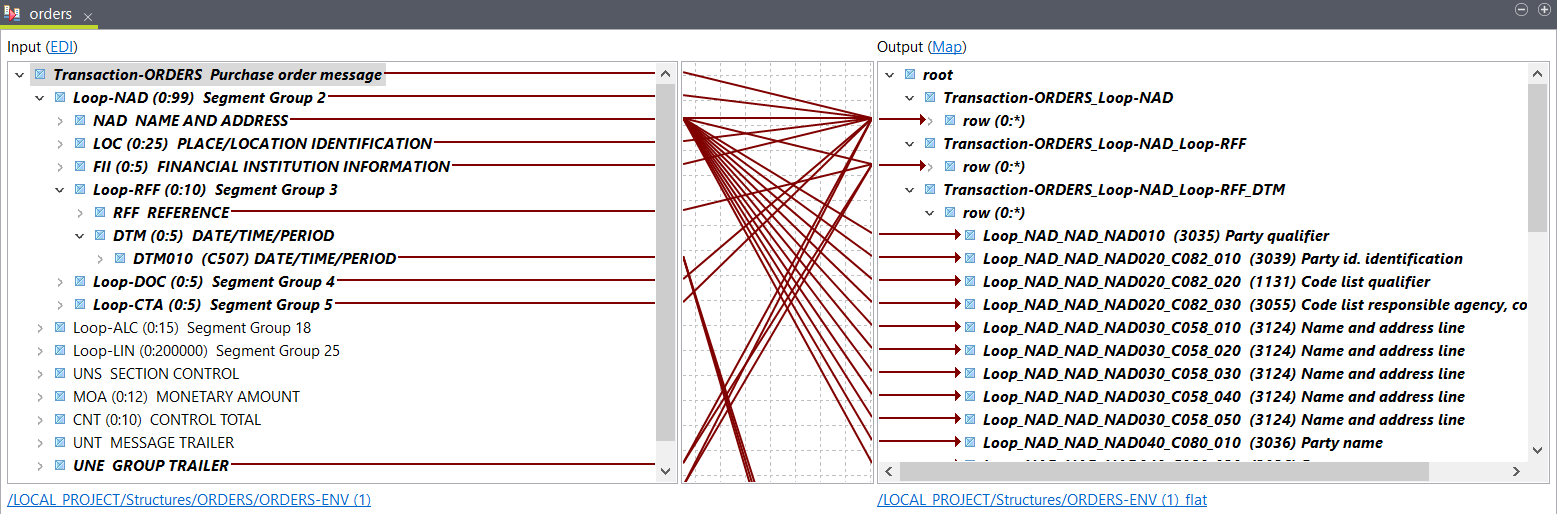
Your map and output structures are created. In the selected folder, one structure is created for each output, and another structure is created to combine them. The map opens and the elements from the input structure are automatically mapped with the elements in the output structure.
In this example, it looks like this:
Did this page help you?
If you find any issues with this page or its content – a typo, a missing step, or a technical error – let us know how we can improve!