
Setting up a Dynamic Engine and a Dynamic Engine environment in Kubernetes
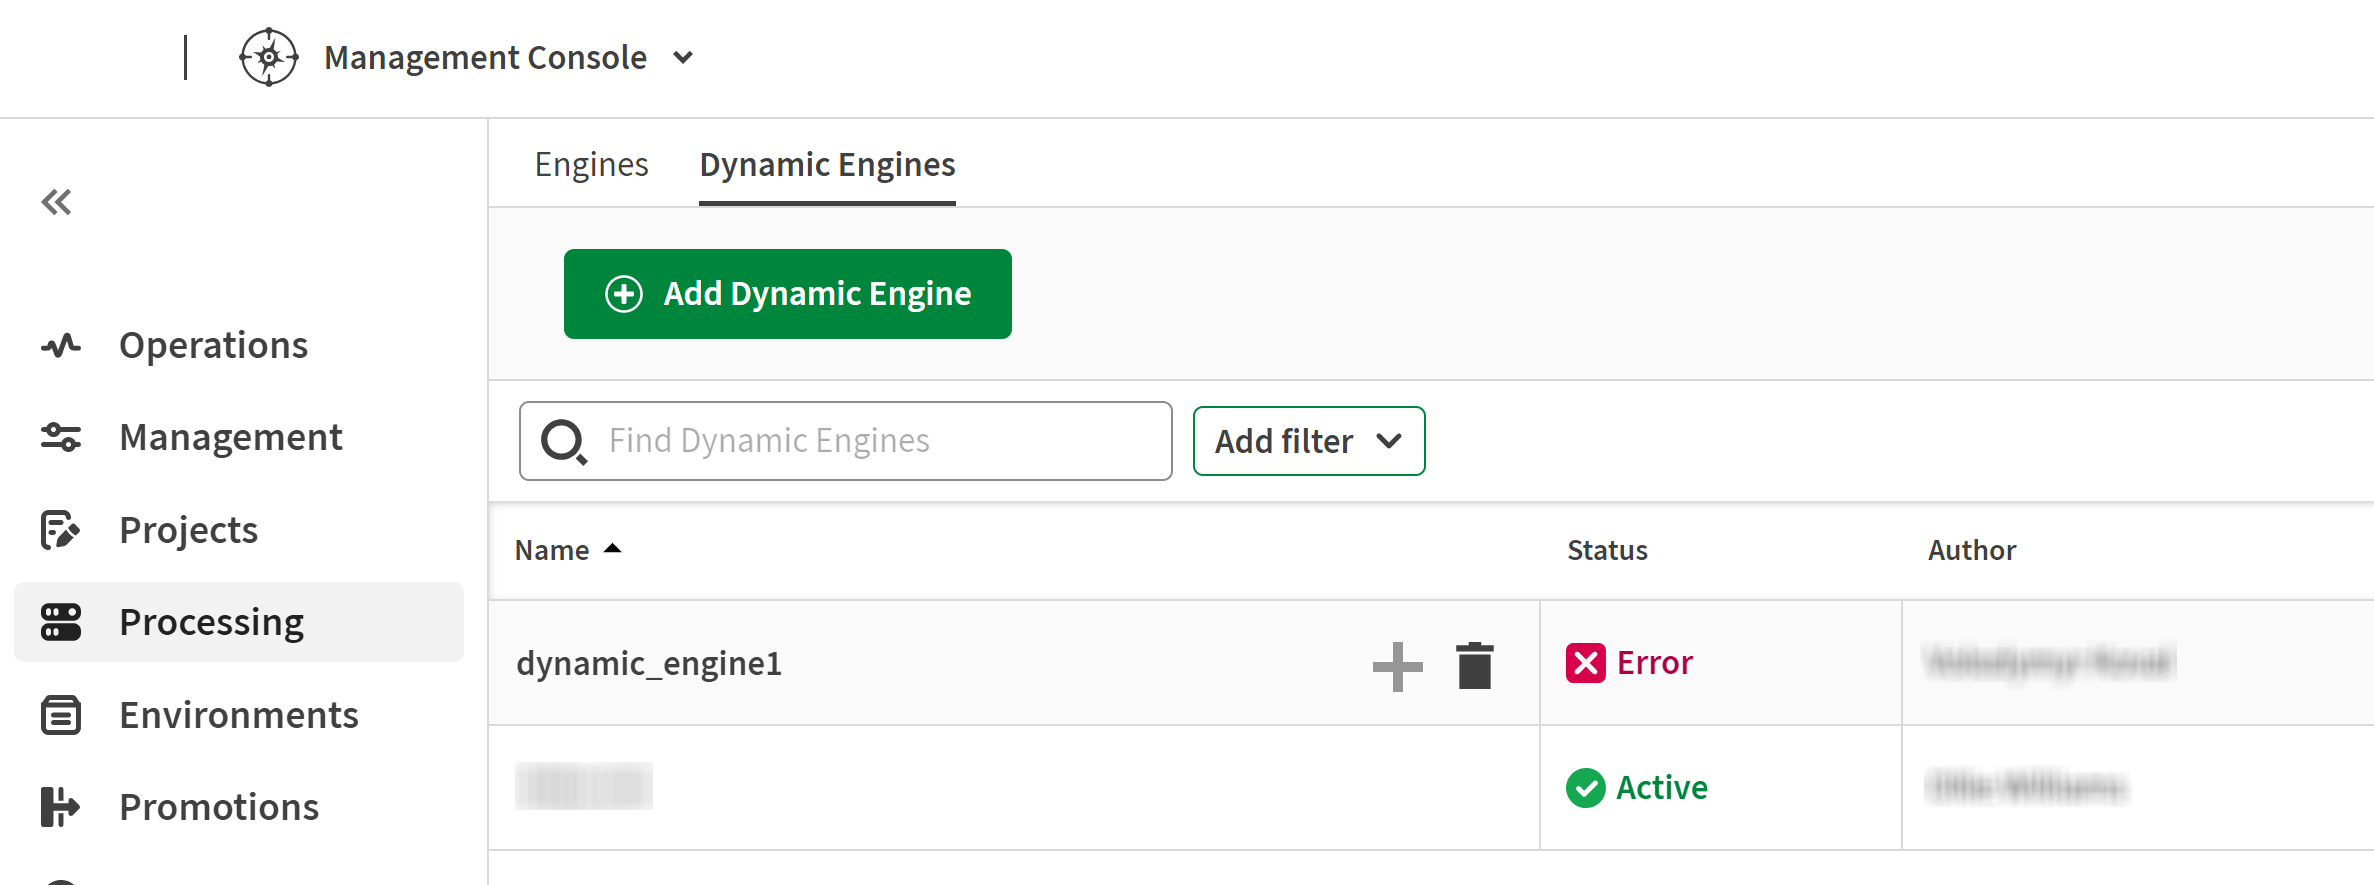
Adding a Dynamic Engine
Before you begin
You must have the Infrastructure Administrator (containing the TMC_CLUSTER_MANAGEMENT permission) role in Talend Management Console.
Procedure
Results
Setting up your Dynamic Engine in Kubernetes using the manifest files
Procedure
Results
If you need to know what has been installed in your Kubernetes cluster, go to your Kubernetes machine and run the commands outlined in this official Kubernetes documentation.
Adding a Dynamic Engine environment
Create a new environment dedicated to a Dynamic Engine.
This environment can be used with Dynamic Engines only and can be assigned to a single Dynamic Engine at a time.
Before you begin
You must have the Environment Administrator role in Talend Management Console.
Procedure
Results
The environment is created with the workspace you specified.
To share the workspace, click the environment name then click the Share workspace icon next to the workspace name from the Workspaces tab.
To add other workspaces to this new environment, click the environment name then Add workspace from the Workspaces tab.
What to do next
Assigning an environment to a Dynamic Engine
Assign one or more environments to an active Dynamic Engine. The next task runs from the environments will occur in the Dynamic Engine.
Assigning an environment to a Dynamic Engine overrides the existing settings of engine and run profile for that environment.
Before you begin
- You must have the Environment Administrator role in Talend Management Console.
- The Dynamic Engine to be associated must have be deployed in a Kubernetes cluster (Active status).
Procedure
-
Hover the cursor in the Name column on the row of the
Dynamic Engine to which you need to assign an environment.
A
 button appears next to the engine's name.
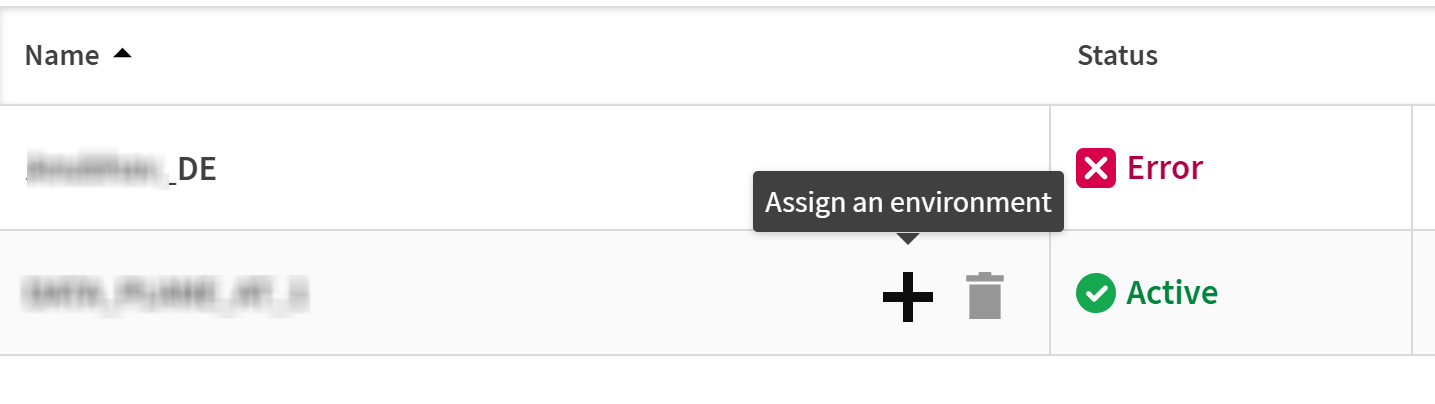
-
Click this bugton to open the page for environment assignment.
Alternatively, you can click the Dynamic Engine name to open the details panel, then click the Manage button to open the page for environment assignment.
-
In the dialog that is displayed, select one environment from the drop-down
list.
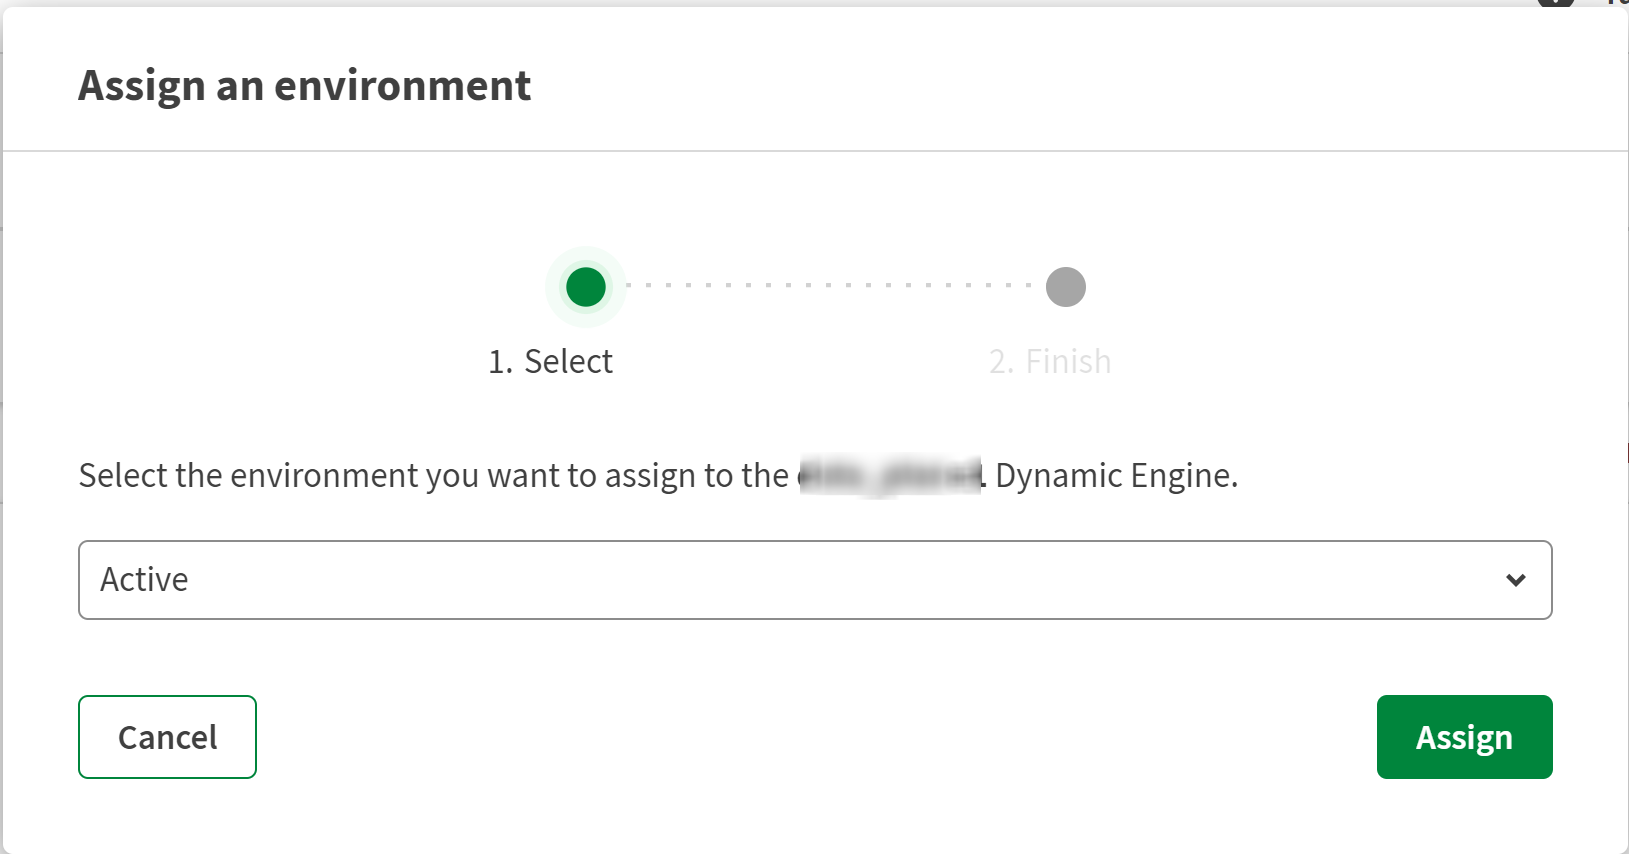
-
Click Assign.
Example
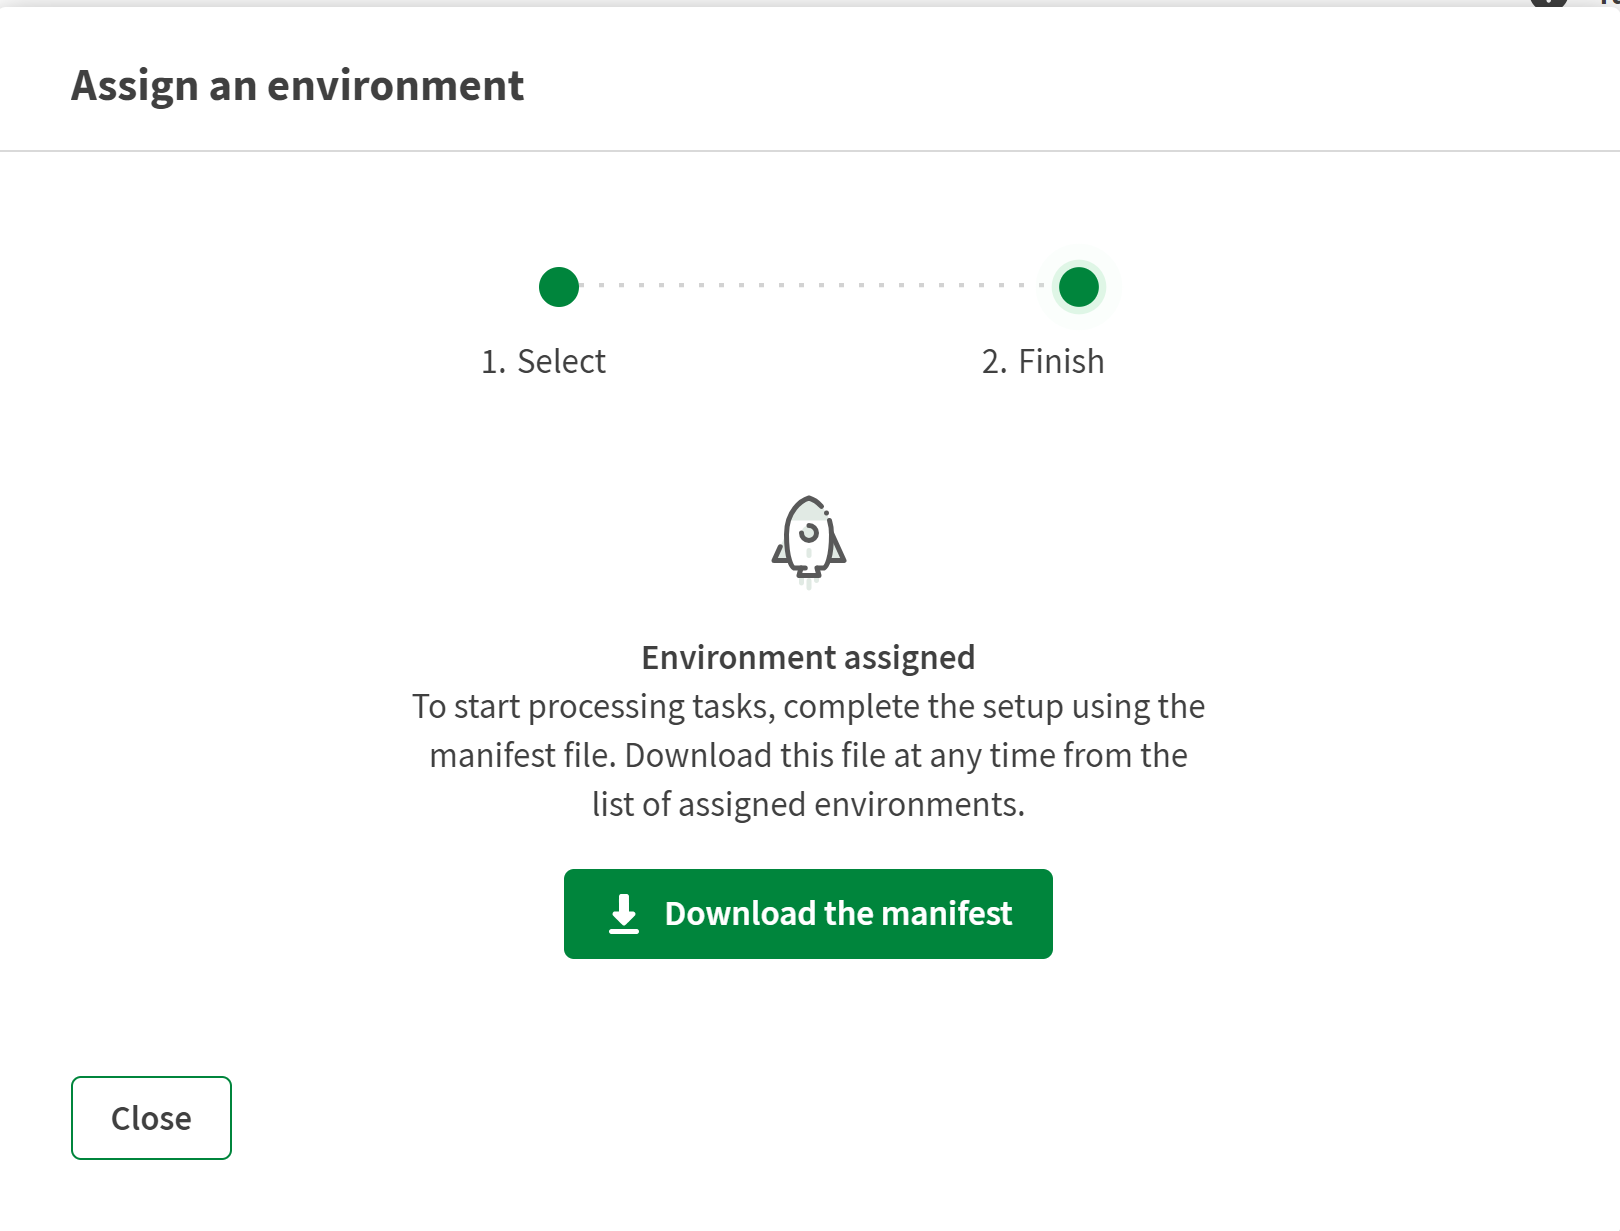
Results
Once done successfully, the Dynamic Engine environment services are installed in your cluster and connect to the Dynamic Engine.
In Talend Management Console, the status of this environment becomes Ready, confirming that it is ready to run tasks or plans.
If the manifest implementation fails or the Dynamic Engine services are disassociated from the Dynamic Engine, the status become Not ready.
What to do next
Did this page help you?
If you find any issues with this page or its content – a typo, a missing step, or a technical error – let us know how we can improve!