
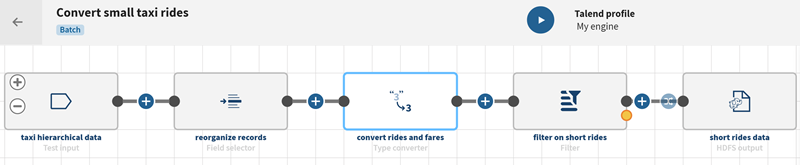
Processing strings to get the revenue corresponding to small taxi rides
Before you begin
-
You have previously created a connection to the system storing your source data.
-
You have previously added the dataset holding your source data.
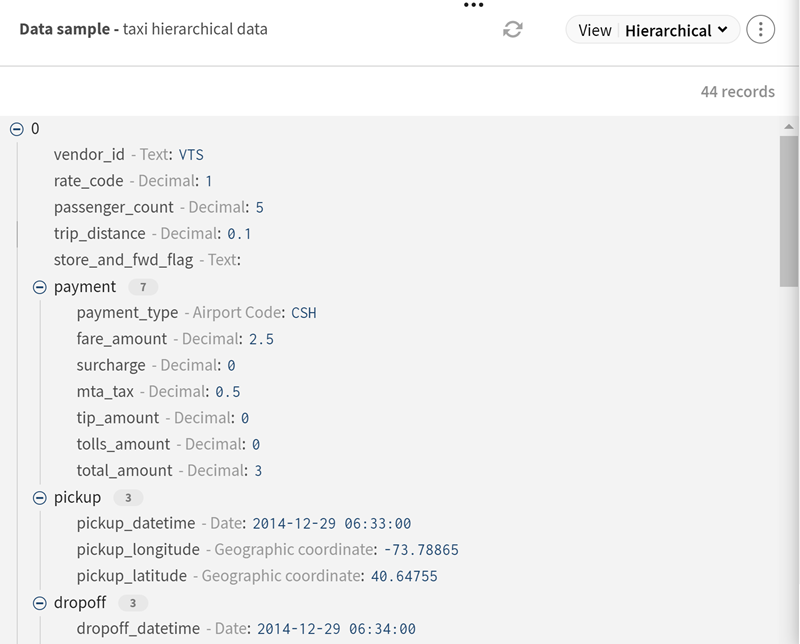
Here, hierarchical taxi data including pickup time, dropoff time, fare, etc. (download the type_converter-taxi.json file from the Downloads tab in the left panel of this page).
-
You also have created the connection and the related dataset that will hold the processed data.
Here, a file stored on HDFS.
Procedure
-
Click ADD SOURCE to open the panel allowing you to select your source data, here it is taxi-related data.
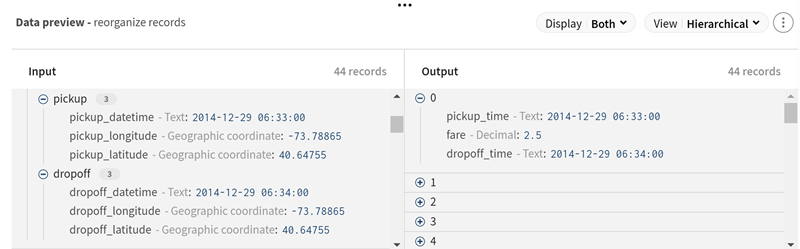
 Information noteWarning: The Type converter processor cannot process sub-records. If you want to convert these records, you need to use a Field selector processor before in order to reorganize the records and put them on top of the schema.
 -
Click
 and add a Field selector processor to the pipeline.
The configuration panel opens.
and add a Field selector processor to the pipeline.
The configuration panel opens.
-
Click the
 icon in the Simple selection mode:
-
Click Edit then Save to save
your configuration.
-
Click Edit then Save to save
your configuration.
-
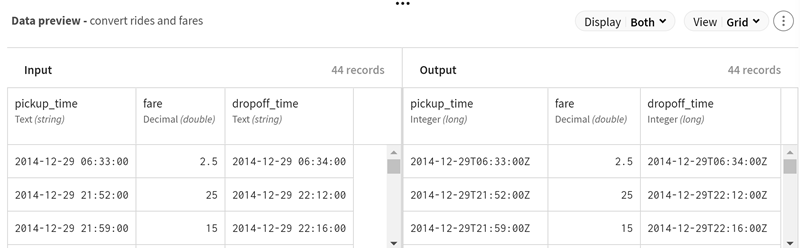
Click and add a Type converter processor to the pipeline.
The configuration panel opens.
-
In the Converters area:
-
Click Save to save your configuration.
-
Click Save to save your configuration.
-
Click after the Type Converter processor on the pipeline
and add a Filter processor.
-
In the Filters area:
-
Click Save to save your configuration.
-
Click Save to save your configuration.
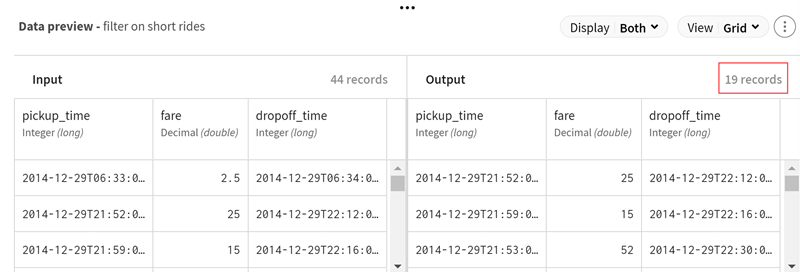
Results
Your pipeline is being executed, the field types are converted and filtered, and the output flow is sent to the target system you have indicated.
Did this page help you?
If you find any issues with this page or its content – a typo, a missing step, or a technical error – let us know how we can improve!