Setting up annotations to business entities
Before you begin
You have already created business entities and attributes in the data model. For further information, see Creating business entities in a data model and Adding attributes to the business entity.
About this task
The data model editor makes it very easy to add specific annotations to any business entity in the data model.
Through annotations, you can define authorization of roles regarding web interface access to business entities. You can also define display issues related to language specific labels, foreign and primary keys, multilingual description, and more.
The below table describes the annotations you can add to business entities.
| Option | Description |
|---|---|
| Add Key | To add a unique key to the selected entity. |
| Set the Labels | To have labels in different languages for any business entity in the data model. |
| Set the Descriptions | To have multilingual descriptions for different business entities in the data model. |
| Set Lookup Fields | To look up fields in the source system through a Process attached to a specific view in order to enrich data on the fly. For example, when an interaction is done on a business entity that is not persisted or not totally persisted in the MDM Hub. For further information, see Running the view result through a Process (registry style lookup). |
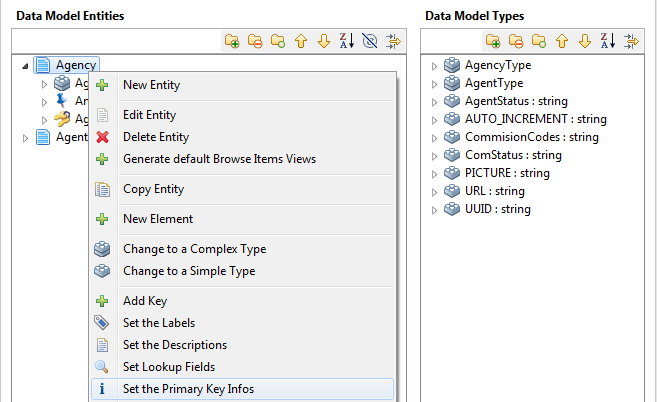
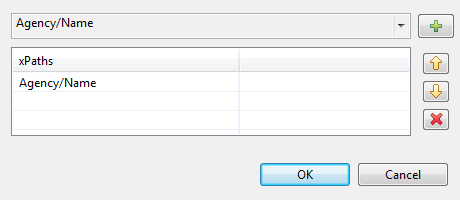
| Set the Primary Key Infos | To display specific data related to the business entity when accessing
any data record in the business entity through Talend MDM Web UI. Information noteNote: It is not recommended to include the value of a foreign
key element in the primary key information, since only its raw
value can be saved in the primary key information and displayed
on Talend MDM Web UI.
|
| Set the Roles with Write Access | To grant one or several roles a Write access to the selected entity. For further information, see Defining access control at the entity level in data model editor. |
| Set the Roles with No Access | To prevent one or several roles from accessing the selected business entity through Talend MDM Web UI. |
| Set the Roles with No Create Access | To prevent one or more specific roles from creating data records in the selected entity through Talend MDM Web UI. |
| Set the Roles with No Logical Delete Access | To prevent one or more specific roles from sending data records to the trash can in the selected entity through Talend MDM Web UI. |
| Set the Roles with No Physical Delete Access | To prevent one or more specific roles from deleting the data records definitely from the selected entity through Talend MDM Web UI. |
| Set the Validation Rule | To set advanced rules that you can use to define constraints between attributes within an entity. For further information, see Adding business rules. |
| Delete All Validation Rule | To delete all validation rules from the entity. |
| Add Category | To add categories that you can use to organize elements in an entity.
For further information, see Adding a category and assigning elements to it. This feature helps to organize elements on Talend MDM Server and display elements under the same category on a separate tab in Talend Data Authoring for MDM. Information noteWarning: This feature has no impacts on Talend MDM Web UI.
|
| Assign Element to Category | To assign one or more specific elements to a category. Only the first level elements in an entity can be assigned to a category. For further information, see Adding a category and assigning elements to it. |
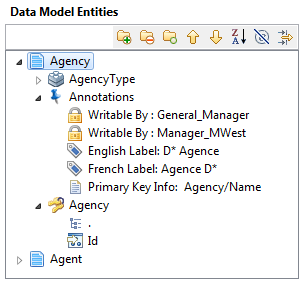
When you add any of the above annotation to a business entity, an Annotations node is added to the business entity in the Data Model Entities panel. This node lists all the annotations added to the business entity.

As an example of how to set up an annotation to a business entity, the below procedure gives detail information about how to add the Set the Primary Key Infos annotation.
Procedure
Results
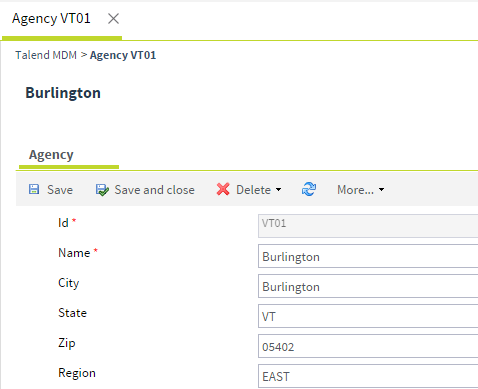
When a business user accesses the data model holding this entity through Talend MDM Web UI and browse for any of the data records in this entity, the detailed view of the data record will have the agency name as its heading as defined in the above procedure.

A detail example about how to Set the Role with Write Access annotation at the entity level is given in Defining access control at the entity level in data model editor.
Did this page help you?
If you find any issues with this page or its content – a typo, a missing step, or a technical error – let us know how we can improve!


 and select from the list the primary key information
you want to display in