
Sharing the finalized preparation
To make your preparation accessible to the other members of a project, you can use the share feature.
This example assumes that you and other users are registered Talend Cloud Data Preparation users.
Users or groups of users from your organization will be able to open and edit your preparations. Sharing is possible at the folder level, not directly at the preparation level.
To create and share a preparation folder, proceed as follows:
Procedure
-
Click the Go back icon on the top left of
the screen to exit your preparation.
Remember that your preparation is automatically saved after each step.
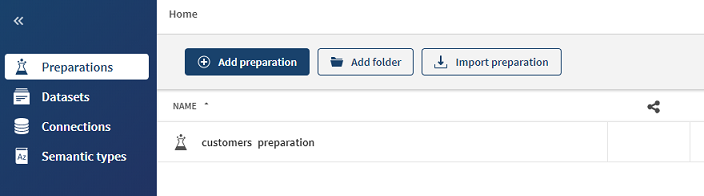
You are now in the Preparations view, where you can see Customers Preparation in the list.
-
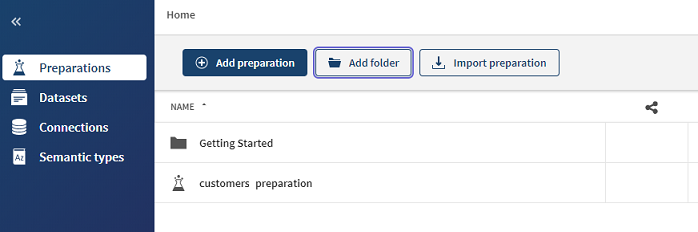
Type Getting Started in
the empty field and click Add.
The Getting Started folder now appears in the list in the Preparations view.
-
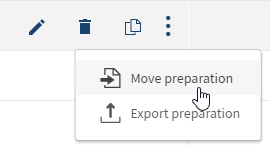
Point your mouse over Customers Preparation in order to
display the available options and click the
 > Move preparation icon.
The Move your preparation window opens, where you can select the destination folder for your preparation.
-
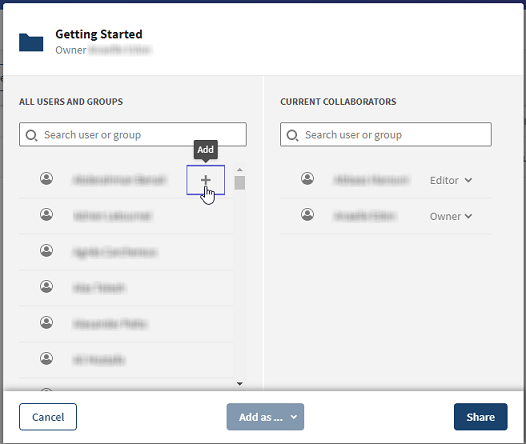
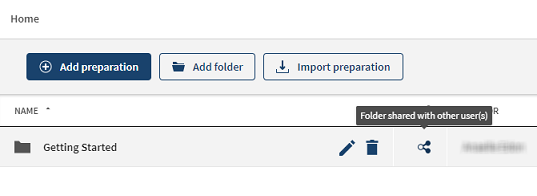
Point your mouse over the Getting Started folder in order to
display the available options and click the
 icon.
icon.
The sharing window opens.
-
Click a user or group and click Add
to the List to add them to the list of contributors.
Results
Did this page help you?
If you find any issues with this page or its content – a typo, a missing step, or a technical error – let us know how we can improve!