Skip to main content Skip to complementary content
Close announcements banner

Configuring Snowflake target connector

The configuration of Snowflake target is performed on the source machine, when distributing a target table. This is the second step in the replication process to a Snowflake target.

Procedure

  1. Prepare your distribution: open the Manager and follow this procedure until step 7 only: Preparing replication.
  2. Click Distribute to open the Property tab.
  3. In Database type field, select Snowflake.
  4. In the Table name syntax field, select DB..Table (or Library..File if your source database is AS/400 IBMi).
  5. Click the Data source value to display the Login to snowflake window.
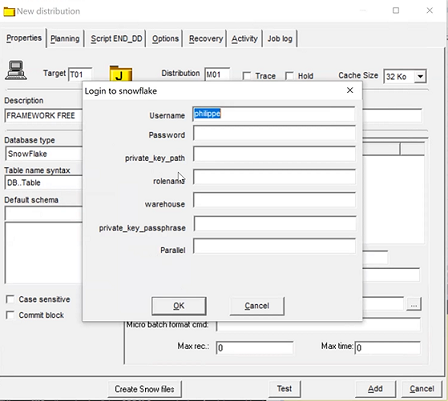
    Enter the mandatory fields: Username, Password and warehouse.
  6. Click OK. In the connection string field, you can see the result of the parameters entered before.
    Example of final connection string:
    DSN=snowflake;UID=philippe;PWD={451769653AC896671D3FA2FG61834U};WAREHOUSE=LAB-T;
  7. Click Test to check the connection. You can directly modify the connection string field if the connection is not successful.
  8. In the Account field, enter the Snowflake account name and password.
  9. In Destination path, enter the intermediate storage path for the target table to be loaded. For example: C:\_temp.
  10. In Micro batch format cmd field, enter LoadData.cmd %s %s 0.
  11. Enter the loading frequency: number of records (Max Rec.) or time delay in seconds (Max Time). For example, if you enter 300 in the Max Time field, data will be loaded every 5 minutes.
  12. Click Add.
    Information noteNote: Changing the environment settings is still possible afterwards. The files located in the intermediate storage path defined in Destination path field can be edited.

Did this page help you?

If you find any issues with this page or its content – a typo, a missing step, or a technical error – let us know how we can improve!