
Configuring a Weekly trigger for Job tasks
Before you begin
You must have the Execute permission on the workspace where the task is located to configure the Schedule steps when creating or editing a task.
About this task
You should adapt the schedule settings depending on the number of weeks in a year and the start date.
How do you know if a year has 52 or 53 weeks?
- 2024 has Monday to Tuesday on the 53rd week and Wednesday to Sunday on 2025. Only 2 days are in the 53rd week of the year. 2024 has 52 weeks in the year.
- 2026 has Monday to Thursday on the 53rd week and Friday to Sunday on 2027. 4 days are in the 53rd week of the year. 2026 has 53 weeks in the year.
You can use this endpoint to simulate the next runs.
You can edit the start date of the weekly trigger or use a CRON trigger if you want to change and adapt your schedule for the end of the year or the new year.
Procedure
-
If you are editing your task after it has been created, go to its details page,
then click the
 icon next
to Trigger.
icon next
to Trigger.
-
Specify values for the following fields:
Field Description Repeat every X week(s) Define the frequency of the run in weeks.
On Select one or more days from the drop-down list.
Repeat Select one of the following options:- At specific time(s): to run the task at
specific times during the week.
From the Trigger time field, select the execution time.
- At specific intervals: to run the task at
specific intervals during the week.
-
In Repeat every X minutes, set the interval time in minutes.
-
In the Repeat from field, enter the start time for the run.
- In the Repeat until field, enter the end time for the run.
-
In this example, the run will happen every four weeks on Tuesday and Thursday at 5 PM. In this example, the run will happen every two weeks on Monday and Friday every hour from 10 AM to 4 PM.
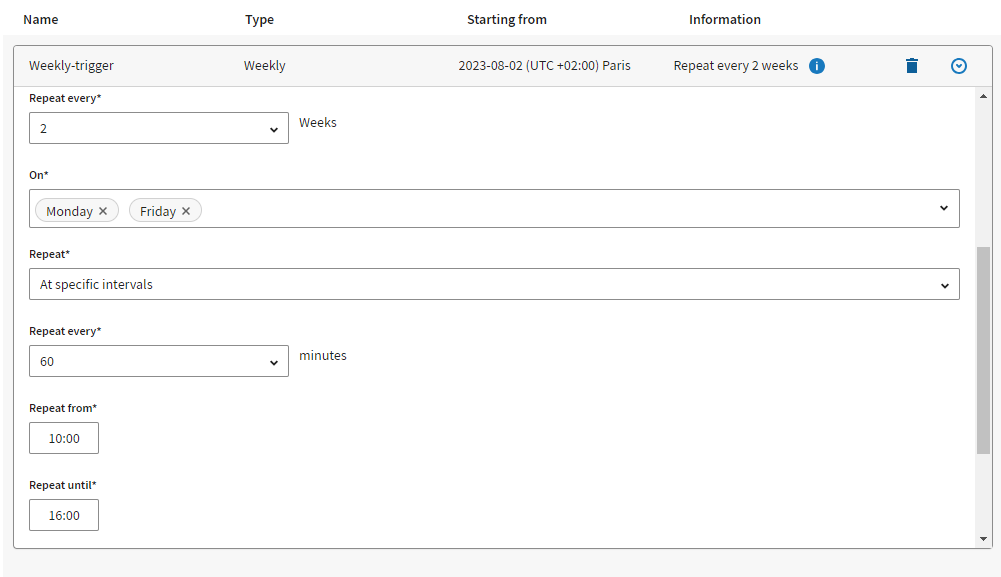
- At specific time(s): to run the task at
specific times during the week.
Results
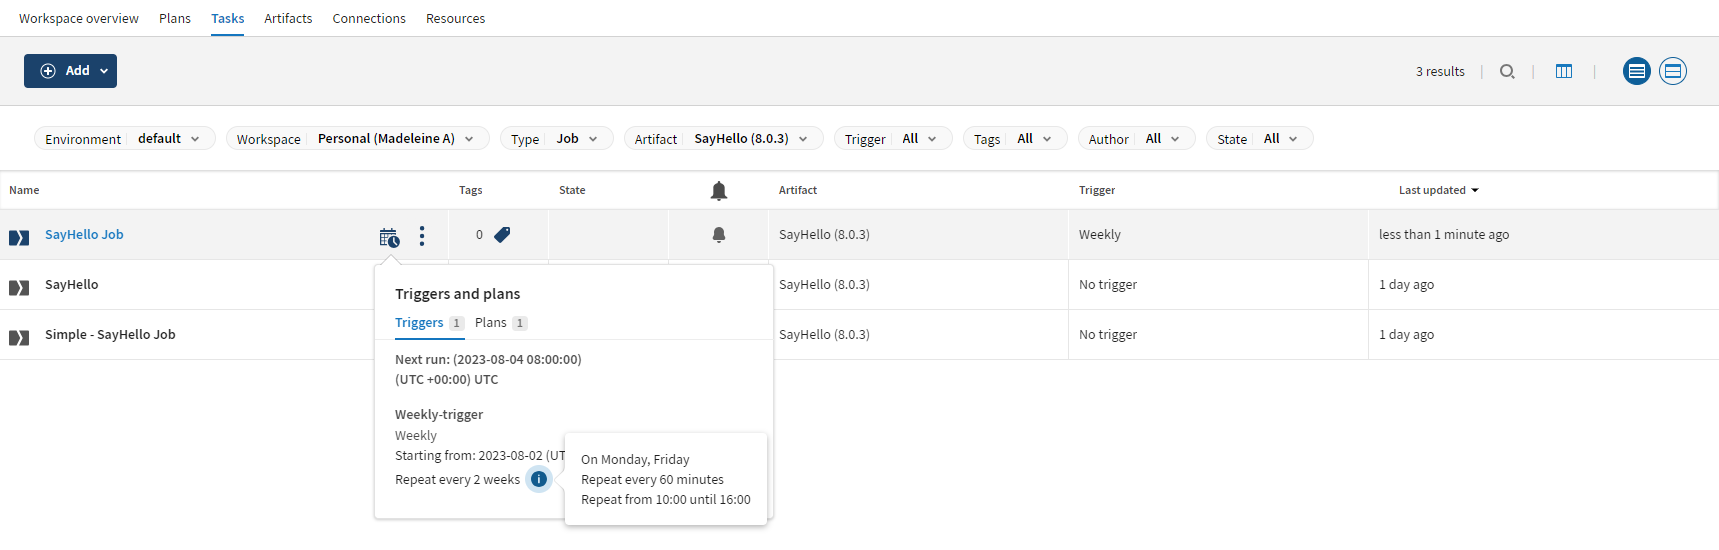
A confirmation message is displayed at the top of the page. You are redirected to the task details page. The schedule you have defined appears under .
If you have selected a time zone with Daylight saving time (DST) changes for your schedule, the transition of Daylight saving time affects the execution schedule since a time interval is repeated due to this transition, and thus the next actual execution is adjusted accordingly. For further information, see Schedules with DST.
Did this page help you?
If you find any issues with this page or its content – a typo, a missing step, or a technical error – let us know how we can improve!