
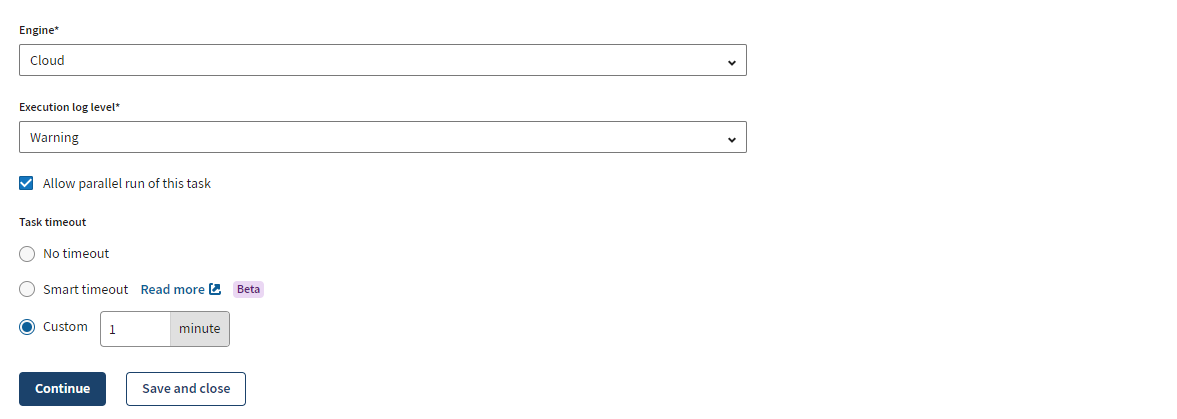
Defining custom Job task execution timeout
Define custom execution timeout on Job tasks.
Before you begin
- You must have Author permission on the workspace where the task is located to create or edit the task.
- You must have Execute permission on the workspace where the task is located to set task execution timeout.
Procedure
-
If you are editing your task after it has been created, go to its details page,
then click the
 icon next to Trigger.
-
Enter a value.
The default value is 5 minutes and the minimum is 1.
Results
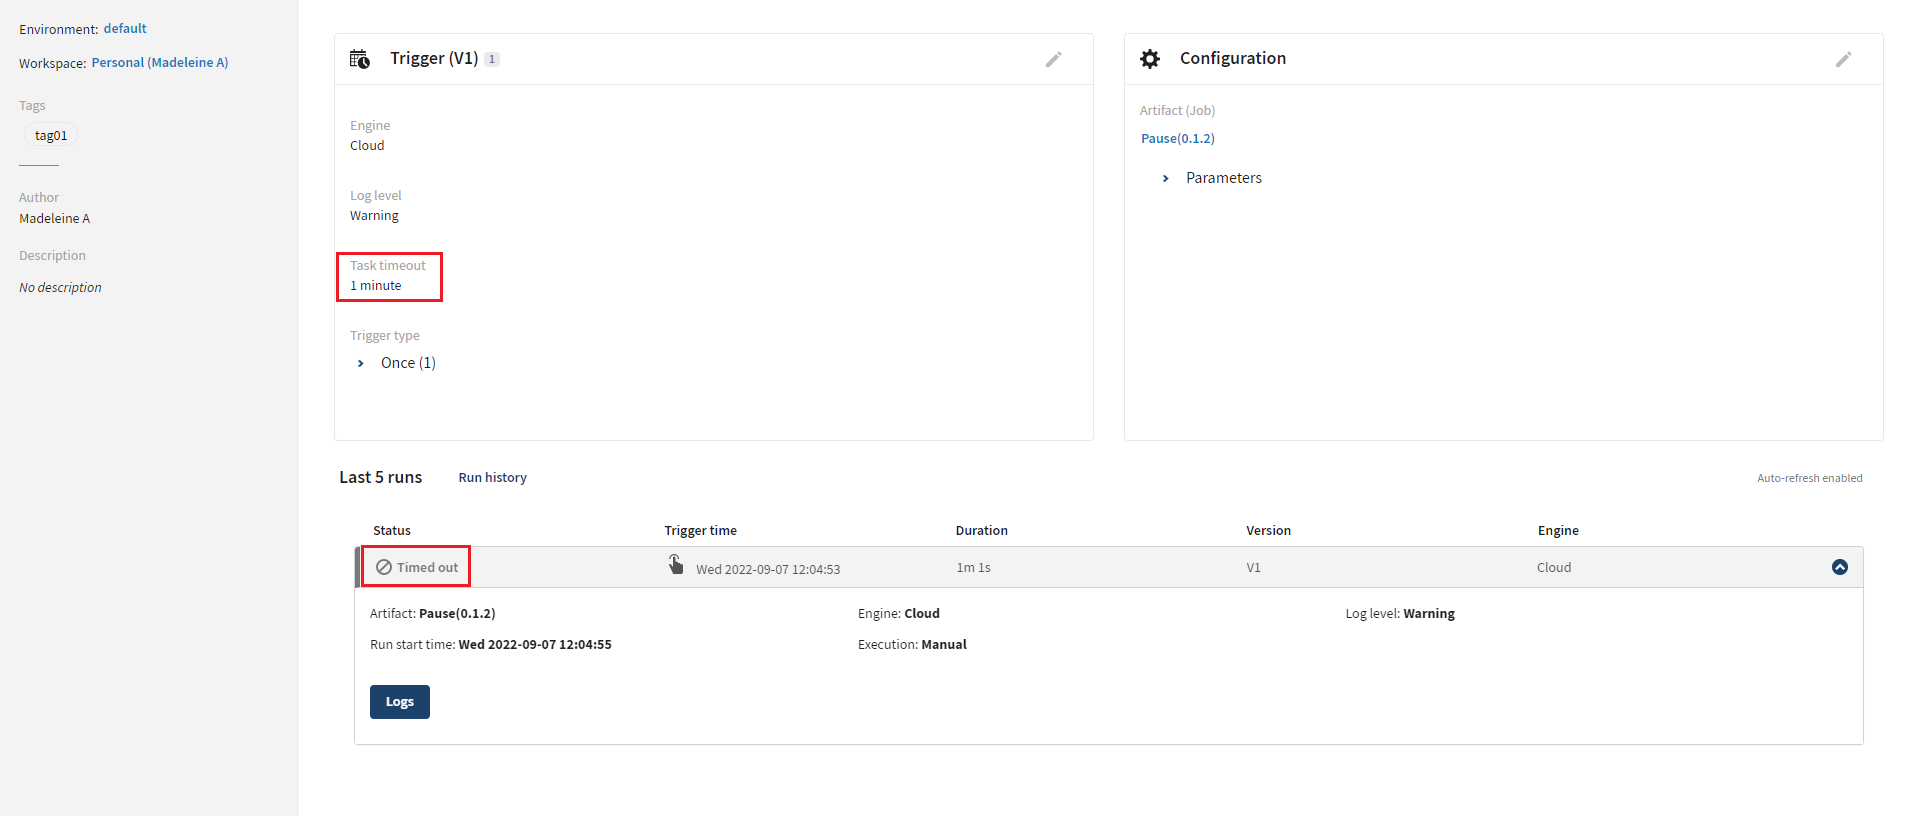
You can also see all executions stopped by a timeout from the Terminated tab in the Operations page with the Timed out status.
Did this page help you?
If you find any issues with this page or its content – a typo, a missing step, or a technical error – let us know how we can improve!