
Import from Data Mapping (SQL like) Scripts
Any data mapping with replication mappings and/or query mappings can be imported (without loss) from the Data Mapping Scripts format. This format is based on the standard database SQL Data Manipulation Language (SQL DML) syntax and includes both:
- The data connection data models (e.g. database schema, tables, columns) of their source and target data stores faithfully representing any supported technology (RDBMS, NoSQL, File Systems)
- The data integration (DI/ETL/ELT/CDC) for the data flow lineage between these data stores.
The specifics of the syntax for the data mapping script format are explained in a sample file at:
$MM_HOME/conf/MIRModelBridgeTemplate/DataMappingScript/DataMappingScriptTutorial.sql
The data mapping scripts can be edited /modified or may be generated entirely from scratch to model (simulate) a DI/ETL/ELT/CDC tool which may not be a part of the supported tools for a native model import.
The data mapping scripts can then be
- imported as independent DI models where you may
- Stitch the model’s connections to any other models (not just the ones originally directly linked to the data mapping
- Schedule re-harvesting of the scripts to include changes and support automatic stitching associated with configuration management
- imported back into a data mapping
- where you may continue to benefit from the data mapper UI
- Import into an existing data mapping, even the one you exported from
- Import into a newly created data mapping.
The newly created data mapping will be connected (linked) to the original source and target automatically.
Note, the requirements for the second user case (importing back into a data mapping) include a requirement that the connections to the original models must match exactly by pathname. I.e., a data mapping in the repository and its source models and a target model that are a part of the configuration that the data mapping is in. Also, these source and target models are linked by non editable connections, so this connection must be made at the time of the import. I.e., there is a great deal of intelligence built into this import bridge and it hunts for identical structure, but cannot simply “guess” or “make something up” in terms of which source and target models to connect to.
If there is no valid source or target model in the configuration that matches by name (and structure) with what is defined in the data mapping script, then the import log will contain errors explaining this fact. You can, of course, reconnect the end-points to another model with identical structure to the edited structure in the script file.
Finally, generally the best practice, when you are NOT using the data mapping editor to make changes but instead editing the data mapping script source, is to import into a model (not a data mapping model) and thus creating an ETL/DI model that can be stitched and take advantage of support for change and configuration management.
The resulting data flow linage would be the same in all these cases.
Import into a Data Mapping
Steps
- Sign in as a user with at least the Metadata Import / Export capability object role assignment on the data mapping you are going to import to.
You may Create a new empty model (a new empty data mapping) or one with existing query and replication mappings. For existing data mapping, the import will add new sub mappings or replace existing ones. However, the import will not remove existing ones.
- Navigate to the object page for the data mapping model.
- Go to More Actions > Import Data Mapping Script.
- Browse for a file (must be a zip file if there multiple scripts) to import.
- Click IMPORT.
- Go to the Operations widget in the banner and select the Export data mapping… to Show log.
- Click Download Operation Files.
Example
Sign in as Administrator and open the Adjustments to Staging data mapping.
Go to More Actions > Import Data Mapping Script.

Browse for the zip file created on the Export earlier.
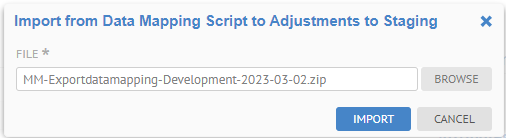
Go to the Operations widget in the banner and select the Export data mapping… to Show log.

Note it is completed. You may review the log. Then, see the mappings that are imported:

Again, unlike the Metadata Excel Format, where it is NOT a good practice to then re-import or update and re-import the spreadsheet into a data mapping, with the data mapping script format you may perform as many round-trips as you wish.
Import into a Model
Steps
- Sign in as a user with at least the Metadata Management capability object role assignment on the model you are going to import to.
You may Create a new empty model (a new empty model) or one that is for the Data Mapping Script import bridge already . Importing creates a new version of the model.
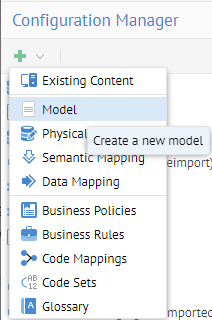
- Go to MANAGE > Configuration and select the data mapping script model you plan to import into or create a new model using the Data Mapping Script import bridge.
- Go to the Import Setup tab and browse to the location of a directory containing the data mapping scripts (uncompressed) to import and click SAVE.
- Click IMPORT.
- Go to the Operations widget in the banner and select the import operation to specify Show log.
- When completed, stitch the connections and click UPDATE and BUILD.
Example
Sign in as Administratorand create a new model named “Adjustments to Staging import from data mapping scripts”. It should use the Data Mapping Script import bridge.

Uncompress the zip file produced earlier for the Adjustments to Staging data mapping export into a folder.
Browse for the folder for the Directory bridge parameter and click SELECT.


Click SAVE and then IMPORT.
Go to the Operations widget in the banner and select the Export data mapping… to Show log.

Note it is completed. You may review the log. Then, see the mappings that are imported:
Click the Connections tab (may need to refresh the browser) and stitch the connections to the original source and target models associated with the original data mapping model. Then click UPDATE and BUILD.

OPEN the model and click the Data Flow tab.

Go to the Adj table in the Adjustments and trace lineage:

The end to end lineage trace is available as you have stitched it into the architecture.
Did this page help you?
If you find any issues with this page or its content – a typo, a missing step, or a technical error – let us know how we can improve!