
Populate (Bootstrap) a Glossary from a Model
You may take an already well documented model and use it to bootstrap a glossary, creating terminology and relationships based upon what is already well-defined in the original model.
Steps
- Be sure the model you are going to bootstrap from is already imported.
- Sign in with at least the Metadata Managementcapability object role assignmenton the glossary you are going to populate.
- Go to OBJECTS > Glossaries > and pick the glossary to bootstrap or create a new one.
The glossary must be empty when bootstrapping.
- Navigate to the object page of the glossary
- Go to
 More Actions > Bootstrap from model (even contained within a multi-model) and select the model to bootstrap from.
 - You may specify:
- GENERATE FILES ONLY
- Yes to not actually create the objects in the glossary, but simply create a set of CSV files which may be imported into the glossary later. This option is useful if you wish to edit the contents of those files before importing.
- No otherwise
- CREATE LINKS – Create links to the original objects in the data model.
- None to not create any links back to the source model
- (Term) Classification to create a term classification mappings between the new glossary terms and the original model data element (from where all the populated terms will be derived) so that semantic lineage may be traced to and from the terms and data elements. You have the option to overwrite any existing term classifications of the model data elements.
- Semantic Mapping to create a semantic mapping between the new glossary terms and the original model data element (from where all the populated terms will be derived) so that semantic lineage may be traced to and from the terms and data elements. You must provide the semantic mapping model with a name.
- Click IMPORT.
- The Log Messages dialog then appears and log messages are presented as the import process proceeds.
- If you receive the Import Successful result, click Yes to open the model. If instead you see the Import Failed result, inspect the log messages and correct the source model file accordingly.
- You may now review the glossary.
Example
We will use the existing Finance-AP model in the Accounting multi-model to bootstrap from.
Sign in as Administrator. Go to MANAGE > Configuration and create a new glossary named “Bootstrap”. Click Open.

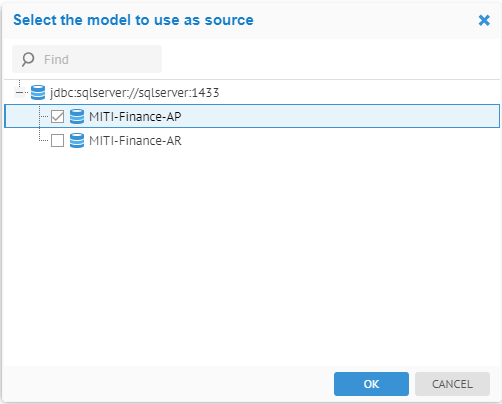
Go to More Actions > Bootstrap from model from model and select the Accounting multi-model.

Then click the checkbox for the Finance-AP model.
Click NO so that the glossary is updated. Click (term) Classification and check the Overwrite existing classification links box.
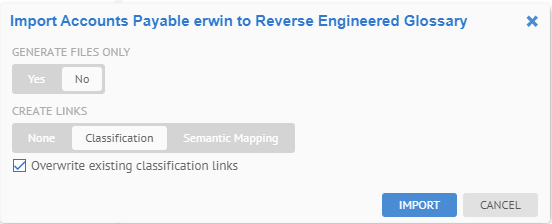
Click IMPORT.
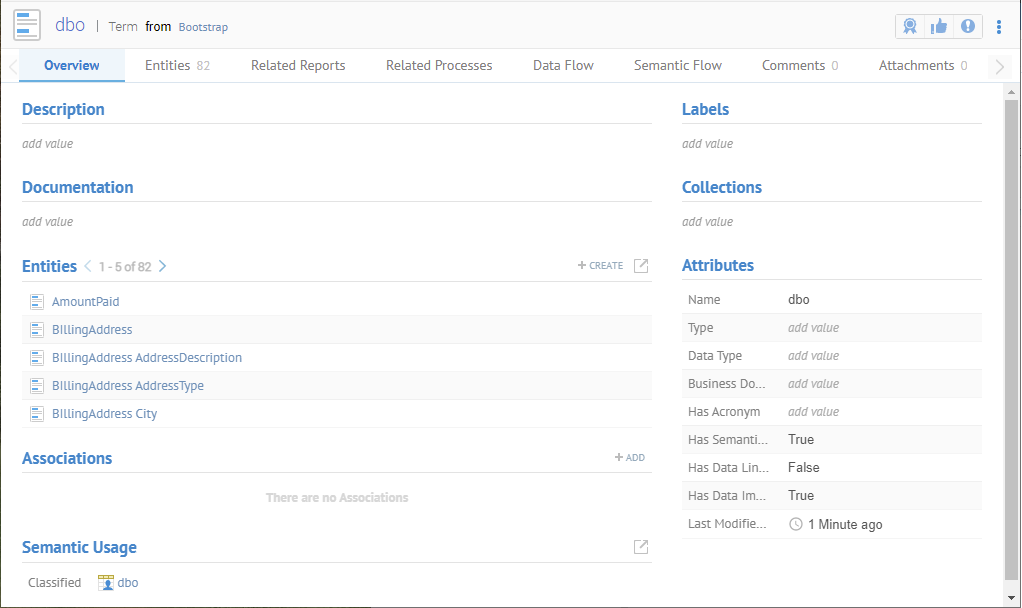
When the process is done, refresh the page, click the dbo term and see all the terms from tables and columns in the model.
Return to the root of the glossary and go to the Hierarchies tab.

Finally, right-click on AmountPaid and select Open and go to the Semantic Flow tab and see that the new term is classified to the object in the dbo schema of the database.

Did this page help you?
If you find any issues with this page or its content – a typo, a missing step, or a technical error – let us know how we can improve!