
Browse Hierarchically using the Object Explorer
Once in the Object Explorer panel, you may use the Browse tab and navigate the hierarchical structures in the configuration. This Browse functionality provides a single hierarchy that may be navigated down to the lowest level of granularity (e.g., fields in a file, or columns in a table) without stopping at the model (harvested) level.
Steps
- Click the OBJECTS tab at the top of the panel and select Explore.
Example
Go to OBJECTS > Explore in the menu.

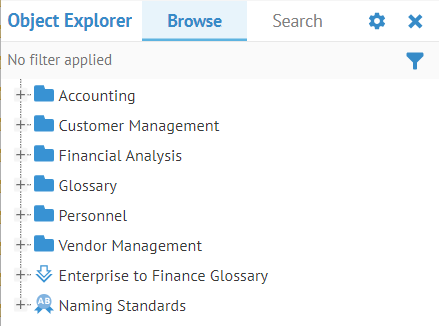
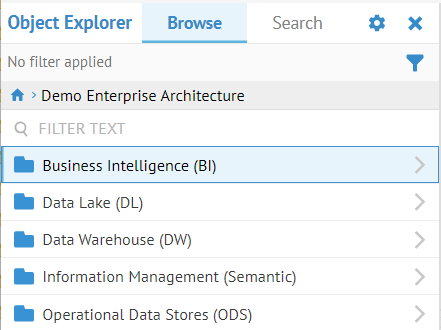
The default hierarchical presentation is a tree view based upon the configuration folder structure.
Explore Further
The Object Explorer panel Browse tab has several options in terms of presentation. You may specify display Preferences.
- Click Preferences.
- Select the specific options.
DISPLAY MODE
There are two modes of navigating the resulting hierarchy.
- Tree - The Tree presentation shows a limited number of siblings and allows you to jump to them all, much like a traditional tree interface.
- Drill - The Drill presentation is useful when you need to work with a long list of siblings (e.g., 10K of tables in a database schema)
HIERARCHY TYPE
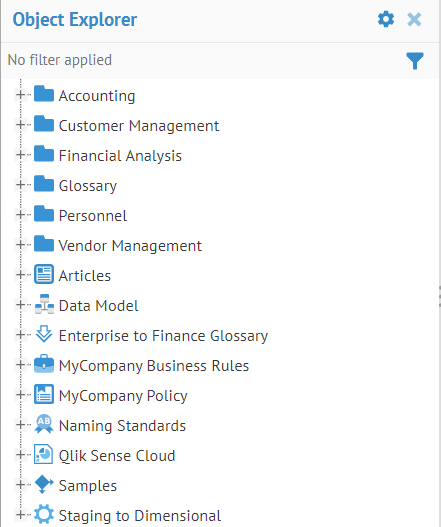
This option allows you to show the tree structure based upon one of the following hierarchical structures, as they are defined in different components within Talend Data Catalog :
- None – Simply a flat structure of the models in the configuration.
- Configuration – Displays the tree using the structure of folders and models defined in the configuration itself.
- Repository – Displays the tree using the structure of folders and models defined in the repository.
MAXIMUM OBJECTS PER LEVEL
Tree structures may be huge and thus Talend Data Catalog “paginates” the results in order to improve responsiveness over networks. This option allows you to specify the number of elements to display at a particular level.
SHOW ATTRIBUTES
Additional attributes may be shown in the tree, including all the curation icons as well as Alternate Name.
Example
DISPLAY MODE
Click Preferences and click Tree.

Tree Mode
Expand the Glossary folder and click the Finance glossary item.
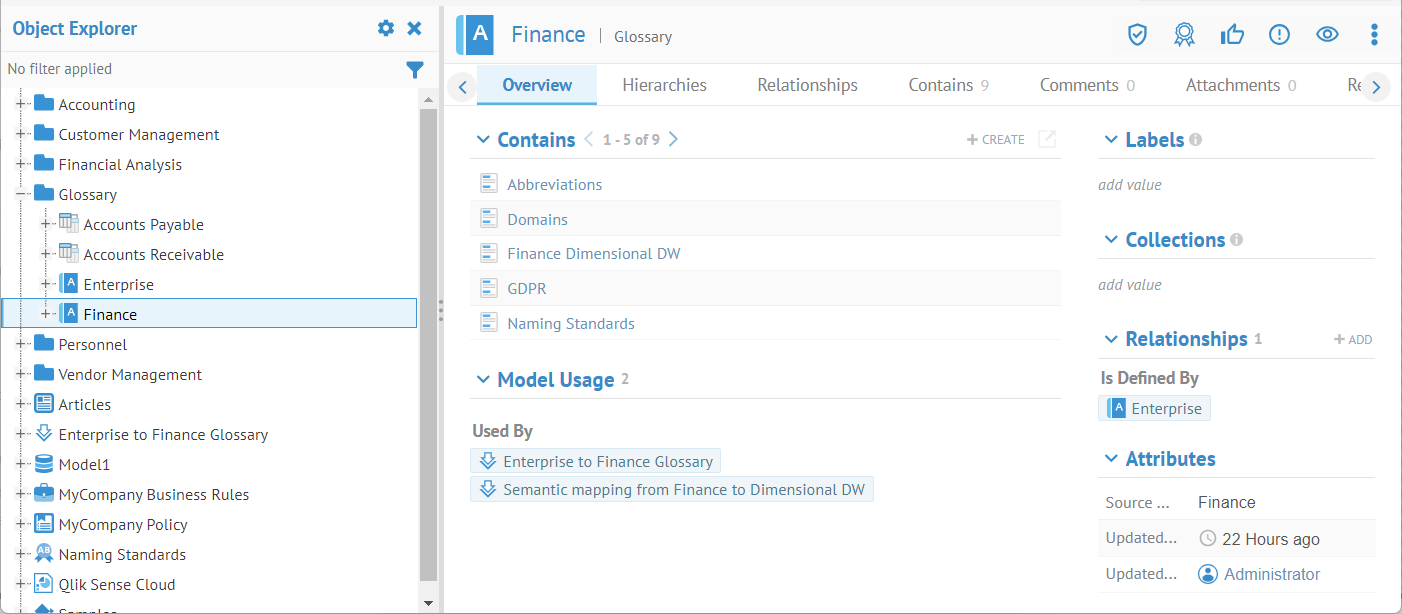
To restore the tree, simply click OBJECTS again. If you click on another item in the tree, you will be taken to that element’s object page. However, the reverse is not true. If you navigate from the object page to an item, the Object Explorer panel does not update. Instead, you may use the Show in Object Explorer option in the upper right.
Click the GDPR term in the object page. Here, we navigate to the GDPR term, but the Object Explorer panel does not update to GDPR.

With the Object Explorer panel opened, it remains as you click outside the panel and other panels are resized to accommodate it.
Now, select Show in Object Explorer from the More Actions pull down in the upper right of the object page, and the Object Explorer panel is updated.


Drill MODE
Click Preferences in the Object Explorer panel and click Drill.

Click the caret to expand the Glossary folder.

Click the Finance glossary item.

If you click on another item in the drill list, you will be taken to that object page. However, the reverse is not true. If you navigate from the object page to an item, the Object Explorer panel does not update.
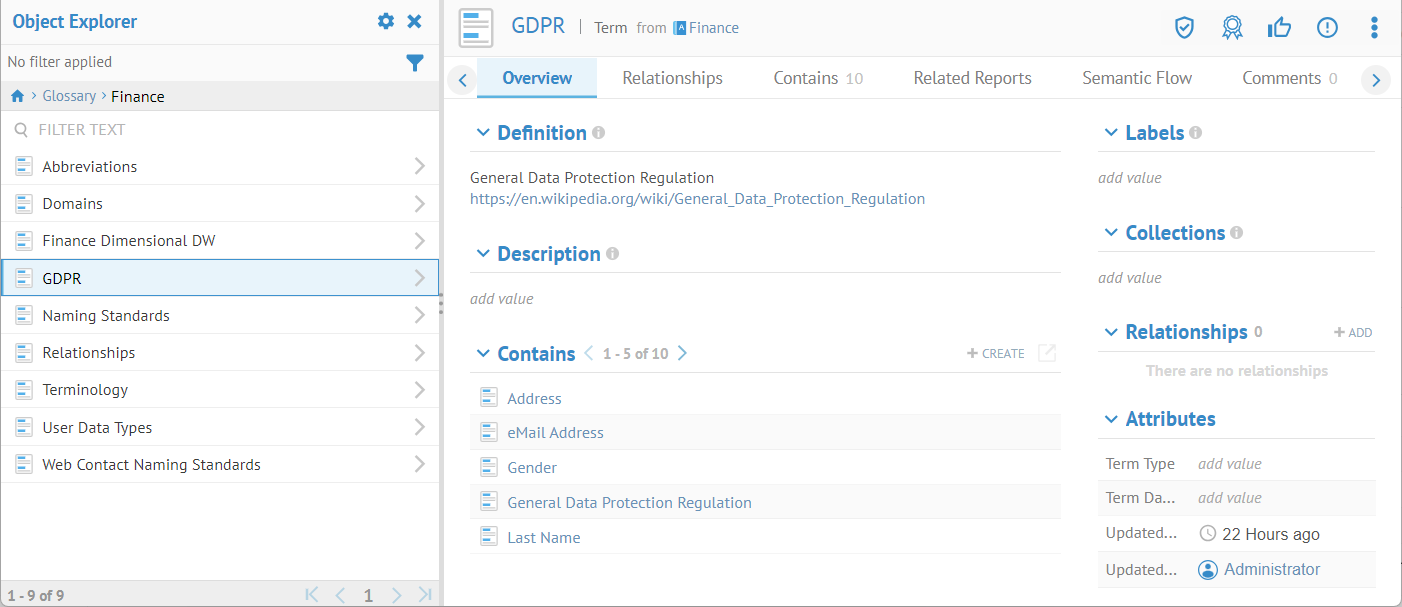
Click the GDPR term in the object page. Here, we navigate to the GDPR term, but the Object Explorer panel does not update.

Now, select Show in Object Explorer from the More Actions pull down in the upper right of the object page, and the Object Explorer panel is updated.
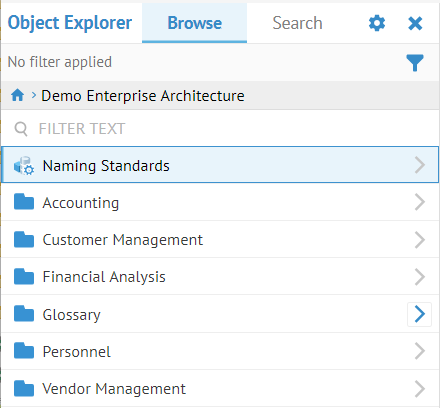
In Drill mode, there is no tree to expand, so the drill level is changed.
Hierarchy TYPE
Click Preferences and select Repository for the HIERARCHY TYPE.

The hierarchical structure now reflects what is defined within the Repository as a whole.
SHOW ATTRIBUTES
Click the Preferences, and click Tree, and select all of the options under SHOW ATTRIBUTES.

Now, we see all the curation icons and alternate names.
Navigating a Hyperlinked Tree
In some instances, there are a number of relationships between elements in a model that cannot be represented by a simple tree structure. E.g., and index on a table relates to a specific set of columns, but is not contained in any one column, so it is shown as contained with the table with hyperlinks (represented by a curved arrow over its icon) to related columns.
Steps
- Open the Object Explorer panel.
- Expand to the tree or drill to a reference (hyperlink). This is an icon with an arrow in the lower left corner.
- Right-click the reference and select Go to reference or double-click.
Example
Navigate in the tree or drill-down to Glossary > Accounts Payable > POLineItemInvoiceItem > VendorID > VendorID reference (hyperlink):

There is an arrow in the lower left corner of the icon for VendorID, indicating it is a reference.
Click the reference.

Clicking the reference takes you to the actual object (Index). To demonstrate this fact, select the Show in Object Explorer option to see where it is in the tree.
You may also right-click the reference and select Go to reference and it will take you to that element in the tree.
When navigating in the MANAGE > Repository page, you may double-click on a reference in the tree of a model in order to go to the referred object, as well as right-clicking and selection Go to reference.
Pinning the Explorer Tree
Large enterprise customers can have metadata systems with many thousands of objects at some levels of their hierarchy. In the case of Walmart, the Hive server has 2,000 databases.
The Object Explorer tree shows a limited number of items per level. When the tree does not show an object you cannot see its children either. For example, it prevents you from analyzing the internals of a database or folder in the Tree when it has an ascendant level with too many children.
When presented with this limited view, you may Pin to a level in the tree. For example, you can search for the level object, navigate to it by drilling up or down.
The Pin interface shows you the pinned level object at the root of the tree and the path breadcrumb of the object. The breadcrumb header allows you to un-pin (show the whole repository tree) or re-pin (pin any parental object in the breadcrumb).
The UI provides you with the Pin in Tree menu option in the Drill and Object Details panels.
Steps
- Sign in as a user with at least read access to the metadata.
Explorer
- Go to OBJECTS > Explore.
- Navigate to any level in the tree or drill-down presentation.
- Right-click an object and select Pin in Tree.
Object Page
- Navigate the object page for an object.
- Click More Actions and select Pin in Tree.
Example
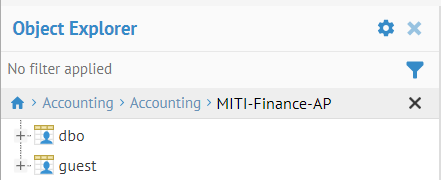
Go to OBJECTS > Explore. Navigate to the MITI-Finance-AP level in the tree and right-click the object and select Pin in Tree.
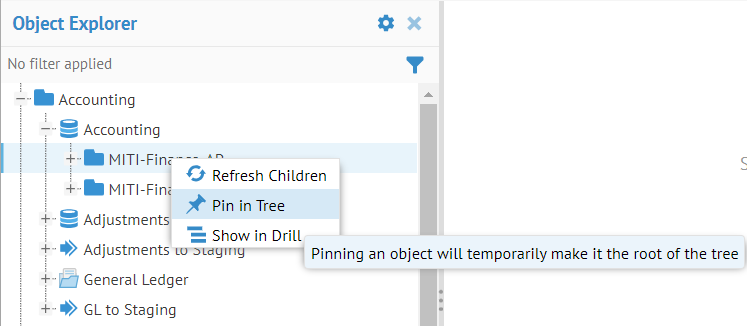

The tree is now scoped down to everything below the level of MITI-Finance-AP.
Click the X next to the pinned level to remove the pin.

Click More Actions and select Pin in Tree.
Again, the tree is now scoped down to everything below the level of MITI-Finance-AP.
Organize the Configuration
You may organize the models presented for the particular configuration.
Steps
- Sign in as a user with at least the Metadata Editingcapability object role assignment to the configuration you wish to organize.
- Go to MANAGE > Repository.
- Click the configuration version.
- In the configuration manager, click New Folder to create folders.
- Drag any model in the configuration into a folder to organize.
Example
Sign in as Administrator and go to MANAGE > Repository.
In the Repository panel, expand the tree until you see the Demo Enterprise Architecture configuration.

Expand the plus sign next to this configuration and click the Published version.
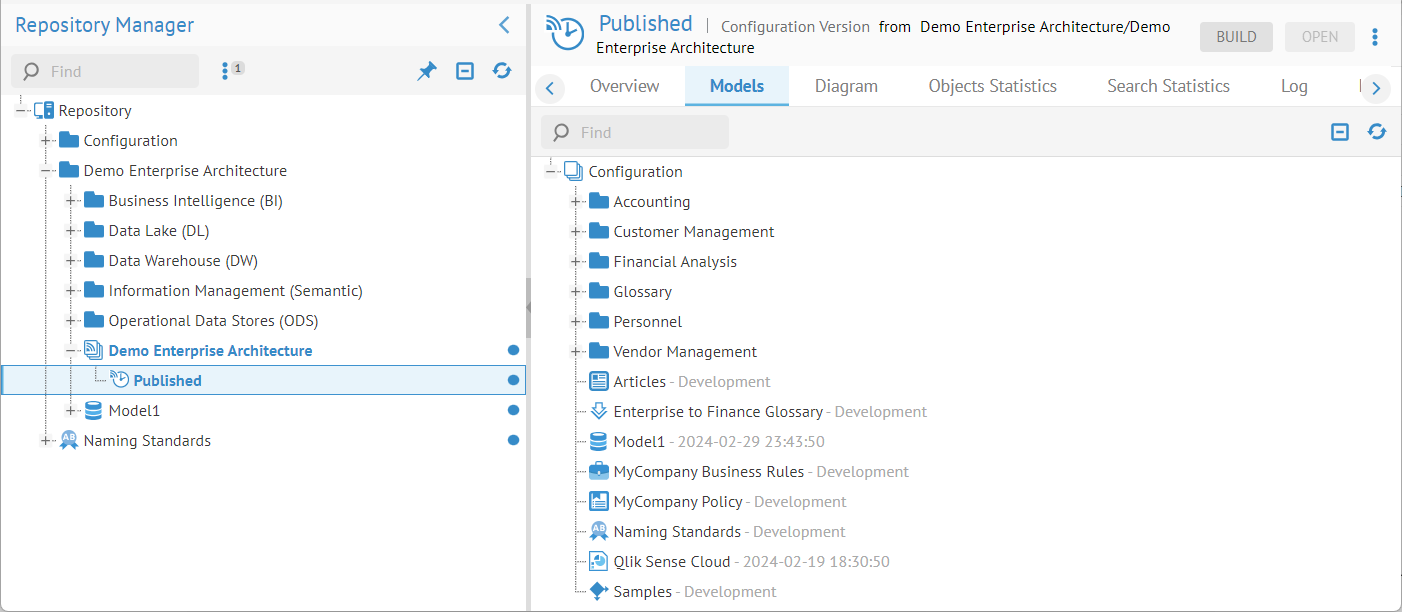
The configuration opens in the middle work panel.
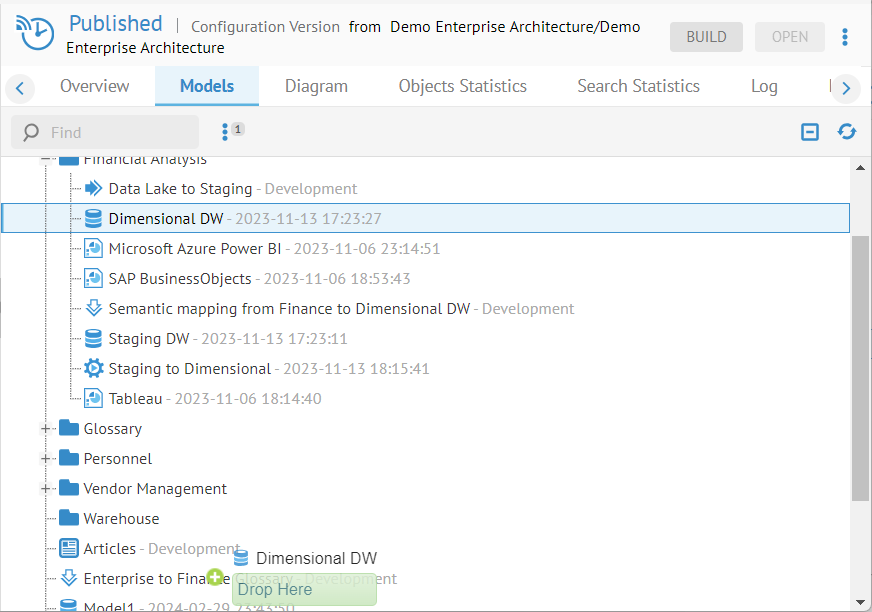
Note, there is already a structure. Right-click the root of the tree (Configuration) then select Add, then Folder and name it “Warehouse”.


Drag the Dimensional DW model into that folder.
Right-click on the Published configuration version and select Switch to this configuration. Then go to OBJECTS > Explore.

See the new folder and structure.
Organize the Repository
You may organize the models presented in the Repository Tree for the Repository as a whole.
Repository organization is very important as you may schedule, assign permissions, and perform actions (right-click) by folder.
Did this page help you?
If you find any issues with this page or its content – a typo, a missing step, or a technical error – let us know how we can improve!