Preparing the journalization - 7.3

Talend Change Data Capture Installation Guide

Version
7.3
Language
English
Product
Talend Change Data Capture
Module
Talend Change Data Capture
Content
Data Governance > Third-party systems > Database components (Integration) > Change Data Capture
Data Quality and Preparation > Third-party systems > Database components (Integration) > Change Data Capture
Design and Development > Third-party systems > Database components (Integration) > Change Data Capture
Last publication date
2023-10-05

This section describes the installation steps necessary to enable the process of journalization (or log file update) on Windows NT Server machines.

About this task

Procedure

  1. Create a directory on the source machine to store the Talend Change Data Capture journals. They will contain the transaction records (updates) of the data in the database, schema (and so on) to replicate.
    Note: As the journal name is composed of the database name, if you have multiple instances, it may be preferable to create a sub-directory for each instance to avoid name conflicts.
  2. Choose a local disk with enough disk space to hold its journals. The volume depends mainly on the activity level of the database.
  3. Specify this directory when journalizing each database or schema.
    In the Manager, go to Source > Journal management. From the list on the left, right-click the name of the database on the left and click Start DB logging process. Now select the subdirectory you created before in Talend_CDC_Journal directory. For more information, see section Creating a journal and journalizing a file.

Results

Make changes to the source database. You are now able to see the following values:
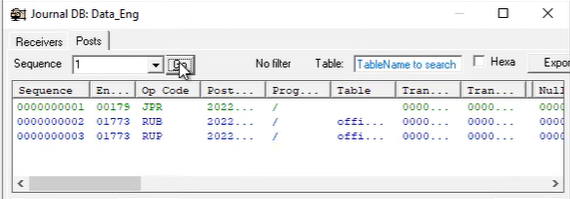
  • JPR (Journal Previous Receiver).
  • RUB (Row Update Before corresponding to the value before the change).
  • RUP (Row Update Past corresponding to the value after the change).
  • JNR (Journal Next Receiver).