
Create a Dashboard
To build a dashboard, you will either start with an empty one (new) or Save As.. from an existing one.
Steps
- Either:
- Go to DASHBOARDS > Manage to begin working on a dashboard. You may also click DASHBOARDS > and select any of the options under
- Explore
- Defaults
- Favorites
- Recent
Or
- Go to DAHSHBOARDS > New Dashboard.
- For a new dashboard, create it and specify the Name, Layout, Sharing and Description.
Example
Here, we will create a new dashboard from scratch.
Log in as Administrator. Go to DASHBOARDS>Manage and click Create. Enter “My Dashboard” in the Name text field. Choose the three-column Layout.
Layout the Dashboard
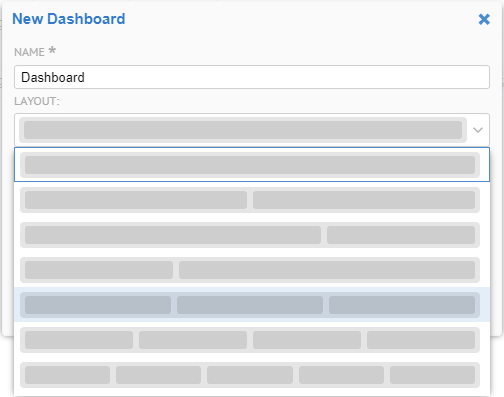
When laying out the dashboard you will not be able to add containers above the first one. Instead, you will have to copy the top one and then edit it to reflect the new design.
Share the Dashboard with Users and Groups
Example
SHARE it with the Administrators group.
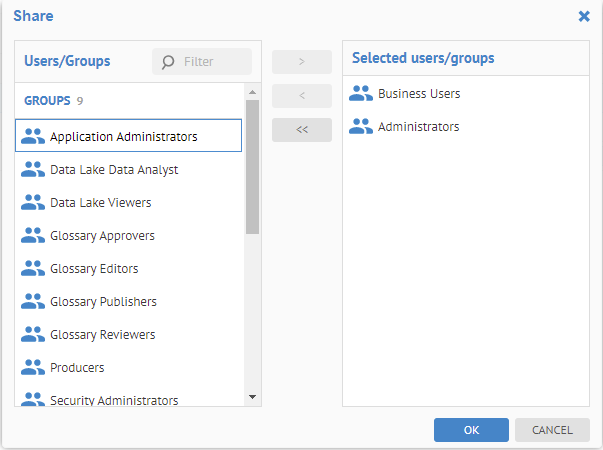
Enter a DESCRIPTION and click OK.

It is now in the list, and note it is shared.
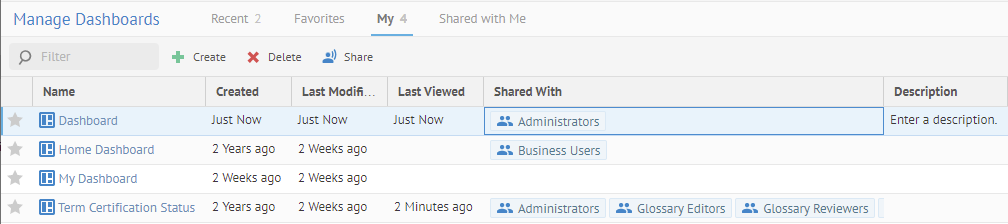
Click on My Dashboard in the list to edit.
Create a New Dashboard from an Existing One
Steps
- Open a dashboard for editing.
- Go to SAVE AS and specify a new dashboard name
Example
In particular, you may create a dashboard based upon the dashboard you just created
Log in as Administrator. Go to DASHBOARDS>Manage and click Create. Enter “My Default Dashboard” in the Name text field. Under SAVE AS, select Generate Sample Dashboard and you will be editing the homepage dashboard.


There is a downward facing caret allowing you to expand or contract each section/widget in the Dashboard
Did this page help you?
If you find any issues with this page or its content – a typo, a missing step, or a technical error – let us know how we can improve!