This section covers the installation of the Snowflake driver, its application and its
connector program (SnowSQL).
Before you begin
Make sure you know the directory destination path where
Talend Change Data Capture
files are installed. This path is called
<DestinationPath> in the
following steps.
Procedure
-
Create an account on Snowflake.
-
Download SnowSQL and Snowflake ODBC driver.
Information noteNote: The SnowSQL installer and the ODBC driver can be downloaded from the
Snowflake Client Repository. No authentication is required. This version of
the SnowSQL installer enables auto-upgrade for patches.
-
Launch the driver setup to install it.
-
Create the DSN name:
-
From the ODBC Data Source Administrator, click
Add. Select the driver and click
Finish.
-
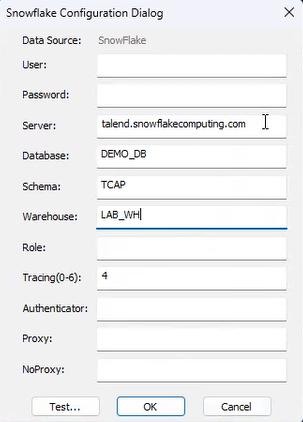
The Snowflake Configuration Dialog screen is
displayed.
Enter the following mandatory settings:
- Server: address of the Snowflake account
- Database: name of the target database created on
Snowflake
- Schema: name of the database schema created for
the project
- Warehouse: storage location of the buffer
- Tracing: log level from 0 to 6
-
Copy snowsql.exe file in
<DestinationPath>\.snowsql\.
-
Install Snowflake connector: after the installation of Talend Change Data Capture, launch the following command:
<DestinationPath>\.snowsql\snow-update.cmd.
The program will install the necessary .exe and .dll programs.
Details about the batch files in .snowsql:
- snow-version.cmd: to know the version of SnowSQL installed.
- snow-version-available.cmd: to get the list of available versions.
- snow-update.cmd: to install a xxxx version. Default version is 1.2.2. To
change the version, edit the file and modify the version number.
Information noteNote: If your target machine does not have an Internet connection:
- Copy the folder Talend Change Data Capture\.snowsql on a server connected to Internet and perform the
updates with snow-update.cmd (\.snowsql\x.y.z is created).
- When the update has been done, copy the folder x.y.z on the Talend Change Data Capture server in
<DestinationPath>\.snowsql\.
