
Editing Data Documentation
You may determine the Name and Business Definition by many different methods. This may be performed by in three places:
- the object pageOverview tab for the imported object you wish to document to edit directly and also edit the term defined, semantic mappings
- the object pageSemantic Flow tab Edit Documentation link for the imported object you wish to document to edit the term defined, semantic mappings
- a worksheet with the appropriate columns
Here they are presented by type of editing you wish to perform.
Local Documentation
In this scenario you will enter an explicit local Name and Business Definition, overriding the reused Name and Business Definition from a term in a glossary.
Steps
From the object page
- Navigate to the object page for the imported object you wish to document. Then click the Overview tab.
- Click on the pencil (Edit) icon in the Documentation section.
- Enter the:
- BUSINESS NAME of the term
The BUSINESS NAME will be pre-populated with any human readable name based upon the physical name.
- BUSINESS DEFINITION for the term
The BUSINESS DEFINITION will be pre-populated with any inferred description information.
- Click OK.
The Business Name (next to the physical name) and BUSINESS DEFINITION in the Term Documentation section now are locally defined.
Example
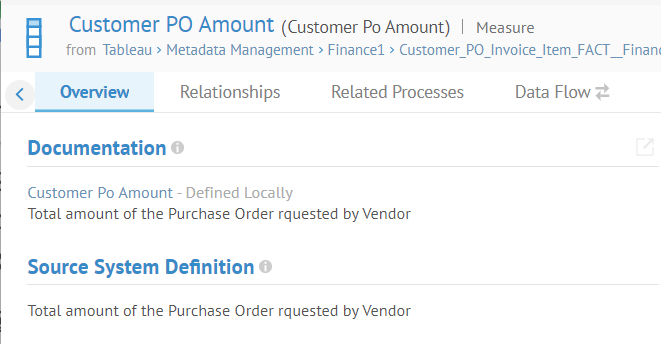
Navigate to the object page for the column Customer PO Amount in the Tableau report at Tableau > Metadata Management > Finance1 > Customer_PO_Invoice_Item_FACT__Finance_Dimensional_DW_ > Customer PO Invoice Item.
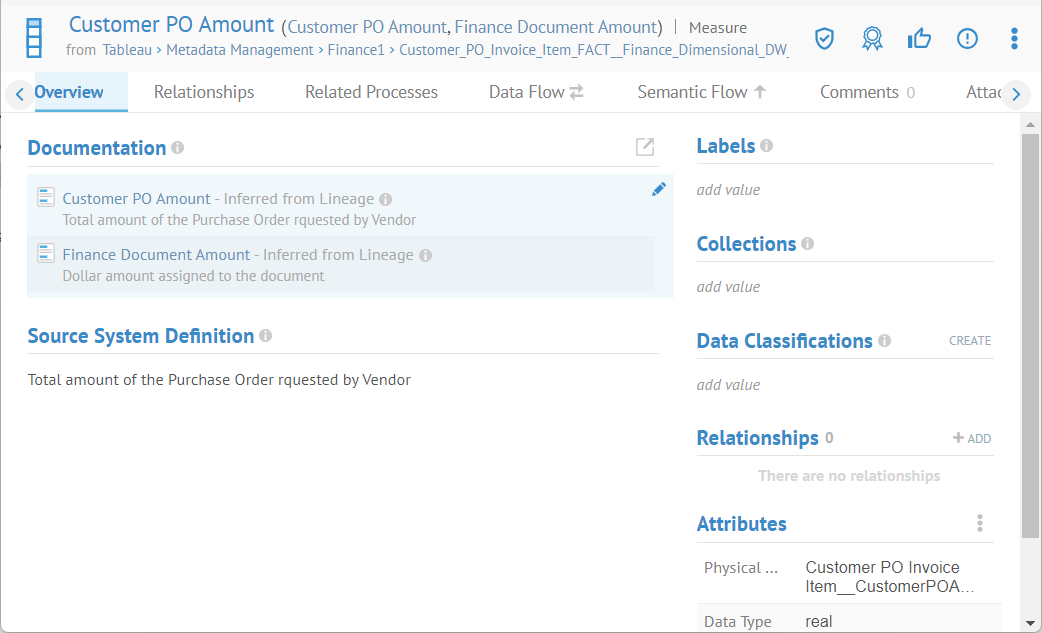
Move the pointer over the right hand side in the Documentation section and then click the pencil (Edit) icon which appears.
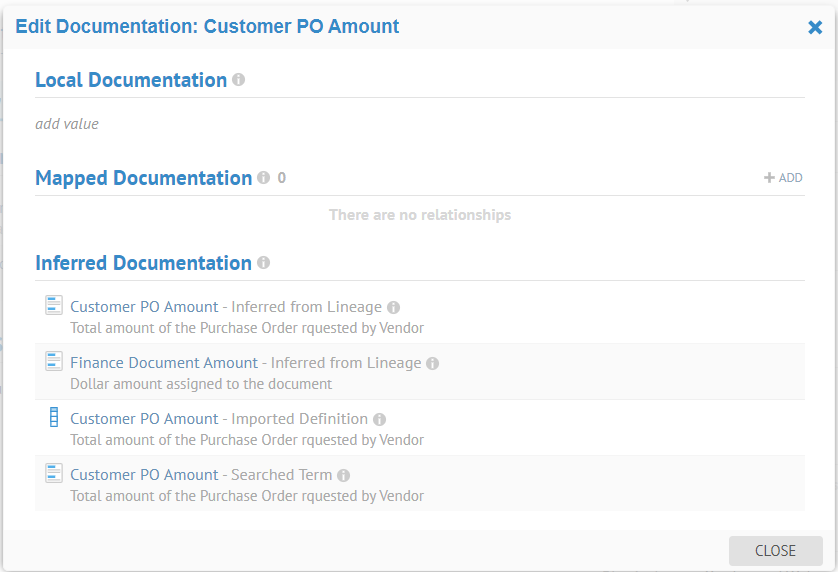
Click on the pencil (Edit) icon in the LocalDocumentation section.
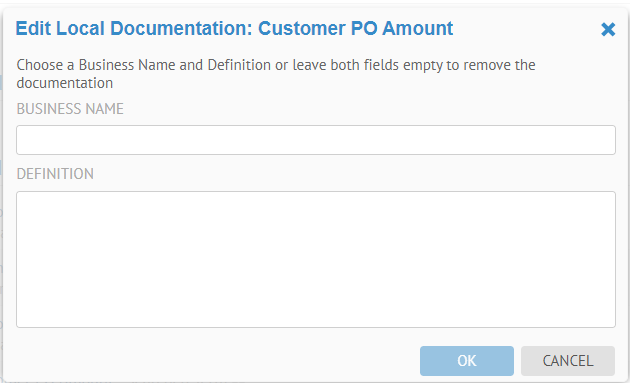
Click in the BUSINESS NAME field.
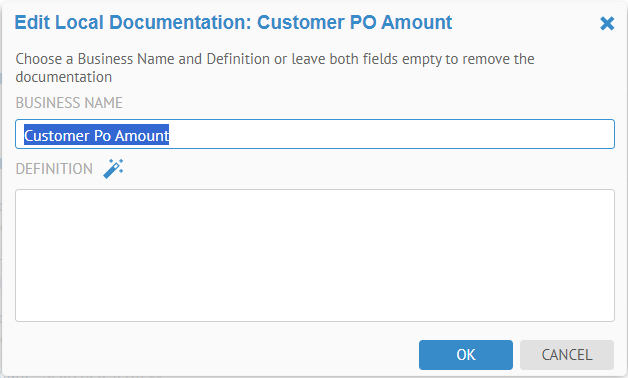
It suggests a good BUSINESS NAME.
It also proposes to take advantage of data standardization and create a term which may be reused for documentation throughout. This is the preferred approach, and locally documenting is not considered best practice. We show it here for completeness.
Click the Propose Definition (magic wand) icon.

The different descriptions are listed based upon the other documentation (term, semantic mapping, inferred).
Select Import all to include all these definitions and you may edit accordingly.
Pick the third item in the list

Click OK.
Click CLOSE.

The object is now locally documented, but by re-using business name and definition for other objects (terms in this case).
Explorer Further
You may also edit the Business Name and Definition, as well as custom attributes by exporting to CSV format and re-importing.
Export Documentation to CSV format (Bulk Update)
You may also enter edit the Business Name and Definition, as well as custom attributes by exporting to CSV format. Then you may re-import.
Permissions required are:
-Export menu options is available when you have the Metadata Viewer capability.
-Import menu options is available when you have the Metadata Editor capability.
Steps
- Sign in as a user with at least the Metadata Import / Export capability object role assignmenton the object.
- Navigate to the object page for the database model for which you want to document the schemas, tables and columns.
- Click More Actions and select Export Data Documentation CSV.
- Specify the COLUMN DELIMITER and specify Complete as the EXPORT MODE.
Specify Complete in most cases as that will provide a complete set of columns, tables, etc., to document. If you specify Compact then you will only see those objects which have any of the attribute values already populated (i.e., for update of existing values only).
- Click EXPORT.
- Click RUN OPERATION.
- Open the log of the operation when complete.
- Click Download Operation Files.
Example
Search for the Staging DW database model and go to its object page. Then click More Actions and select Export Data Documentation CSV.

Specify Complete as the EXPORT MODE.

Click EXPORT, then go to the Operations widget.

Open the log of the operation when complete.
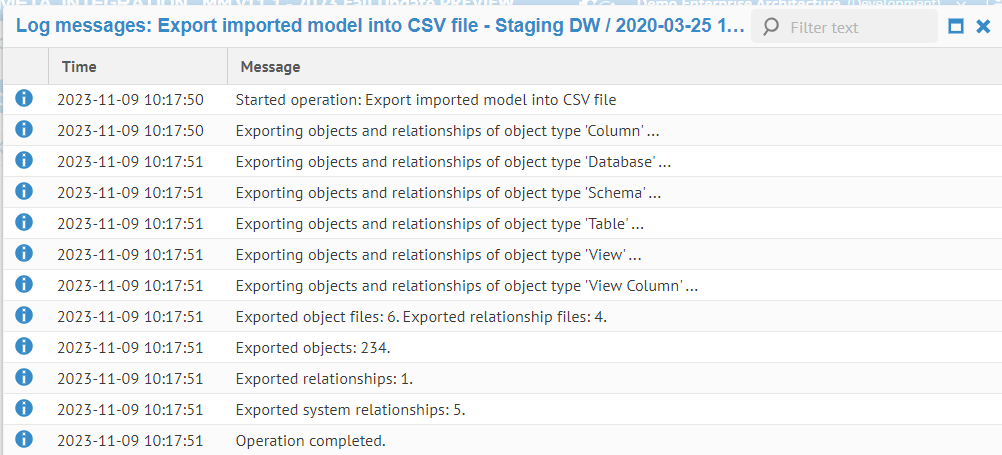
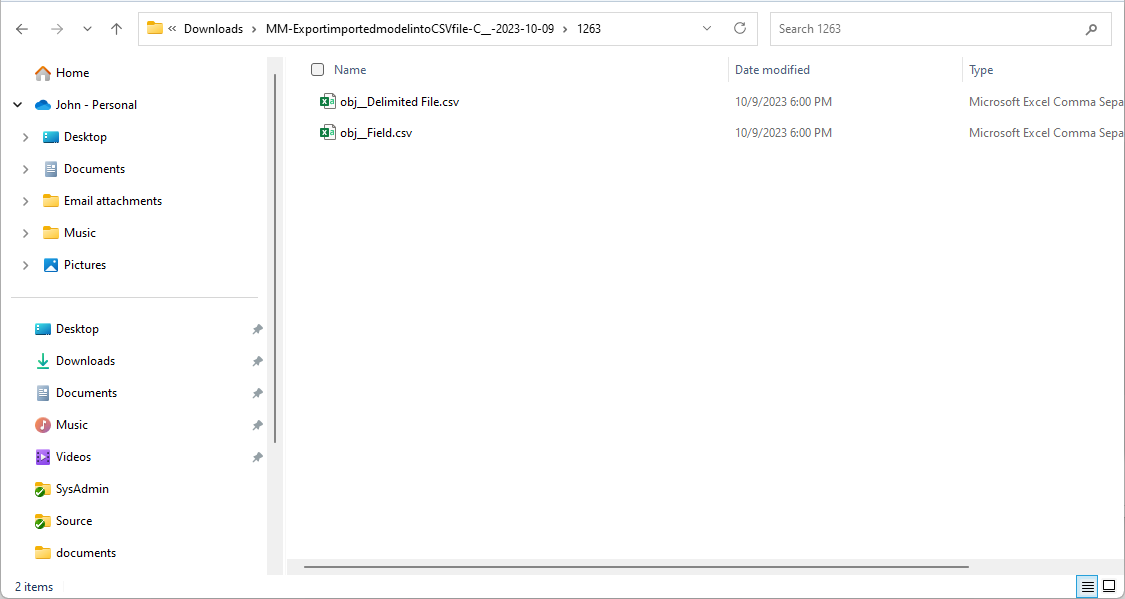
Click Download Operation Files. Expand the compressed (zip) file.

Open any of the resulting .csv files with the Business Name and Definition, Data Classifications, Sensitivity Labels as well as custom attributes in an editor.

This is the Column sheet. You may also select any of the others and then re-import the changes together.
Export File System Imported Model to a CSV Hierarchy
Search for the Data Lake file system model and go to its object page. Then click More actions > Show in object explorer in order to see the hierarchical structure.

Click various levels in the model and note that at each level if you select More Actions you are able to see the selection Export Data Documentation CSV.
You may export to CSV from any level in a Hierarchical multi-model, like a file system model, down to the individual sub model level (an individual file in this case).
At the root of the model select More Actions > Export Data Documentation CSV.

Be sure to specify “Complete” for EXPORT MODEL and “Yes” for RECURSIVE to ensure that you have all the semantic links, custom attributes, etc., as well as the entire structure and sub model contents.
Click Download Operation Files and save, then open the zip and take a look.

Again, there is a submodel.csv file with the structure:

The submodel.csv lists unique IDs for folders in the export and its matching pathname in the original hierarchical Data Lake multi-model
Each folder contains the metadata of the object (file) and the contained fields.
Export a File System File
You may export any type of model to CSV format. In the example we will export a file in the Data Lake
Search for the Employee.csv model and go to its object page. Then click More Actions and select Export Data Documentation CSV.

Specify Complete as the EXPORT MODE.

Click the operations widget.

Open the log of the operation when complete and click Download Operation Files.

Open any of the resulting .csv files with the Name and Business Definition, Data Classifications, Sensitivity Labels as well as custom attributes in an editor.

Import Documentation from CSV format (Bulk Update)
You may export a .csv format file for editing the Name and Business Definition, as well as custom attributes by exporting to CSV format. Here is how you re-import that file.
Permissions required are:
-Export menu options is available when you have the Metadata Import / Export capability.
-Import menu options is available when you have the Metadata Import / Export capability.
This feature is only available for data store (database, file system, etc.) models.
Steps
- Sign in as a user with at least the Metadata Import / Export capability object role assignmenton the object.
- Navigate to the object page for the database model for which you want to document the schemas, tables and columns.
- Click More Actions and select Import Data Documentation CSV.
- Browse to the file, specify the format and click IMPORT.
The CSV format file will be uploaded from a local file.
If you cannot find the location using the Browse function you must configure (as part of the installation) the available paths to present to users. More details may be found in the deployment guide.
Example
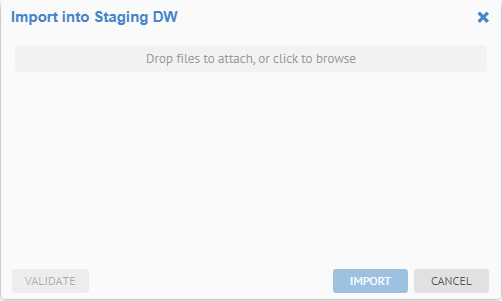
Search for the Staging DW database model and go to its object page. Then click More Actions and select Import Data Documentation CSV.

Browse to the file, specify the format and click IMPORT.
If you cannot find the location using the Browse function you must configure (as part of the installation) the available paths to present to users. More details may be found in the deployment guide.
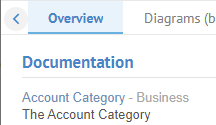
Navigate to the Account Category table in the model and note the Name and Business Definition and other edits are present.
Mapped Documentation
In this case you may reuse the Business Name and Definition of an already documented object (quite commonly a term in a glossary) via a semantic mapping link.
You may:
- Document using one or more existing terms
- Create a new term and document with it
- Create a new term based upon existing terms used for documenting the object and thus normalizing the term documentation.
Term documentation is implemented as part of the Glossary Model Type in MANAGE > Metamodel as Defines and Is Defined By.
Mapped Documentation Using Existing Terms
Steps
From the object page
- Navigate to the object page for the object you wish to document. Then click the Overview tab.
- Click on the pencil (Edit) icon in the Documentation section.
- In the Mapped Documentation section of the dialog, click on the pencil (Edit) icon.
Talend Data Catalog automatically searches with the physical name of the object. You may wish to remove that search filter if you wish to find a different term or one that is spelled differently.
- If it did not find the term you are looking for, remove the search filter.
- Search or navigate to the term you wish to use to document this object and select the term.
- Click OK.
The Business Name (next to the physical name) and Business Description in the Term Documentation section now inherit from the term selected.
From the Semantic Flow tab
- Navigate to the object page for the object you wish to document. Then click the Semantic flow tab.
- Click Edit Documentation.
- From here it is the same steps as on the Overview tab.
Example
Navigate to the object page for the column AddressID in the Address table of the Accounting > MITI-Finance-AR model.
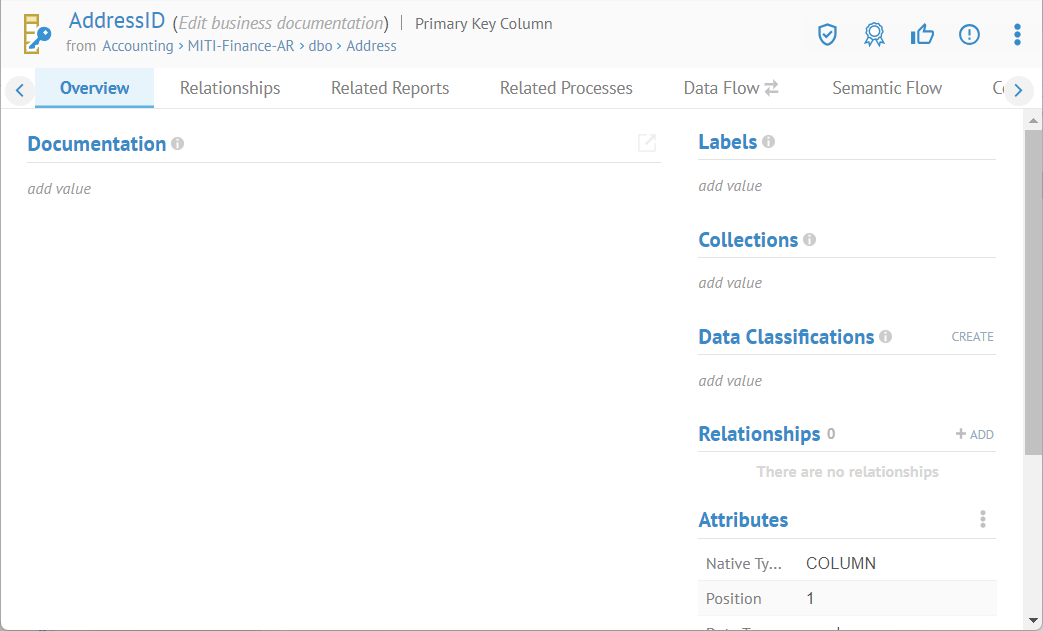
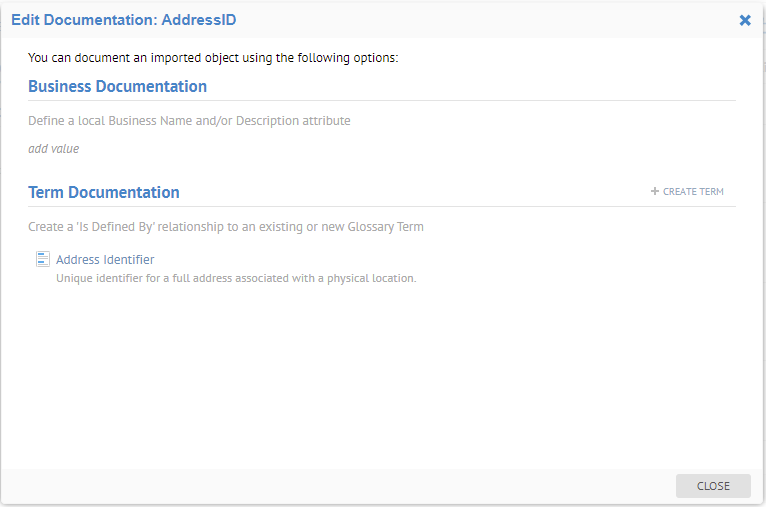
Click on the pencil (Edit) icon in the Documentation section.

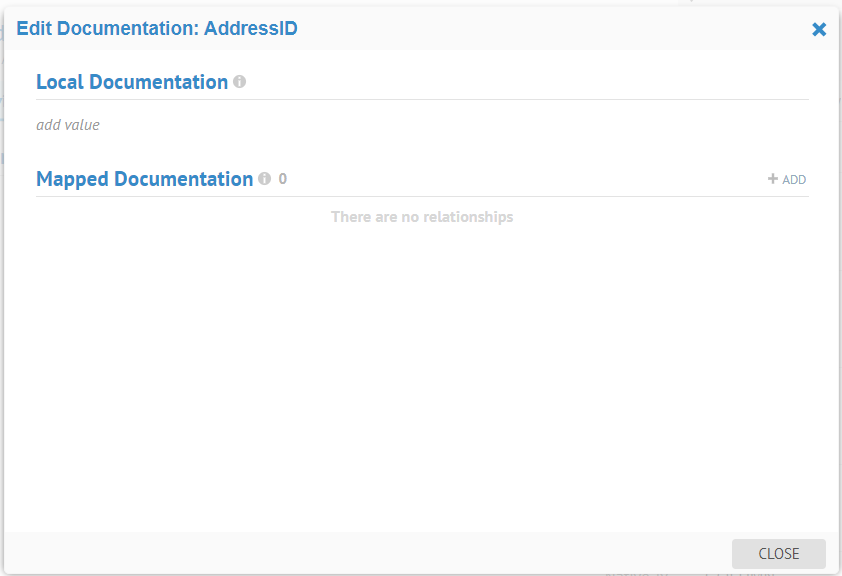
In the Mapped Documentation section of the dialog, click on +ADD.

We want to reuse an existing term in the Finance glossary and map this term to this object so that it infers its Name and Business Definition from the term. One may do all of this in one step, and then re-use the term for other objects.
However, the first time that you want to create such a semantic link to an object in a particular model (the Accounting model in this case), you must have a semantic mapping repository object to contain these semantic links.
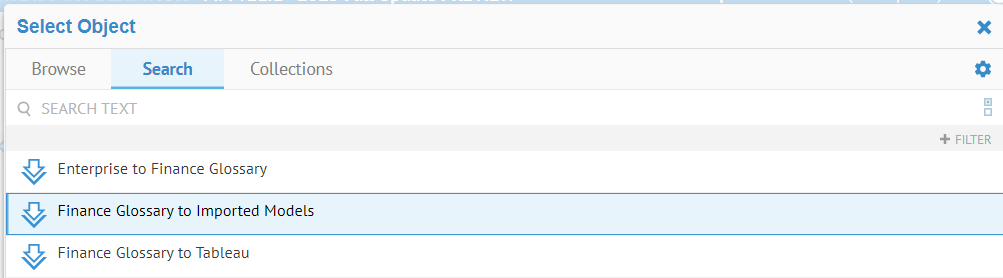
Click the Select object icon.

The recommended objects are presented, which are a list of all the semantic mapping models in this configuration.
If there is already such a semantic mapping object that you wish to reuse, you may do so from the list. However, these are rather specific semantic mapping model for glossary to glossary links and another for links to Tableau only. Thus, we can create a new semantic mapping.
Create a new semantic mapping using the hyperlink above that is named Finance Glossary to Imported Models.
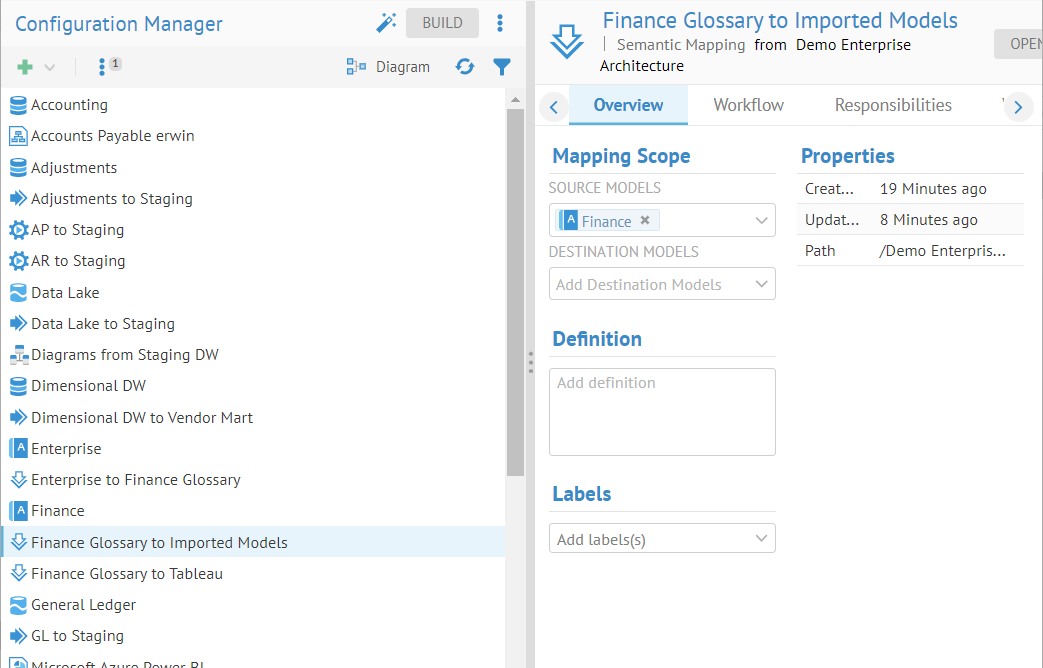
The SOURCE MODELS is specified as the Finance glossary, so it will always suggest terminology. However, in order to work for any imported model, no DESTINATION MODELS have been defined.
Now, return to the AddressID object and click the Select object icon again. Then in the Mapped Documentation section of the dialog, click on +ADD again. Finally, click the Select object icon, again.
This time, you are presented with the new semantic mapping model and can use it here.
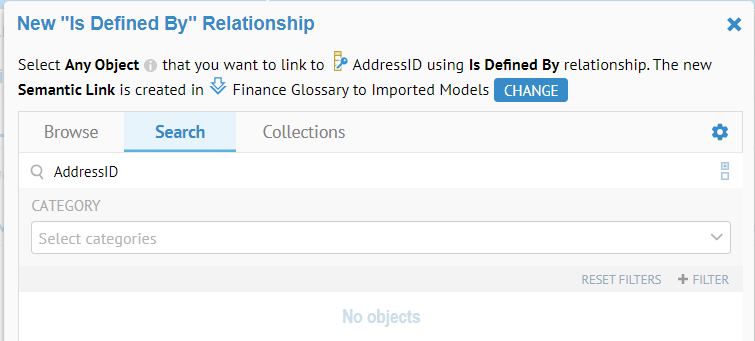
Change the search text to “Address ID”, i.e., add a space character.

Select the term Address ID from the list and click OK. Then click CLOSE.
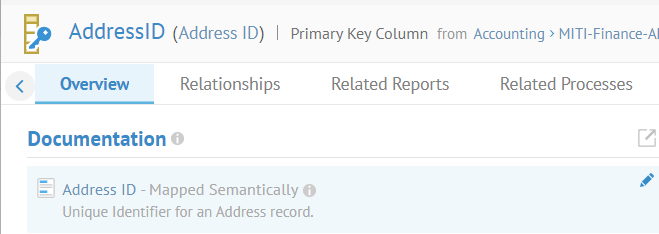
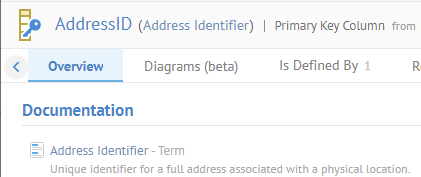
The imported object AddressID now reuses the Name “Address ID” and Definition from that term.
Mapped Documentation with a New Term
Steps
From the object page
- Navigate to the object page for the object you wish to document. Then click the Overview tab.
- Click on the pencil (Edit) icon in the Documentation section.
From the Semantic Flow tab
- Navigate to the object page for the object you wish to document. Then click the Semantic Flow tab.
- Click Edit Documentation.
For Either Case
- In the Mapped Documentation section of the dialog, click +ADD.
- Enter the:
- OBJECT PARENT which is the parent term or glossary which will contain the new term.
- NAME of the term
The NAME will be pre-populated with any human readable name based upon the physical name.
- DESCRIPTION of the term which will be inherited as the Term Documentation for the object.
- Click the magic wand icon to pick a DESCRIPTION to reuse from inferred definitions
- Click OK.
The Business Name (next to the physical name) and Business Description in the Term Documentation section now inherit from the term selected.
Example
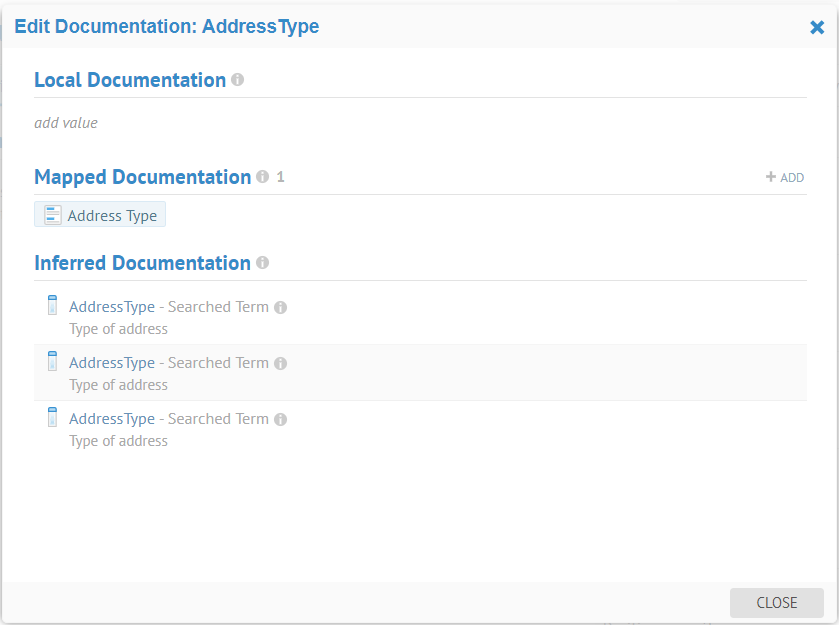
Navigate to the object page for the column AddressType in the Address table of the Accounting > MITI-Finance-AR model.

Click on the pencil (Edit) icon in the Documentation section.

We want to create a new term in the Finance glossary and map this new term to this object so that it infers its Name and Business Definition from the term. One may do all of this in one step, and then re-use the term for other objects.
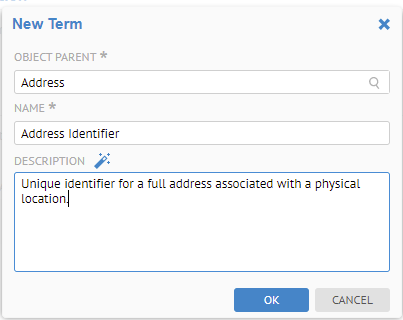
Go to the Browse tab, navigate to the term named Terminology and right-click and select New > Term.


Un-check the Mandatory fields only checkbox.

Enter the text as follows:

Click OK.

The new term is now available and selected as the mapped object.
Click OK.
Click CLOSE.

The Documentation section is now populated.
The Name and Business Description are now inherited from the new term.
You may remove this documentation and the term relationship by again clicking the pencil icon.
Term Documentation with a New Term from Existing Terms - Normalization
Steps
From the object page
- Navigate to the object page for the object you wish to document. Then click the Overview tab.
- Click on the pencil (Edit) icon in the Documentation section.
From the Semantic Flow tab
- Navigate to the object page for the object you wish to document. Then click the Semantic tab.
- Click Edit Documentation.
For Either Case
- In the Term Documentation section of the dialog, click + CREATE TERM.
- Enter the:
- OBJECT PARENT which is the parent term or glossary which will contain the new term.
- NAME of the term
The NAME will be pre-populated with any human readable name based upon the physical name.
- DESCRIPTION of the term which will be inherited as the Term Documentation for the object.
- Click the magic wand icon to pick a DESCRIPTION to reuse from inferred definitions
- Click OK.
The Business Name (next to the physical name) and Business Description in the Term Documentation section now inherit from the newly created term. In addition, a
Example
Navigate to the object page for the column AddressID in the Address table of the Accounting > MITI-Finance-AR model.

There are two terms related to this imported object with the Is Defined As relationship. Thus, this object is not uniquely defined.
In order to normalize the term documentation, click on the pencil (Edit) icon in the Documentation section.

In the Term Documentation section of the dialog, click on CREATE TERM.

Specify the NAME and DESCRIPTION as follows:
Click OK.
The Term Documentation section is now normalized and there is only one definition.
Then click CLOSE.
The Name and Business Description are now inherited from the new term.
Go to the object page for the newly created term and note the See Also link back to the two pre-existing terms that you create this new one for

There are See Also relationships to the previously defining terms.
Mapped Documentation Other Than Glossary Based
You may also reuse the Name and Definition of a object, such as in a data modeling imported model.
Bulk Mapped Documentation
Steps
- Create or open a worksheet of the objects you wish to bulk document.
- Select (click, shift-click or ctrl-click) one or more objects.
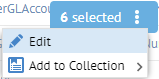
- Click the More options icon in the <number> selected indicator and select Edit.
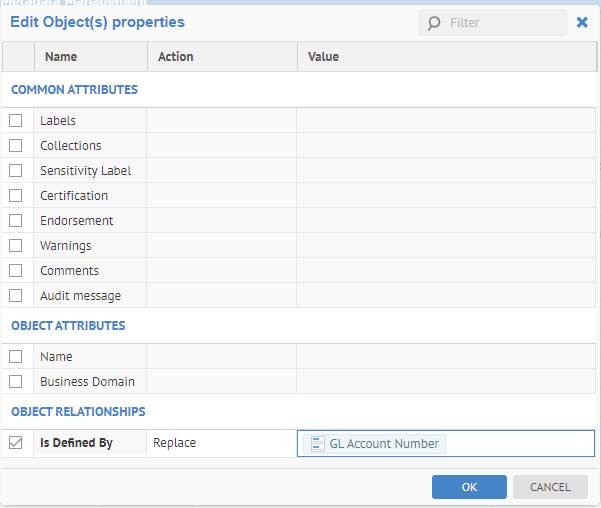
- Specify one or more terms in the is Defined By in OBJECT RELATIONSHIPS.
- Click OK.
Example
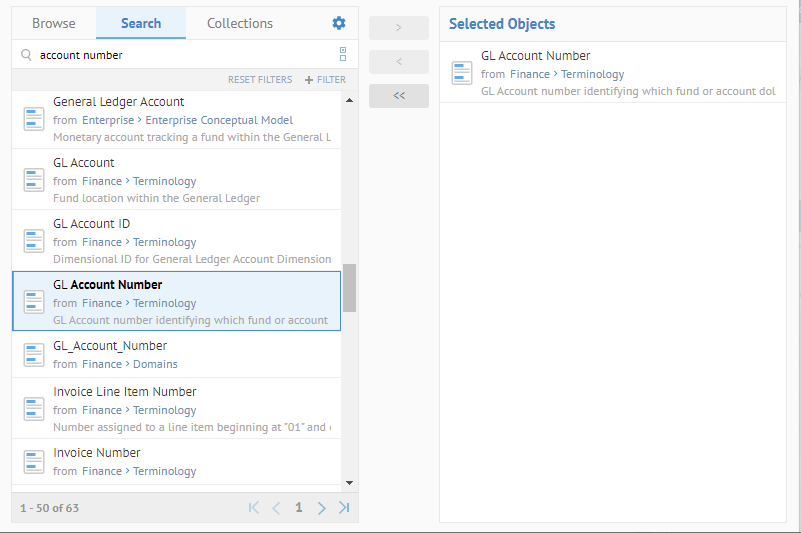
Create or open a worksheet of CATEGORY of type Dataset > Data Attributes with the Search string “GLAccountNumber”.

Click Columns and add the Documentation, Inferred Documentation and Mapped Documentation and the is_Defined_By columns to the worksheet.

Click outside the Columns dialog.

As can be seen, many of the objects found in the search are already defined, mostly through inference. In particular, there is Dimensional DW > dbo > GLAccount > GLAccountNumber which is semantically mapped with a definition from a term of the same name with spaces (GL Account Number).
Let’s take a look at this column, term and how inference works in this case.
Click the term and go to the Semantic Flow tab and select Usage. Also, select the Diagram presentation and expand to columns level.
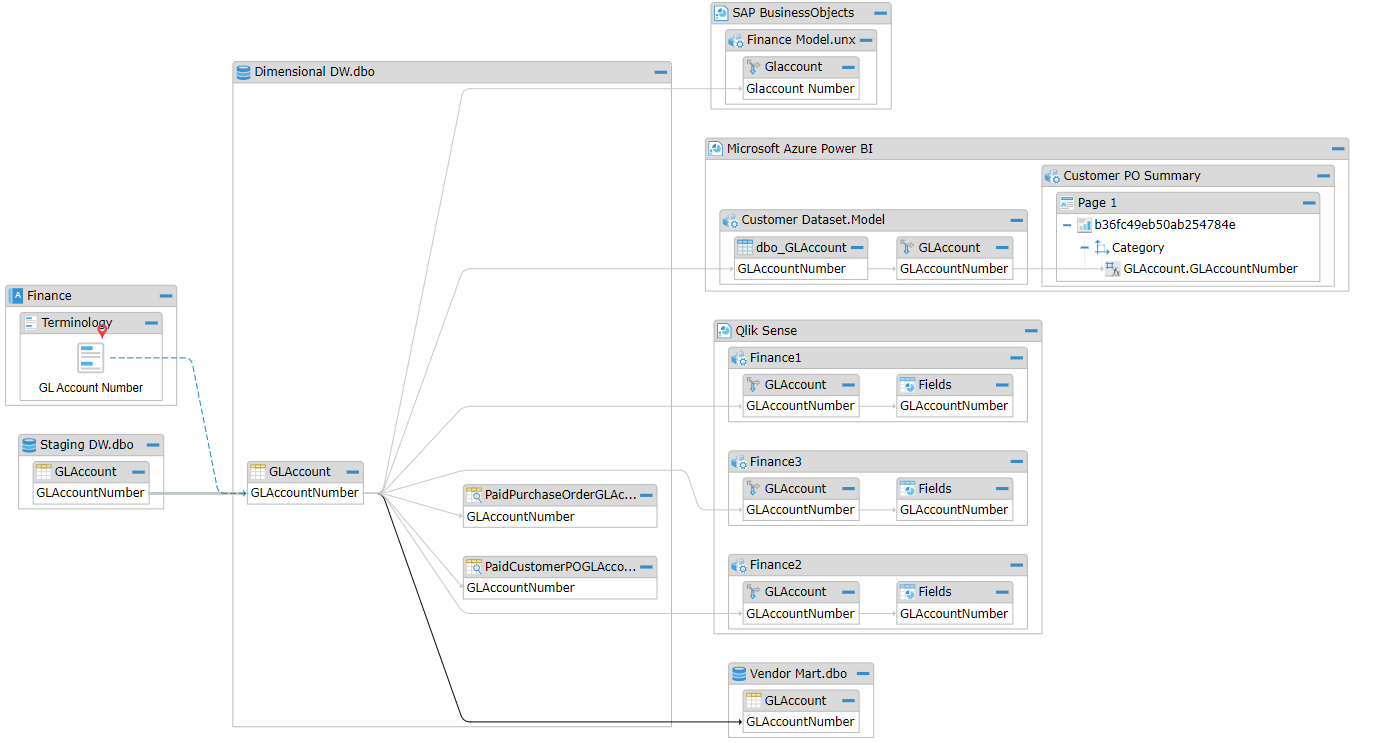
Now, we can see all the pass-through lineage (light grey lines) and these are all column level objects which infer their documentation from this term. By mapping a term with a good business definition to one object in the data flow, we see that many objects up and downstream infer their documentation. Thus, strategically documenting (semantically mapping in this case) a central set of columns/field in a warehouse or data lake, and you have documented the entire architecture (at least that portion with pass-through lineage).
We can now finish documenting the objects in the worksheet in bulk by selecting the Mapped Documentation column for those objects without anything in the Documentation column.
Select (click, shift-click or ctrl-click) one or more rows.
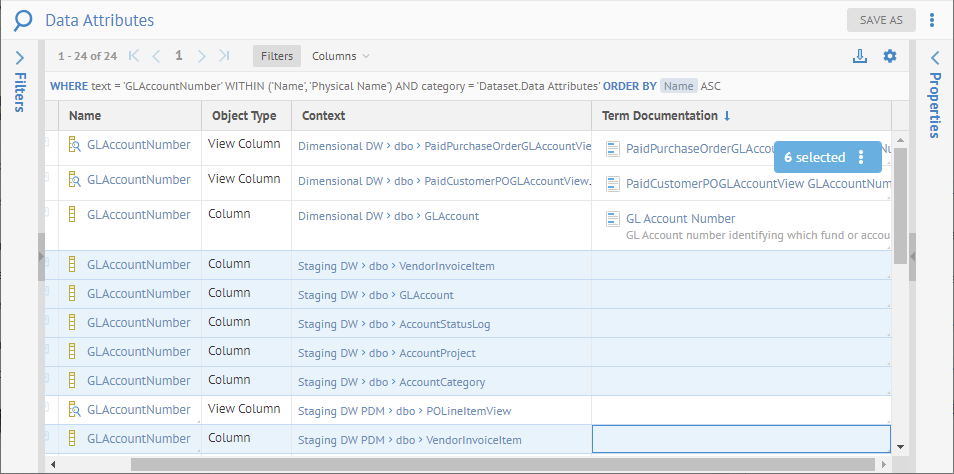
Click the More options icon in the 6 selected indicator and select Edit.
Specify one or more terms in the is Defined By in OBJECT RELATIONSHIPS.
Click OK.
Click OK. Refresh the list.

Inferred Documentation
In this scenario you will work with inferred semantic relationships for the Name and Business Definition.
Steps
From the object page
- Navigate to the object page for the object you wish to document. Then click the Overview tab.
- Click on the pencil (Edit) icon in the Documentation section.
- In the Inferred Documentation section of the dialog, click on the ADD button next to a line item to create a direct term documentation link to that term.
- Or click on the Edit icon in the Mapped Documentation section and pick as in that section.
- Click OK.
The Name (next to the physical name) and Business Definition in the Mapped Documentation section now inherit from the term selected.
From the Semantic Flow tab
- Navigate to the object page for the object you wish to document. Then click the Semantic Flow tab.
- Click Edit Documentation.
- From here it is the same steps as on the Overview tab.
The items in the list are of different Types which reflect the documentation type. The types are defined here.
Example
From the object page
Navigate to the object page for the field PTCID in the PAYTRANS.csv file.

Click the pencil icon to edit the Documentation.

You may edit the Local Documentation directly here, create an Mapped Documentation relationship from an existing term or other object or a new one you create from this information, see the Inferred Documentation links including search matching terms if available.
From the Semantic Flow tab
Navigate to the object page for the column Customer PO Amount in the Tableau report at Tableau > Metadata Management > Finance1 > Customer_PO_Invoice_Item_FACT__Finance_Dimensional_DW_ > Customer PO Invoice Item.
Go to the Semantic Flow tab.
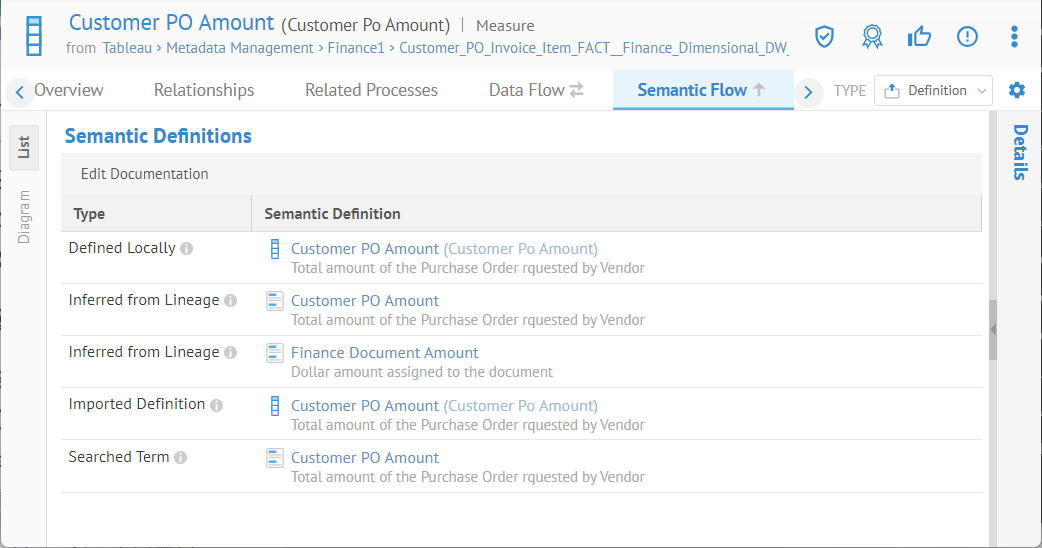
All the definitions which could be found are through inference. In this case, the data flow (pass-through, i.e. without transformation) lineage and semantic lineage trace is performed on the list of possible inferred definitions is presented.
The list of types are defined here.
Click on the Diagram tab on the left.

The graphical pass-through data flow and semantic lineage trace is presented.
Click on the Expand icon and select To column level.

All the column level data flow lines are gray, indicating pass-through lineage. If there were a transformation defined for that step in the lineage then it would be assumed that the meaning is different and a definition may not be inferred beyond that point in the data flow lineage.
Return to the List view (click the List tab on the left).

The definitions inferred from terms are listed first and then the definitions inferred from other objects are list after.
Now, to pick one of these term definitions and directly create an Is Defined By relationships between the actual term with the definition and this imported object, simply click Edit Documentation and you have the same presentation as with the Overview tab and can ADD with the preferred definition (the first one in the list in this case).

Inferred Documentation Worksheet
As an effective tool to:
- Identify documented data elements
- Identify those data elements which still require documentation
You may define a worksheet which shows term defined, locally defined, mapped and inferred documentation (i.e., Name and Business Definition) for an imported object, e.g., the fields of a data lake.
Steps
- Create a new worksheet.
- Filter to the Models and Categories you wish to analyze.
- Add the following columns:
- Name
- Business Definition
- Is Defined By
- Mapped Documentation
- Inferred Documentation
- Documentation
Example
Ensure proper permissions
Sign in as a user with at least the Metadata Management capability object role assignmenton the Configuration you are in.
Create the worksheet
Go to the WORKSHEETS > Database > Column in the banner.
Click Columns to add the following columns from the worksheet:
- Name
- Is Defined By
- Mapped Documentation
- Inferred Documentation
- Documentation

Did this page help you?
If you find any issues with this page or its content – a typo, a missing step, or a technical error – let us know how we can improve!