
Data Classification
Once you have data classes defined, you may apply these to harvested data elements:
- Manually: You may do this through the object page or a worksheet and even in bulk for data-detected data classes, and on the manage data classes page for metadata-detected data types.
- Programmatically: You may invoke a data classification process where data classes are proposed based upon the patterns and metadata queries defined for the different data classes.
Written another way:
- Metadata-detected data classes are used to auto-tag (propose classifications)
- upon creation and editing of the data class
- on demand can be performed manually.
- Data-detected data classes are used to auto-tag (propose classifications)
- as side of effect of import only if the data classification import option is checked
- on demand in the UI with the Data Classification option
- Compound data classes may consist of both metadata and data-detected data classes and thus may be may be used to auto-tag (propose classification) through any of the above processes.
After there are data classes proposed, you may also approve or remove particular assignments.
Data Classification Learning Methodology
Talend Data Catalog provides machine learning and a data class inference system centered around learning from the activities you perform, as well as continuing to learn from users accepting and rejecting inferred semantic types, by the following:
- Automatic Data Classification uses Sample and Profiling data to assign "class" values (former semantic types) to data columns to identify what kind of data these columns contain.
- You can instruct Talend Data Catalog to classify an object, model, or folder for the first time or again.
- You can accept or reject inferred data classes or add existing or new classes. You can specify/accept multiple data classes per column.
- The application remembers your data classification decisions and uses them to improve classification suggestions in the future.
Any Learning algorithm for data classification will have a data-driven origin. Therefore, Talend Data Catalog captures as much information associated with the classes as possible. Given sensitivity, the matching ratio controls the data classification algorithm, which you can adjust with the "learning" index according to the predefined weight.
Data Class Proposal and Approval Process
Data classification auto-tagging proposal:
- For data-detected data classes, when the confidence level is higher than the MATCHING THRESHOLD specified for that data class the application proposes to classify the harvested object with the data-detected data class (e.g. Country Code (98%)). You can accept or reject the proposal.
- For metadata-detected data classes, when the associated Metadata Query Language (MQL) query produces the harvested object as a match the application proposes to classify the harvested object with the metadata-detected data class (e.g. Maiden Name). You can accept or reject the proposal.
- For compound data classes, when either of the two above conditions applies to any of the contained data classes the application proposes to classify the harvested object with the compound data class (e.g. PII). You can accept or reject the proposal.
When you accept the proposal the application creates the “classifies” relationship between the data class and harvested object. The application creates the same relationship when you assign a data class to a harvested object manually.
When you reject the proposal the application remembers it and does not propose the match from then on. If you rejected the match by mistake you can instruct the application to forget about the rejection by classifying the column with the term manually.
Invoking Data-detected data Classification
You may invoke the data-detected data classification process for a
- Entire model (all objects in the model)
- Object within a model (and all objects contained withing, e.g., columns in a table)
You do not invoke metadata-detected data classification. Instead, application proposes new matching metadata-detected data classes that were not rejected before on import of a model or update of a metadata-detected data class including as the result of import of metadata-detected data classes.
Invoking Data-detected Data Classification of a Model
Once you have your data classes defined and you have imported your model with Generate Data Sampling and Profiling information, you may invoke the data classification process.
Steps
- Sign in as a user with at least Metadata Editingcapability object role assignment for that model you wish to classify.
- Navigate to the object page of the model.
- Go to More Actions… and select Data Classification.
An operation is invoked. Once completed all metadata objects which have profiling and sampling data will have data classes proposed for them based upon the matching criteria.
Example
Sign is as Administrator and navigate to the object page of the Data Lake model.

There is also the option to Generate Data Sampling and Profiling. This action will ensure that there is data sampling and profiling information for the data classification process to work with.
Go to More Actions… and select Generate Data Sampling and Profiling.
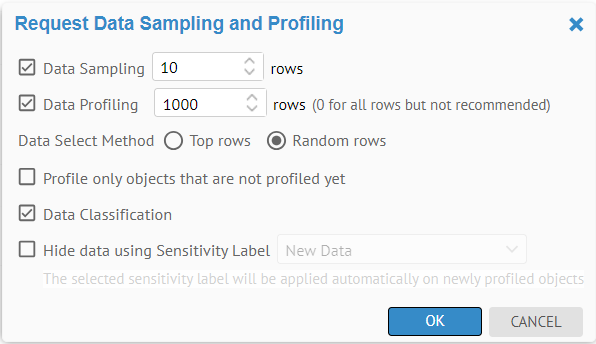
See data sampling and profiling options details.
Click OK.
Once that process is done, go to More Actions… and select Data Classification.

You may classify by a single group or all groups.
Choose Product as the data CLASSIFICATION GROUP and click OK.
The action kicks off an operation which runs as a separate process.

Search for ProductNumber in the Data Lake model.

The Product Number Query and Product Number data classifications are proposed for this data element. However, again, the Product Number Query was proposed as soon as the metadata-detected data class was defined as you do not have to invoke metadata-detected data classification. Instead application proposes new matching metadata-detected data classes that were not rejected before on import of a model or update of a metadata-detected data class including as the result of import of metadata-detected data classes.
As assigning both is redundant, you can set Product Number Queryto be a virtual data class.
Invoking Data-detected Data Classification of an Object in a Model
Once you have your data classes defined and you have imported your model with data sampling and profiling information, you may invoke the data classification process of individual objects or container objects and all those contained within (e.g., columns in a table).
The process is identical as for data classification of a model (entire model) except that you Navigate to the object page of the object in the model, rather than the top level of the model.
Invoking Metadata-detected Data Classification
You do not need to invoke metadata-detected data classification. Instead, the application proposes new matching metadata-detected data classes that were not rejected before either upon harvesting of a model or upon update of a metadata-detected data class.
You may invoke it manually when you wish to confirm that it has been performed by following these steps
Steps
- Either:
- For all metadata-detected data classes:
- Go to MANAGE > Data Classes
- Go to More Actions… and select Classify Metadata.
- For specific data classes
- Go to MANAGE > Data Classes
- Select one or more Metadata type data classes in the list
- Right-click and select Classify Metadata.
- You may also perform data classification in bulk from a list (worksheet) of feature type objects.
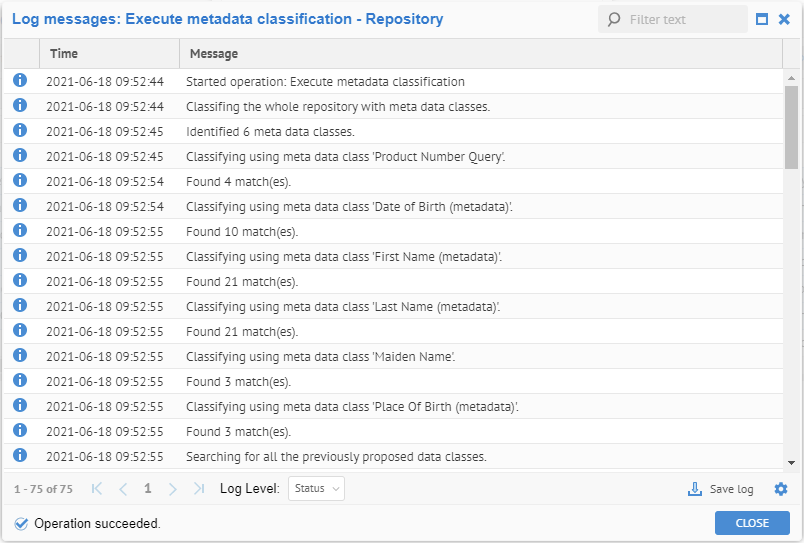
An operation is invoked. Once completed all metadata objects will have data classes proposed for them based upon the matching criteria.
Example
Sign is as Administrator and go to MANAGE > Data Classes. Select one or more Metadata type data classes in the list.
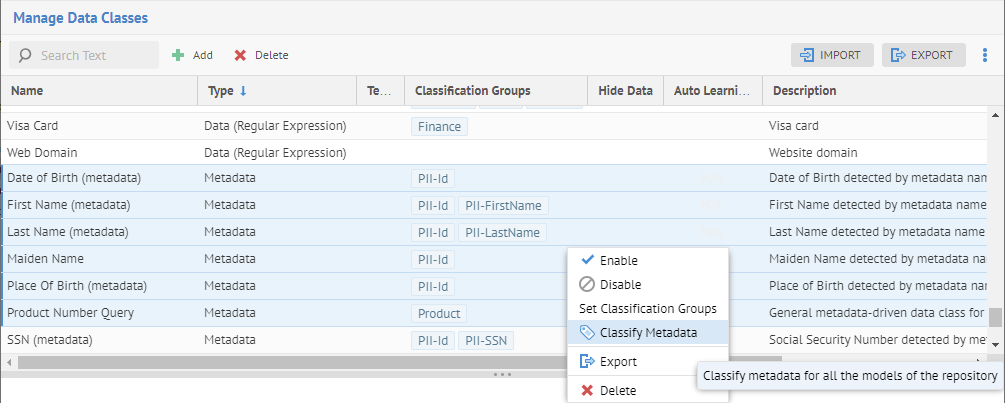
Right-click and select Classify Metadata.

The action kicks off an operation which runs as a separate process.
Metadata-detected Data Classification in Bulk


Editing Data Classifications
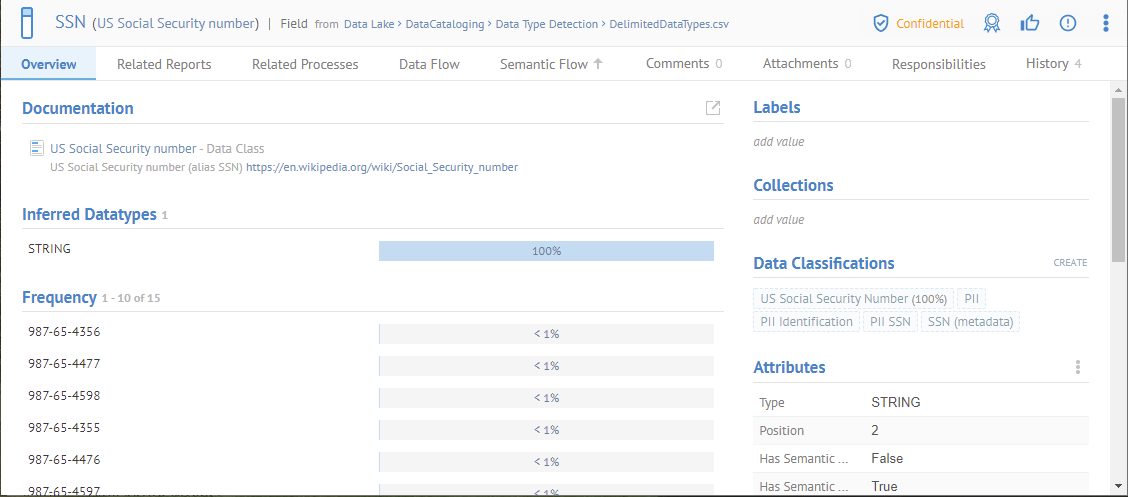
Data classification assignments may be assigned manually or automatically proposed to an object and appear in the object’s Data Classifications. If automatically proposed, then one may approve or reject the assignment.
Approving the assignment changes the state of that data class assignment to approved, and you may filter by that information in worksheets.
Rejecting the assignment changes will cause the product to remember this action and future automatic data classification of that object will never assign that same data class to that object, as it was rejected.
To clear this reject, simply manually re-assign the data class to the object’s Data Classifications.
One may simply remove a data class proposal by editing the object’s Data Classifications and removing the data class, rather than rejecting it. In this case, the product does not remember this action and future automatic data classification of that object will assign that same data class to that object, as it was not rejected.
Steps
- Sign in as a user with at least Metadata Editingcapability object role assignment for that model you wish to classify.
- Navigate to the object page of the object with the proposed data class.
- Or, edit in like a spreadsheet via a worksheet.
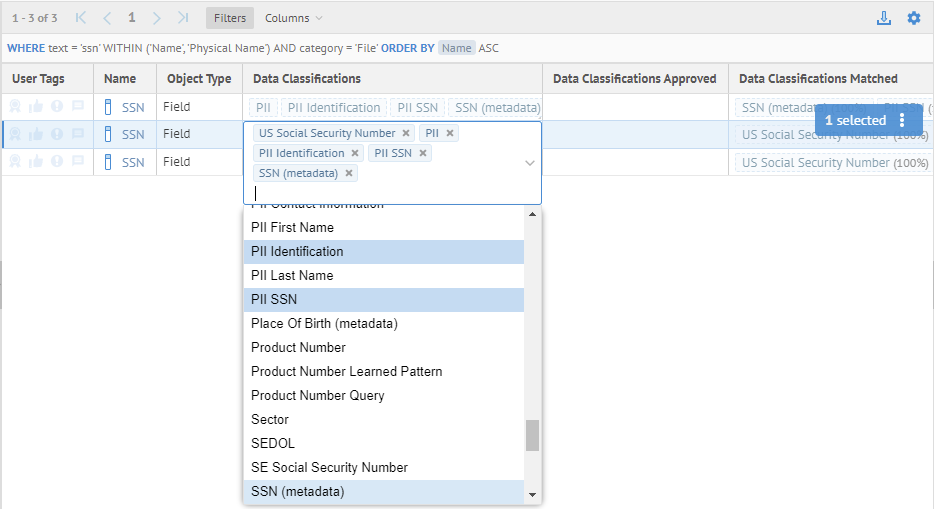
When editing data classifications in spreadsheet format, you must include the Data Classifications column in order to edit it.
You may also wish to add the Data Classifications Approved, Data Classifications Matched and Data Classifications Rejected columns (These replace the older concept of Semantic Type and Inferred Semantic Type).
To approve a proposed data class, click the check mark next to the data class.


Rejecting Data Classifications
To approve a proposed data class, click the “X” next to the data class.


Removing Data Classifications
To remove (without rejecting) a proposed data class, DO NOT click the “X” next to the data class, but instead double-click on the data classification editing box, then click again in the box and a pull down is presented where you can add or remove data classes.
Did this page help you?
If you find any issues with this page or its content – a typo, a missing step, or a technical error – let us know how we can improve!