
Manage Worksheets
You may also select WORKSHEETS > Manage to manage your existing worksheets.
Steps
- Go to WORKSHEETS > Manage.
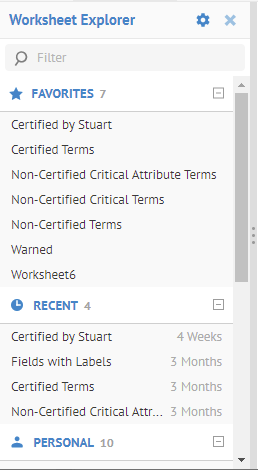
- You see the list of Favorites. It is the default tab.
All the worksheets you have favorited are here.
- From here you may:
- Open/Edit the worksheet
- Restrict the list by using the Search Text
- Favorite or un-Favorite a
- Click the My tab.
All the worksheets you have created are here.
- From here you may:
- Open/Edit the worksheet
- Restrict the list by using the Search Text
- Create a new saved worksheet
- Delete and existing saved worksheet
- Favorite or un-Favorite a worksheet
- Set Viewers and Editors for this worksheet with groups and/or users
- Edit the Name or Description of a worksheet
- Assign a worksheet to one or more (or all) Configurations
- Click the Recent Tab.
All the worksheets you have recently opened are here.
- From here you may:
- Open/Edit the worksheet
- Restrict the list by using the Search Text
- Favorite or un-Favorite a worksheet
Example
Save a Worksheet
You may save any worksheet you are working on at any time, evening existing saved ones by be saved as new worksheets.
Steps
- Open a worksheet by any of the create methods detailed, or go to
- WORKSHEETS > Manage,
- WORKSHEETS > RECENT >,
- WORKSHEETS > FAVORITES >.
- Click SAVE > Save to save the updated state of an existing saved worksheet or save and assign a name to a not yet saved worksheet.
- Click SAVE > Save As to save the updated state of an existing saved worksheet and assign a name.
Example
Click WORKSHEETS > FAVORITES > CertifiedTerms.

Click +FILTER > Model. Include the Finance glossary.
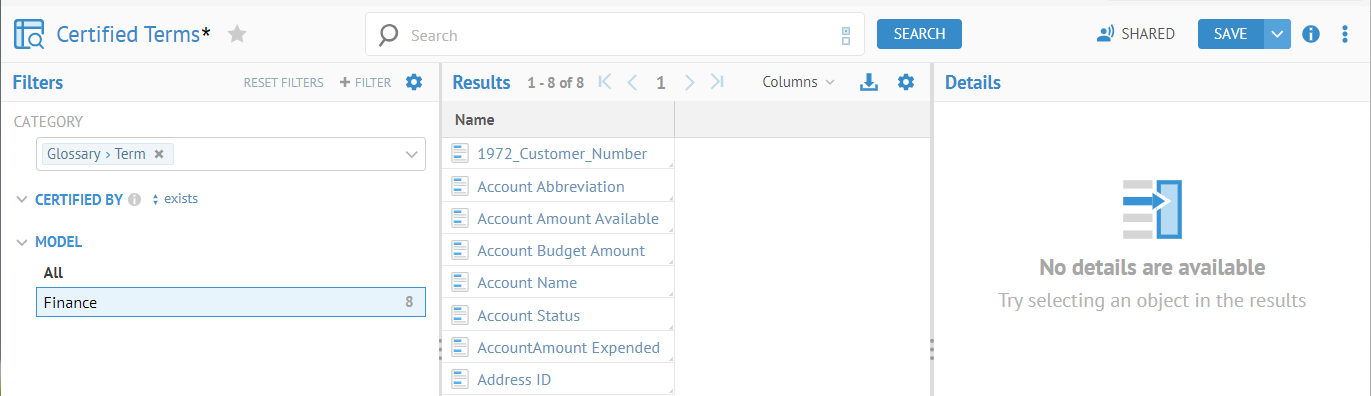
The Finance glossary is the only choice as the Enterprise glossary does not contain any certified terms.
The Save button is enabled as the filter has changed.
Click Save. You have now have updated an existing worksheet.
Click SAVE > Save As….

Enter the name “Recently Certified Terms” and click OK.

MQL cannot include the sort order on columns. In fact, the sorting by column in a worksheet is performed entirely by the UI, and thus is not in the results.
Create a Worksheet
Go to WORKSHEETS > Manage.
Click the My tab.
Click Create.
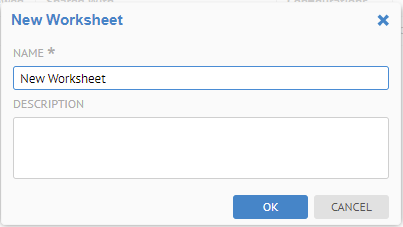
Enter the name “New Worksheet” and press Enter.
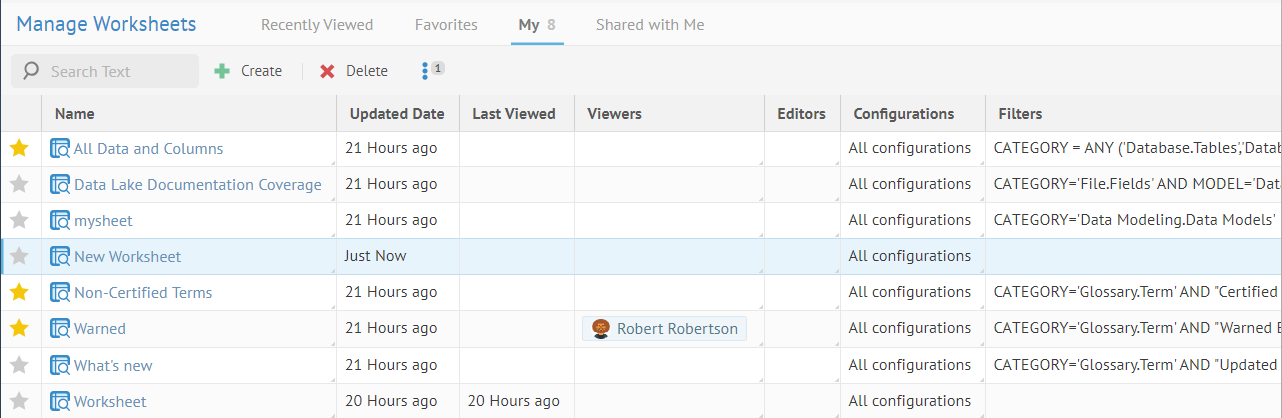
You will then have a worksheet saved but with no filters defined yet.
Delete a Worksheet
Go to WORKSHEETS > Manage.
Click the My tab.

Click  Delete.

Click YES to Confirm.
Favorite / Un-Favorite a Worksheet
Go to Worksheets > Manage.
Click the My tab.
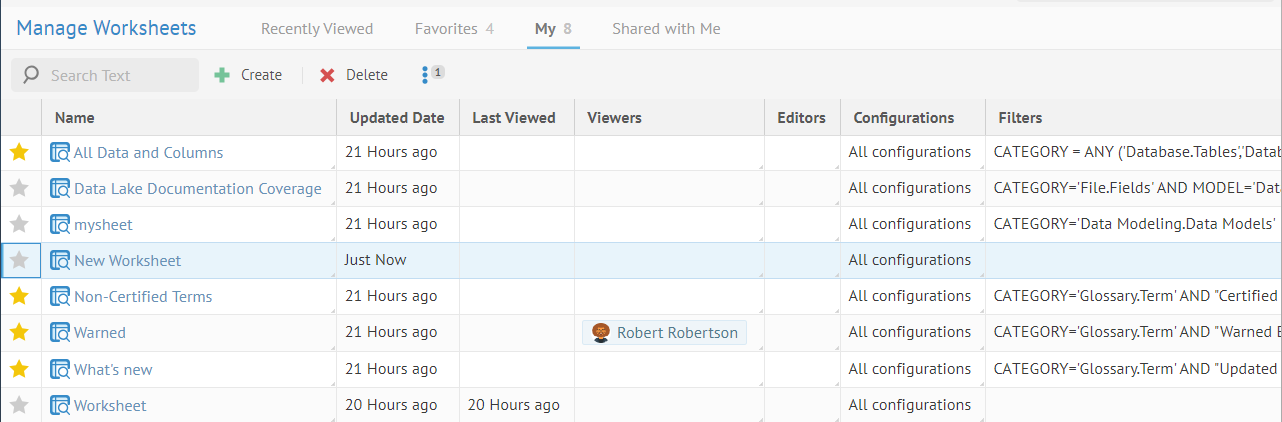
Click Favorite next to New Worksheet to favorite that worksheet.
Click Favorite next to What’s new to un-favorite that worksheet

Multi-Select in MANAGE Worksheets
You may perform all the MANAGE > Worksheet functions on multiple worksheets in the grid by multi-selecting. The Show actions control is then presented in the grid header with the number selected.

Shared Worksheet
Worksheets have an owner who is the creator of the worksheet. That owner may open, edit, or remove a worksheet. The worksheets that one owns may always be found in the My tab under WORKSHEETS > Manage.
In addition, a worksheet may be shared, with specific users and/or groups. One may share the worksheet as
- Viewerable to see and query with the worksheet, as well as save it as a new worksheet and edit it.
- Editor can edit the worksheet name and content. Only the owner can change the sharing options and delete the object.
- Searcher able to see and query with the worksheet, as well as save it as a new worksheet and edit it. More importantly, it means that the list of search worksheets presented to the user will include this one.
Once shared, users that are in the sharing criteria specified may view and favorite those worksheets, as well.
Steps
- Go to WORKSHEETS > Manage.
- Go to the My tab.
- Double-click in the Viewers or Editors cell for the row containing the worksheet.
- Pick users or groups to assign the sharing role.

Default Shared Search Worksheets
By default there are four default shard search worksheets:
- All Objects
- Data Inventory – Dataset object
- Report Inventory – Reporting tool objects
- Vocabulary – Glossary terms.

If we then sign in as Bob we will see the list of current search worksheets to be:

Assign a Worksheet to a Configuration
When you assign a worksheet to one or more configurations, the worksheet will only appear in those configurations for all by the WORKSHEETS > Manage screens, e.g., the WORKSHEETS > Explore menu.
By default, a worksheet is available to all configurations. Once a worksheet assignment is made, then those configurations are the only ones assigned.
If a configuration is deleted, then the assignments to it are removed.
When only one configuration is assigned, on deletion, the assignment reverts to All.
Steps
- Go to WORKSHEETS > Manage.
- Go to the My tab.
- Double-click the Configurations cell for the row containing the worksheet.
- Pick one or more configurations to assign the worksheet to.
- To assign a worksheet to all configurations, simply remove the specific (or all) specific configuration assignments.
Example
Go to WORKSHEETS > Manage and go to the My tab double-click on the Configurations cell for New Worksheet.
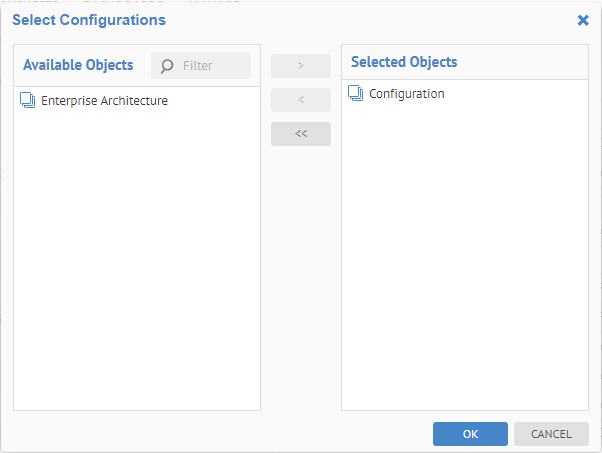
Select the Configuration and click OK.
Now, go to the WORKSHEETS > Explore and note the New Worksheet is not in the FAVORITES list.
But, if you switch configurations to that one, you will see the New Worksheet.

Sharing a Worksheet
The owner (creator) of a worksheet may share that worksheet with and users and/or groups.
Steps
- Go to WORKSHEETS > Manage.
- Go to the My tab.
- Select a worksheet.
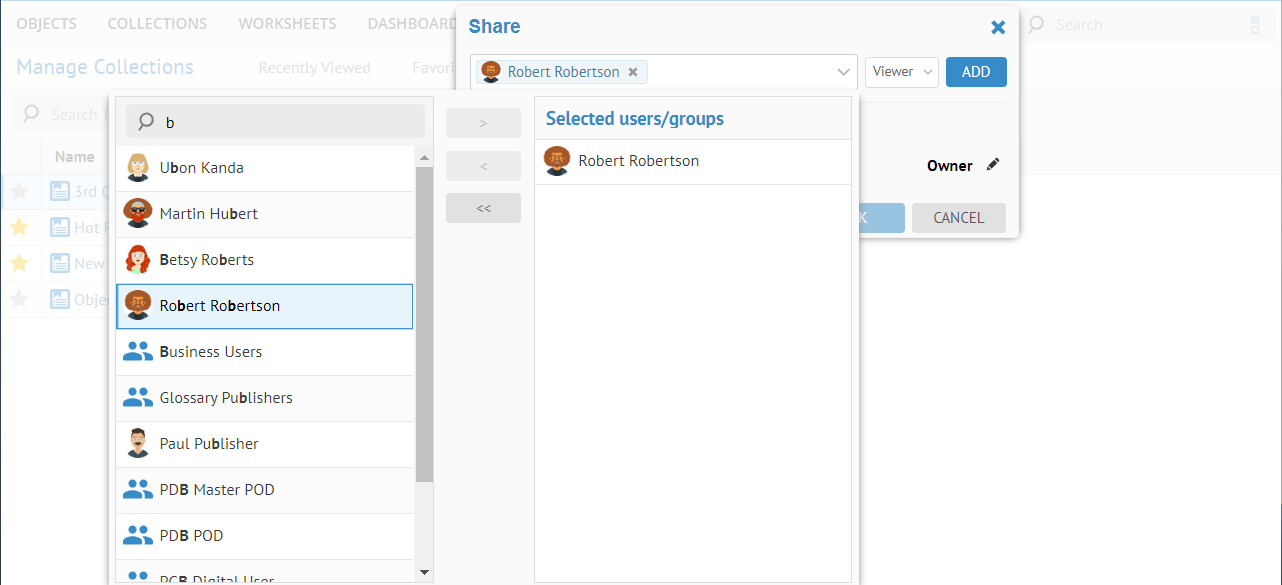
- Click Share.
- Pick one or more users and/or groups to share the worksheet with.
- To un-share a worksheet, simply remove the specific (or all) users and/or groups.
Example
Go to WORKSHEETS > Manage. Click the My tab. Click the line for New Worksheet.
Double-click in the Viewers cell and pick the user Bob to assign the sharing role.

Log out and log in as Bob.
Go to WORKSHEETS > Manage. Click the Shared with Me tab. Click Search. Locate the New Worksheet collection. Click  Favorite next to that worksheet.
Now, go to the Favorites tab and see this worksheet as Bob.
You cannot add to this worksheet as Bob because Bob does not own it.
Click on the worksheet name and then click Save As and enter the name “Bob’s Worksheet” and Click OK.
You may now edit the list. You could also share it back with Administrator.
You may save a shared worksheet before specifying whom to share it with. You may come back later and specify whom it will be shared with.
System Object Children Worksheets
The object page for different types of objects (e.g., Tables or Schemas) contains a number of tabs which present the results of a system object children worksheet for that particular type of object represented by the tab (e.g., Columns for Tables or Tables for Schemas).
When viewing the object page results, say the Columns tab for a Table, you may designate an existing worksheet that you saved or that was shared with you as your personal default.
In addition, users with the Application Administratorcapability global role assignment may designate system object children worksheets for groups or users, which will be the system default, unless over-ridden, when one the object page for that type of object.
However, it would be awkward to require that one go to each type of object page and tab in order to manage defaults. Thus, you may manage all of your defaults in MANAGE > System Object Children Worksheets.
System defaults are not shown on this page as you cannot edit them. It requires an Administrator to do so.
Steps
- Go to MANAGE > System Object Children Worksheets.
- Click any item in the list and you may.
- Click the Name or right-click and select Rename and type a new name.
- Click Delete orright-click and select Delete to delete.
Example
Go to the object page for the Terminology term of the Finance glossary and go to the Contains tab.

Click Columns and switch to Grid mode and include Term Data Type as a column.

Click the background to remove the dialog.
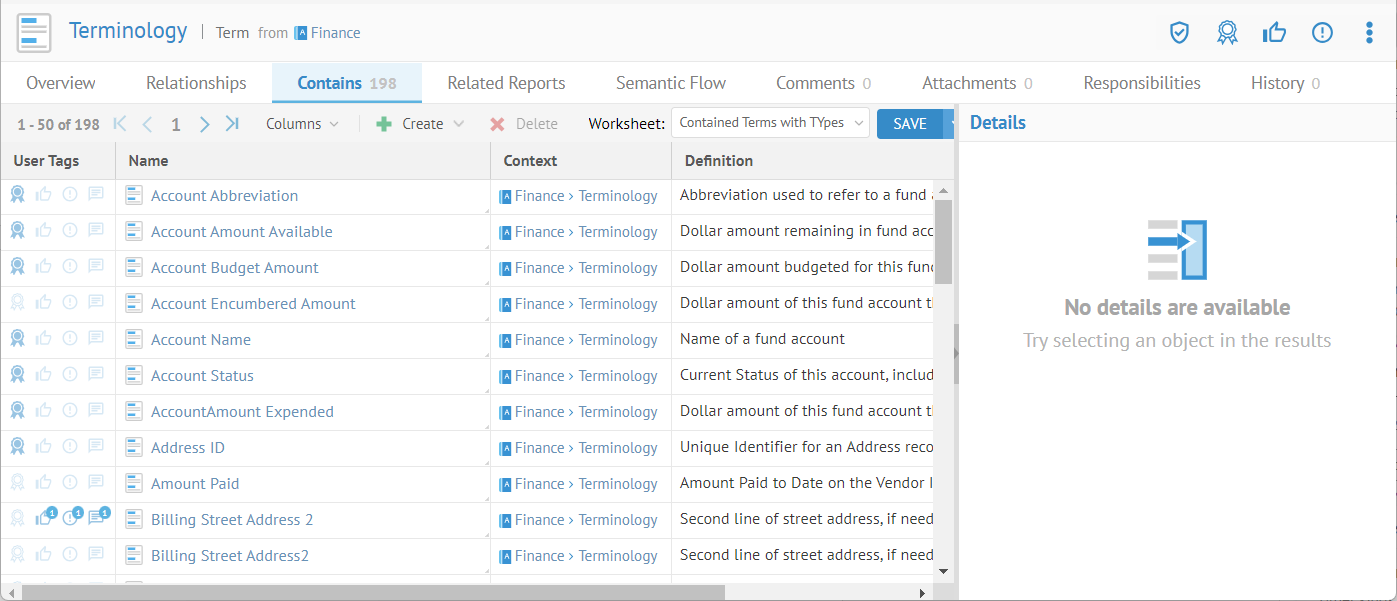
Click SAVE AS and create a system type worksheet with the below settings.
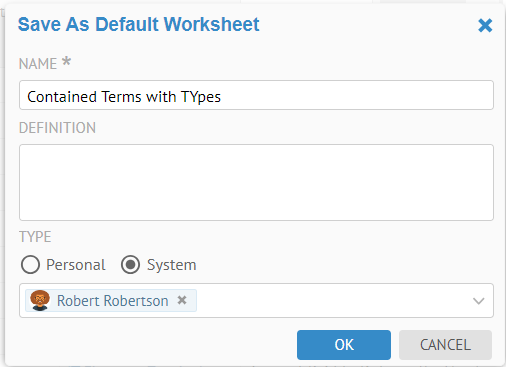
It is a System type worksheet, so it may be shared as a default for others. Also, it is already shared with Bob (Robert Robinson).
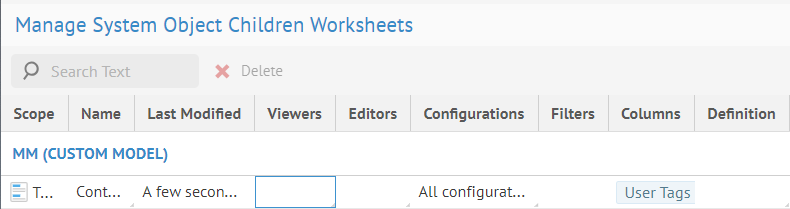
Now this default worksheet is in the MANAGE > System Object Children Worksheets and those users will see it by default.
Did this page help you?
If you find any issues with this page or its content – a typo, a missing step, or a technical error – let us know how we can improve!