
Object Page Customization
Customization of the Object Page with Preferences
Many customizations may be made through the use of group preferences.

In particular, these apply to the object page:
Preference Name | Description |
Worksheet Export Maximum number of objects | Maximum number of objects which may be exported to CSV at a time. |
Worksheet Maximum number of objects per Page | Maximum number of objects which may be presented on one page of the results. |
Show <> Widget | Whether to show these widgets by default in the object page |
Group Tabs Default Display Mode | Default display mode (Grid or List) for result sets in tabs of the object page. |
Show Business Lineage View | By default, show the business level lineage view. |
Customization of Object Page Tabs
The object page has many tabs and among these are child tabs. Each child tab shows a group of related types of child objects. For example, a database Table object page has the Columns tab that shows regular and PK column objects.
A child tab shows its child objects using a worksheet. A worksheet allows you to change its filter conditions and columns. The child tab lets you save and recall the worksheet configuration or object tab used.
Associate a Worksheet with the tab on a Object Page
You may designate existing worksheet to be used for specific tabs in specific object pages by object type.
Steps
- Save a worksheet or use an existing one that you either created or is shared with you. It must be filtered to the specific object type that you want to assign it to as the default.
- Go to the object page of an object that would have a tab that matches the object type of the worksheet.
- Go to the tab for that object type.
- Pick the worksheet from the Worksheet pull-down list.
Example
Go to WORKSHEETS > File > Fields to create a worksheet for the Fields tab in File System files.

Click Columns and add Labels to the displayed columns.
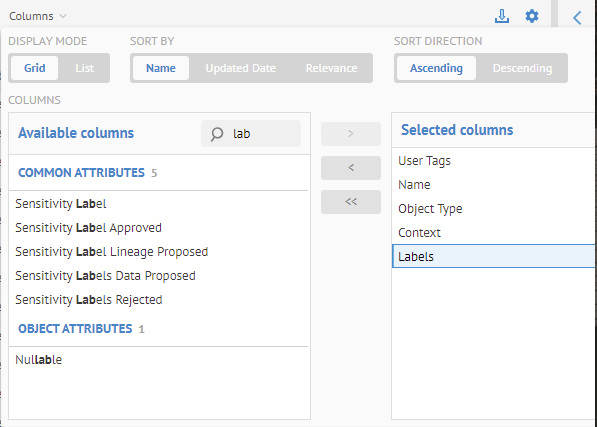
Save the worksheet as “Fields with Labels”.

Now, search for Customer.csv and click to go to its object page. Go to the Fields tab.
Select Fields with Labels from the list of Applicable worksheets.
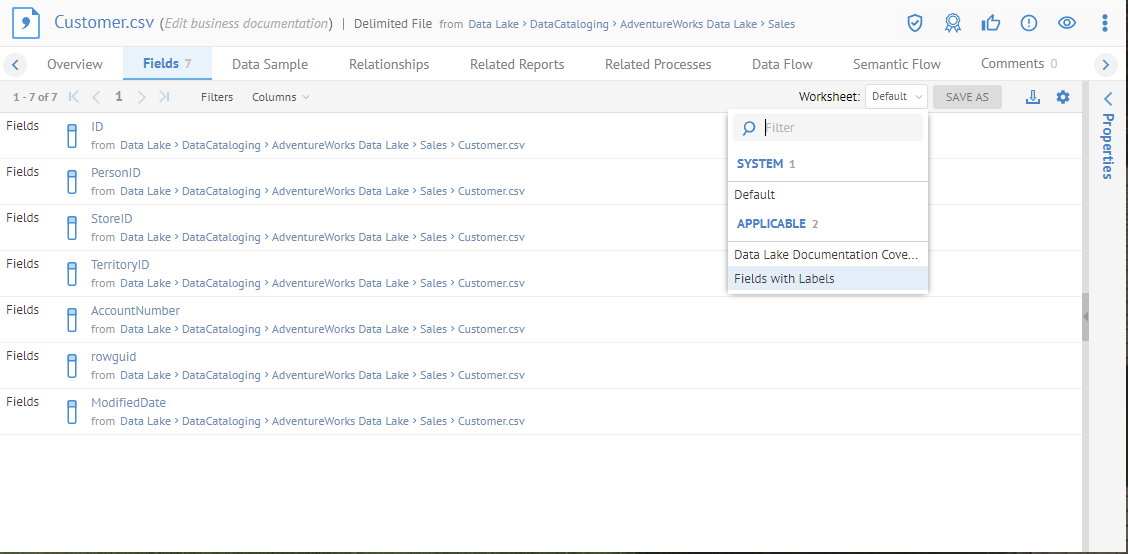
And the result is the worksheets is used for the Fields tab.
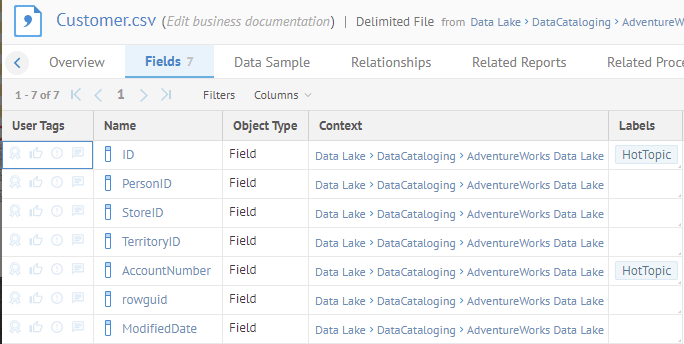
This will now the default presentation. You may always restore the original by select Default from the Worksheets pull-down.
You may take the current worksheet being used for a particular tab on the object pages and Save As a default worksheet for yourself as a Personal Default Worksheet. Any user can save and recall their personal defaults per child tab.
System and personal defaults apply to a particular tab only. When you need to have a default worksheet that applies to multiple tabs you can define a worksheet that applies to types of children objects these tabs shows.
Steps
- Associate a worksheet with the tab for a object page.
- Click Save As.
- Click the Personal radio button and provide a Name and Description for the default worksheet.
- Click OK
Example
Follow the example to Associate a worksheet with the tab for a object page.

Click Save As.
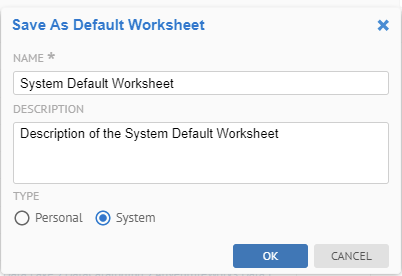
Click the Personal radio button and provide the below NAME and DESCRIPTION for the default worksheet, and click OK:

It is now in the list of defaults.
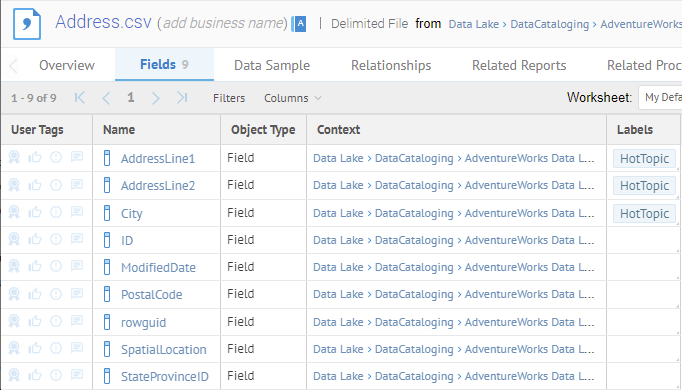
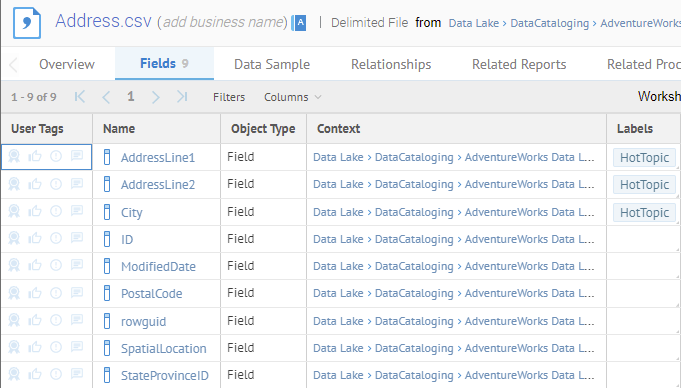
Now, search for Address.csv and click to go to its object page.
Go to the Fields tab.
The same Default Fields Worksheet to is the default presentation.
System Default Worksheets
A user with the Application Administratorcapability global role assignment can Save As a system default worksheet for a child tab and share it with other users and/or groups. The child tab then shows the worksheet to any user in these groups by default. When a user is a member of different groups that have different defaults, the child tab makes all of these options available to the user. The child tab shows the first one (according to the alphabetical order) to the user, by default. In this way, you may published default presentations to these users.
System and personal defaults apply to a particular tab only. When you need to have a default worksheet that applies to multiple tabs you can define a worksheet that applies to types of children objects these tabs shows.
Steps
- Sign in as a user with the Application Administratorcapability global role assignment.
- Associate a worksheet with the tab for a object page.
- Click Save As.
- Click the System radio button and provide a Name and Description for the default worksheet.
- Specify the Users and/or Groups to assign this system default worksheet to.
- Click OK
Example
Sign is as Administrator.
Follow the example to Associate a worksheet with the tab for a object page.
Click Save As.
Click the System radio button and provide the below Name and Description for the default worksheet.
Pick the below two Groups to assign the System Default to and click OK:
Sign out.
Sign in as David.
Now, search for Address.csv and click to go to its object page.
Go to the Fields tab.
The same Fields System Default worksheet to is the default presentation.

You may go to MANAGE > Default Worksheets to manage existing system default worksheets.
Customizing the Object Page Overview tab Presentation
You may customize object page presentation entirely. You may
- Develop a Presentation of the object page Overview tab in a manner similar to creating a Dashboard
- Show/Hide the various object page tabs, e.g., Columns, History, Data Flow, etc.
For any object category (e.g., terms, fields, tables, etc.) you may pick an existing customized overview from a pool of ones you have created or have been shared with you.
Steps
- Go to the object page for an object category.
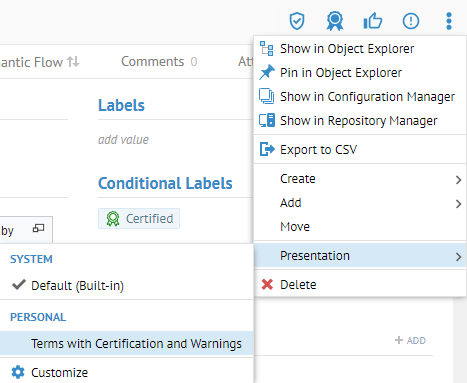
- Go to the More Actions menu in the upper right.
- Select Presentation.
- Select any presentation listed there.
The available presentations are listed in two groups, SYSTEM and PERSONAL, each then in alphabetical order.
If no presentation is manually selected then the first (alphabetically) SYSTEM presentation will be used, and it will be the Default (Built-in) if no system level presentations have been shared with this user.
Example
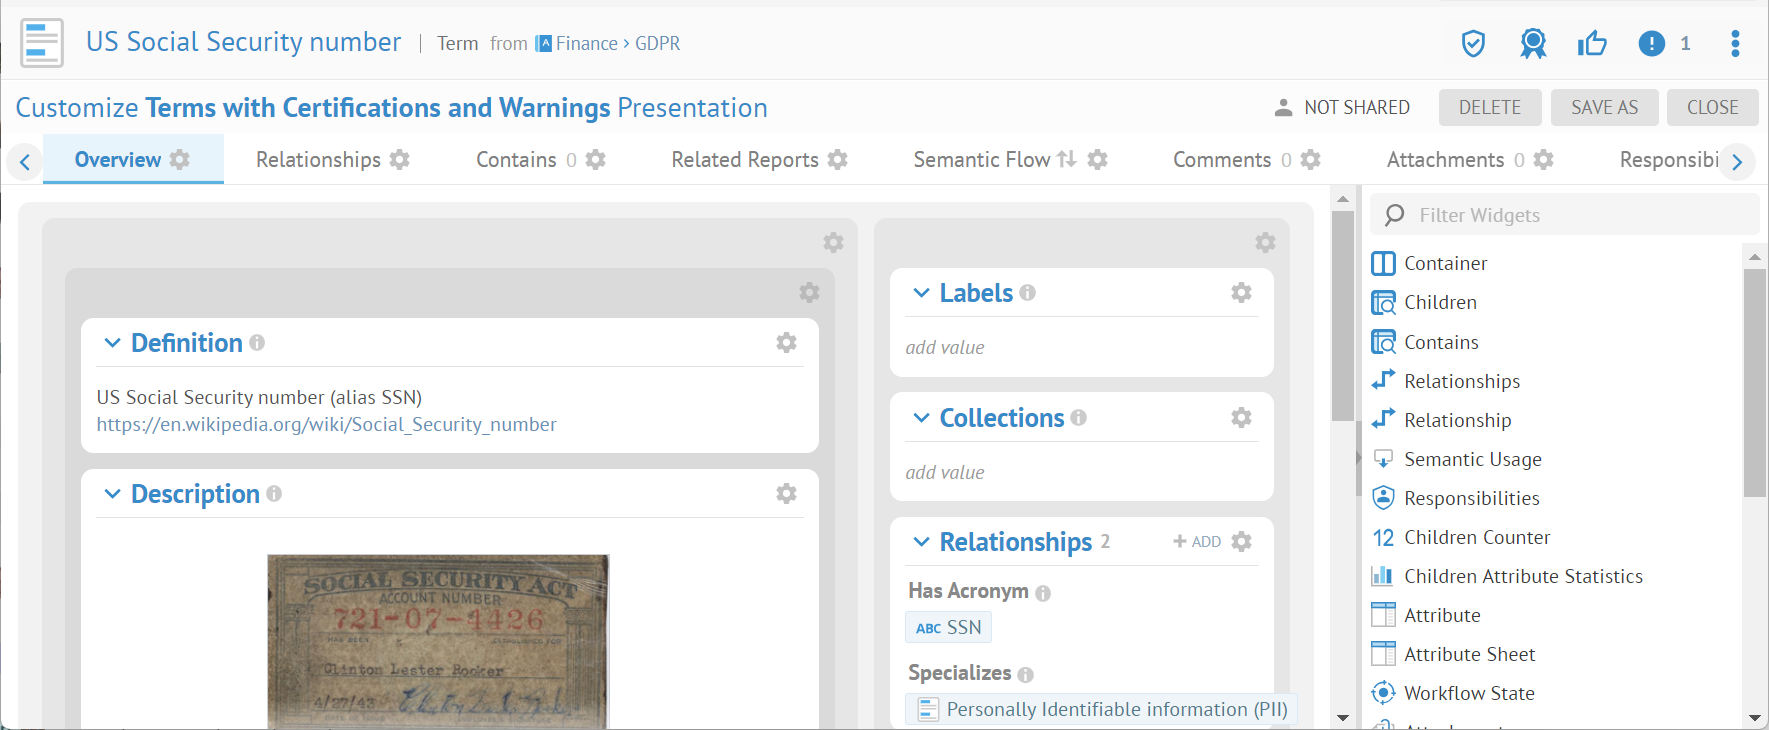
Search for SSN.
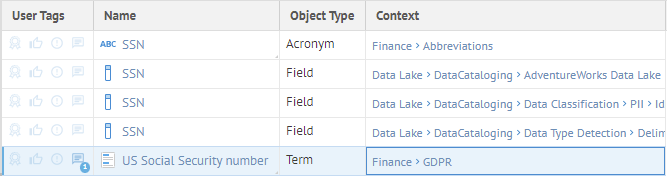
Select the term name US Social Security Number.

You are presented with the Overview tab. Thus, we will be picking a customized presentation for any term (object category).
There is a downward facing caret allowing you to expand or contract each section/widget in the Dashboard
Go to the More actions menu in the upper right and select the Terms with Certifications and Warnings presentation presented there.

We now see the social curation details in the Overview tab.
Create or Update a Customized Presentation
For any object category (e.g., terms, fields, tables, etc.) you may start from an existing presentation and customize it. It may be a system presentation if you are an administrator.
Steps
- Sign in as a user with the Presentation Customizationcapability global role assignment.
- Go to the object page for an object category.
- Go to the Preferences menu in the upper right.
- Select Presentation > Customize.
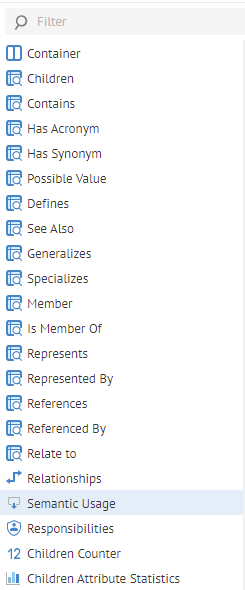
- From here you may:
- Add Widgets, including containers
- Customize existing widgets and containers
- Rearrange containers and widgets
- Close without saving.
- Click SAVE AS to save your new work as a newly created presentation.
- Specify Personal or System type presentation
Personal – Owned by and available only to the user who created it.
System - Owned by the creator but may be shared with other users and/or groups.
- Provide a description.
Several widgets are included by default, and vary by object category. Some are not included by default, generally as these would affect display performance significantly. In particular, History and Comments (including endorsements, warnings and certifications).
Example
Search for SSN.

Select the term name US Social Security Number.
You are presented with the Overview tab. Thus, we will be customizing the Overview tab presentation for any term (object category).
Go to the Preferences menu in the upper right and select the Presentation > Customize.
One generally begins with an existing presentation, not from scratch.
Customize with any of sections/widgets and then SAVE.
Now, search for Account Status and select the Term with that name.

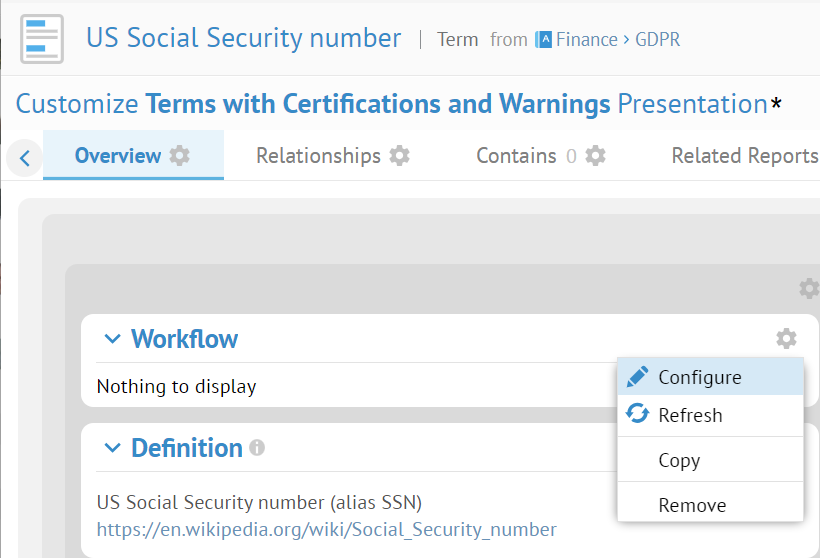
The same customized overview is shown. This will be true until you pick another one. There is a Certification shown, but no warnings.

There is nothing to display without showing the Customize option as this glossary is not under workflow.
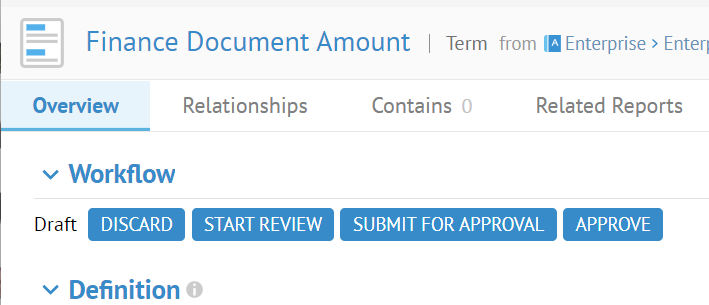
So, search for “finance document amount” and click on that term in the Enterprise glossary (which is under workflow).
Many of the widgets are also used in dashboards, and you may learn how to use them in the edit dashboard widgets section.
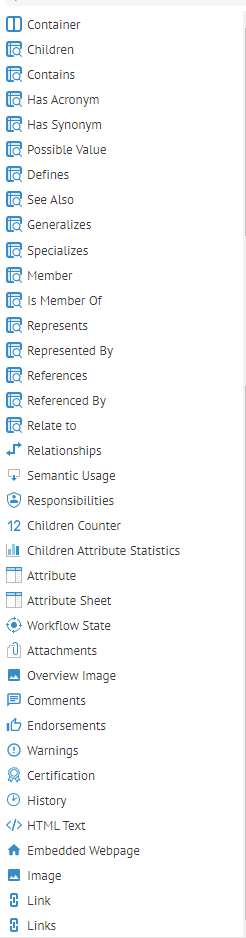
The following are examples of the other widgets unique to presentations.
Generally, the Overview tab will have one Attribute Sheet named Attributes by default. You may edit this (or add a new one and edit just as here).
Example
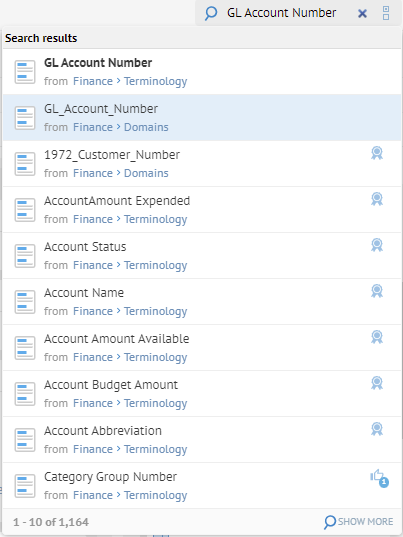
Search for the term GL_Account_Number and go to the object page.

Go to the More Actions menu in the upper right and select the Presentation > Customize.


Click Settings next to the heading of the Attribute Sheet widget named Attributes.


Now, you may add or remove attributes to show in DISPLAY ATTRIBUTES. So, click the x next to Type to remove it from the Attribute Sheet.
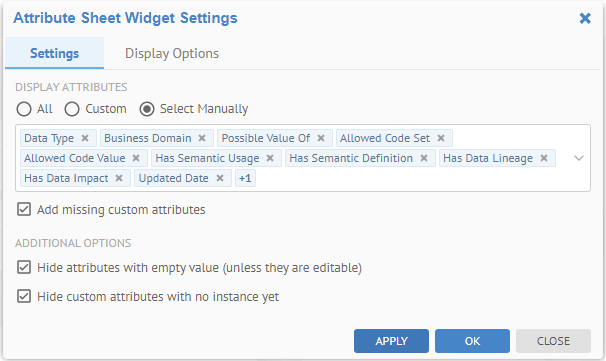
Click OK.

The Type attribute is no longer in the Attribute Sheet.
Attributes which are selected will not appear in the widget if they have an empty value for the particular object and you have Hide attributes with empty values (unless they are editable) checked, which is the default.
Add Attribute Widgets
In addition to the default Attribute Sheet named Attributes, you may add and edit new single attribute widgets.
Example
Search for the term GL_Account_Number and go to the object page.
Now that we removed the Type attribute, we will add it as a single Attribute Widget.
Go to the More Actions menu in the upper right and select the Presentation > Customize.

Drag the Attribute widget into the upper left container.
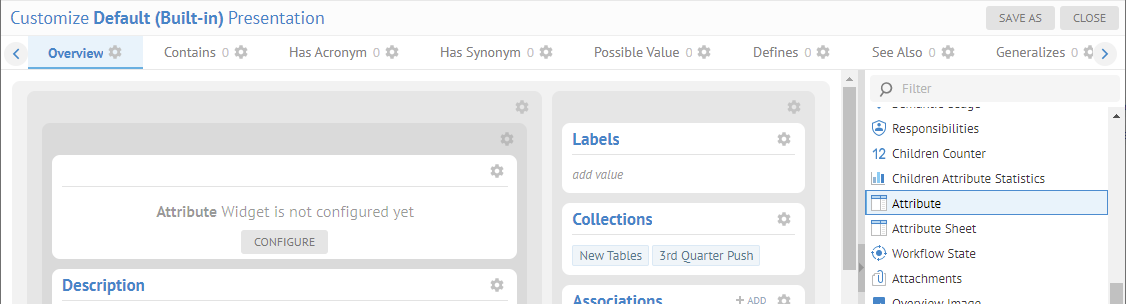
Click Settings > Configure.
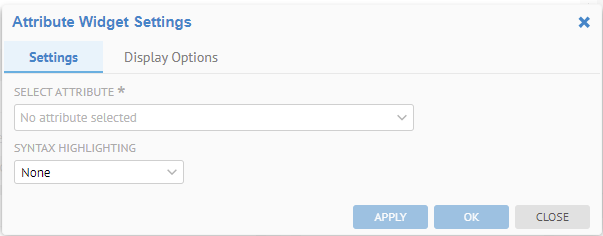
Select Type in the SELECT ATTRIBUTE combo box.
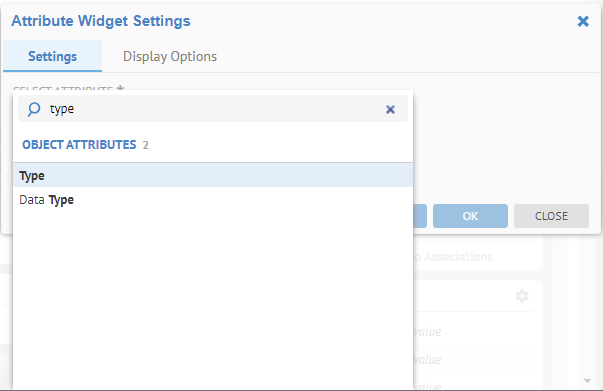
Click OK.
Now the Type attribute has its own widget.
Add Children Widget to a Presentation
With the children widget you may provide a display of the children of any category (e.g., columns in a table).
Search for Staging DW. PurchaseOrder and go to the object page.

We will be customizing the Overview tab presentation for any term (object category).
Go to the Preferences menu in the upper right and select the Presentation > Customize.
Drag the Container widget into the lowest container.
Add Custom Model Associations Widgets
Custom model objects can have a number of associations (relationships) and those associations become tabs in the object page presentation. Then, when customizing the presentation of a custom model object (e.g., Term) you may add widgets matching all the the types of associations which are valid for the object.
Example
Search for the term GL_Account_Number and go to the object page.

Go to the More Actions menu in the upper right and select the Presentation > Customize.
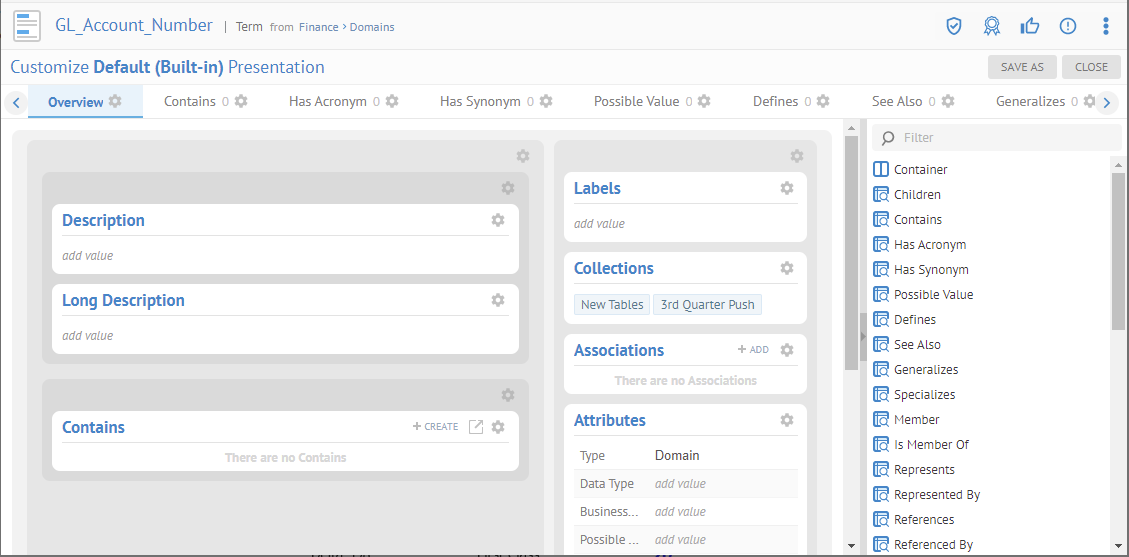
Drag the Has Synonyms widget into the lowest container.
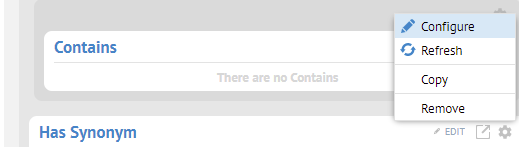
Click Settings > Configure.
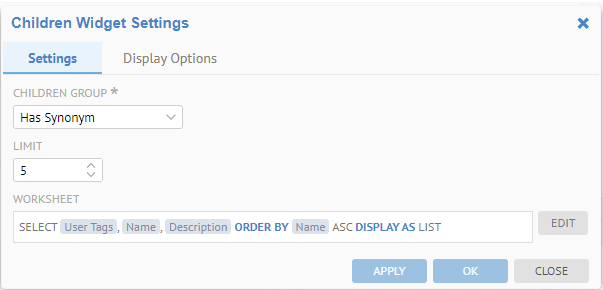
Now, you may see that it is simply a specialized Children widget, and you may proceed with those details.
Add Responsibilities Widget to a Presentation
You may add a widget to the Overview tab, and have it show one or more types of responsibility assignment.

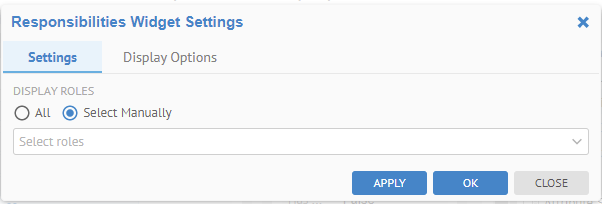


The STEWARD responsibility has a special presentation based upon Preferences defined for groups of users.
Add Semantic Usage Widget to a Presentation

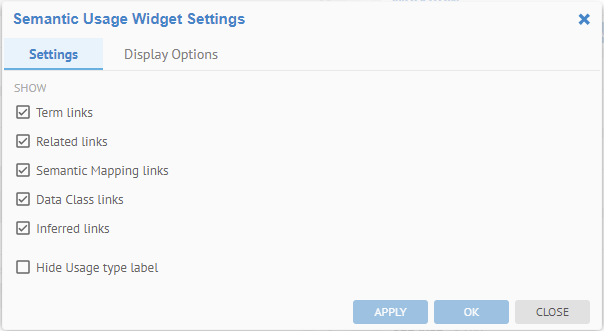
You may show/hide the specific types of links in the Semantic Usage widget.
Add History Widget to A Presentation
Search for SSN.
Select the term name US Social Security Number.
You are presented with the Overview tab. Thus, we will be customizing the Overview tab presentation for any term (object category).
Go to the Preferences menu in the upper right and select the Presentation > Customize.
Drag the History widget into the lowest container.
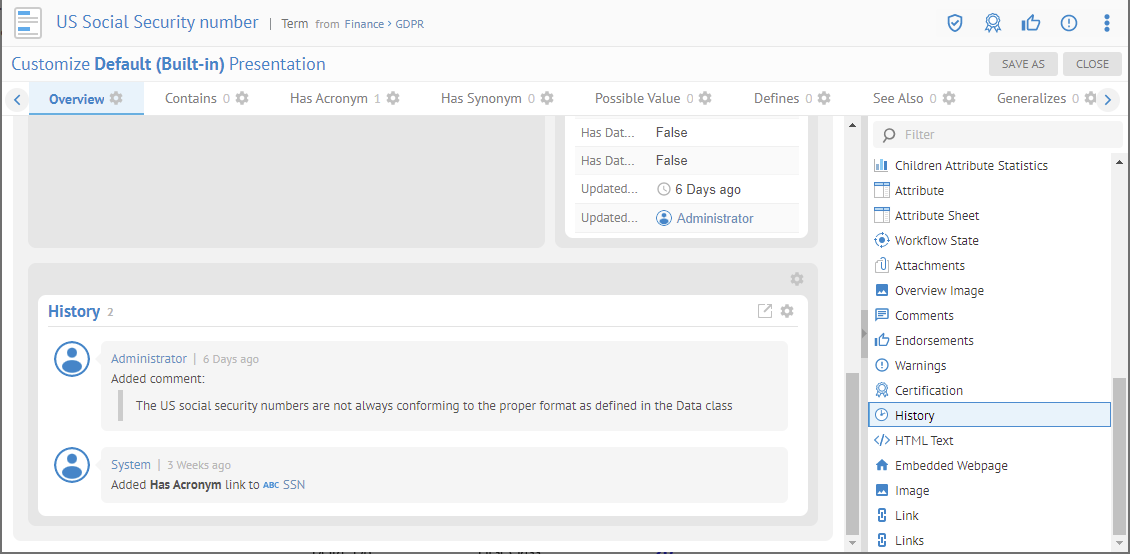
Click Configure for the new widget.
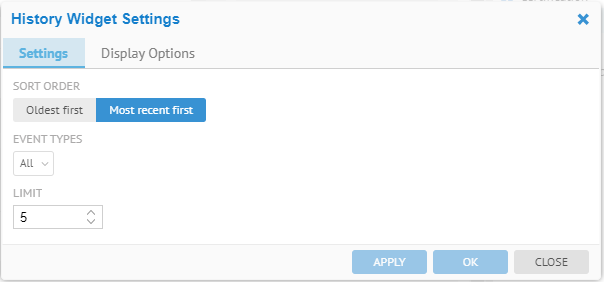
Specify Most recent first as the SORT ORDER.
Click on the EVENT TYPES pull down and select  Search.

Click OK
Click SAVE AS.
Add Overview Image to the Object Page
The overview image is a single image which may be added to the object page Overview tab optionally. By default, it is not included in the presentation, so you much first add it to the presentation to see the option.
Go to the object page of the Customer term in the Finance glossary.
Go to the More actions menu in the upper right and select the Presentation > Customize.
Drag the Overview Image widget into the lowest container.
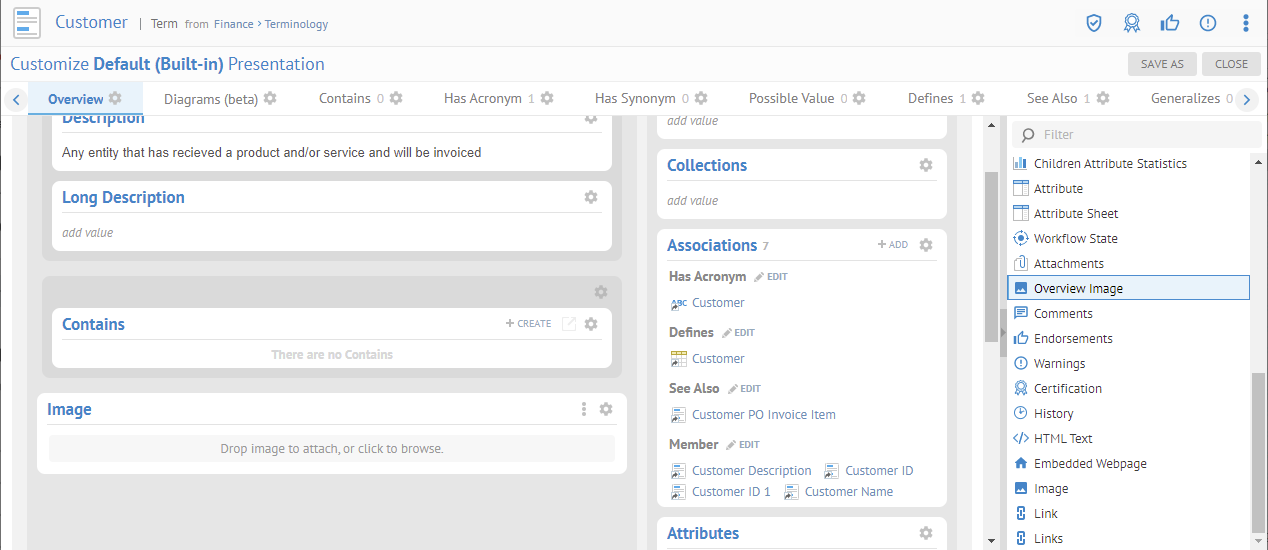
Click SAVE AS. Give it a name and click OK. Then click CLOSE.

Click on Manage image > Upload image next to Image and pick an image.

The Model Usage widget will show by default the models that are used by the current model and the models where the current model is being used. These models will only be visible if they belong to the current configuration).
This widget only applies to the root of a model (not on sub models of a Multimodel).
Navigate to the object page for the Staging DW model.

You are presented with the Overview tab. Thus, we will be customizing the Overview tab presentation for any term (object category).
Go to the Preferences menu in the upper right and select the Presentation > Customize.

The Model Usage widget is quite similar to the Usage tab in MANAGE > Repository and MANAGE > Configuration for the model except that those also show the configuration usage of the model.
The Model Usage widget is already defined for a model by default.
Click Configure for the widget.
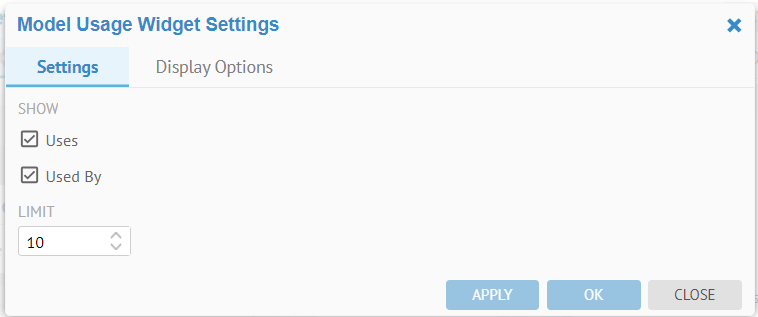
You may select to show either Uses, Used By or both and the number of items in each.
Add Comments to the Object Page
Search for SSN.
Select the term name US Social Security Number.
You are presented with the Overview tab. Thus, we will be customizing the Overview tab presentation for any term (object category).
Go to the Preferences menu in the upper right and select the Presentation > Customize.
Drag the Comments widget into the lowest container.

Click SAVE AS.
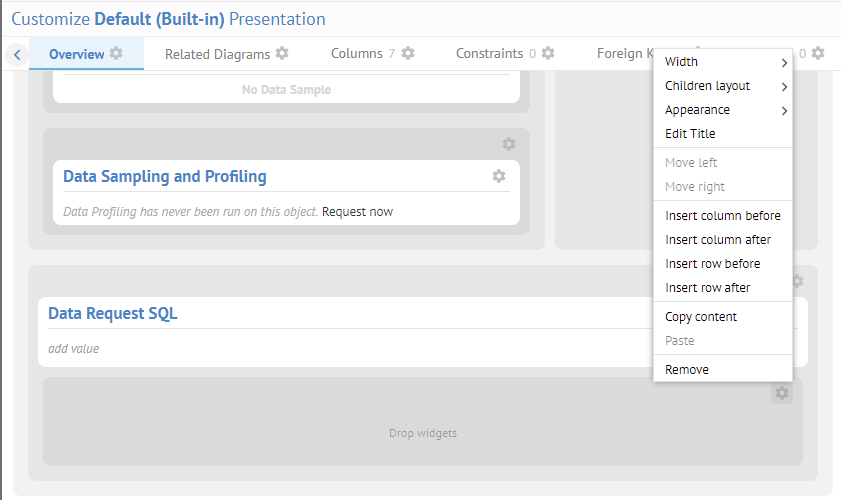
Show / Hide Object Page Tabs
Along with customizing the layout of the Overview tab of the object page, you may also control whether a particular tab is shown or not (hidden) in a particular presentation.
Steps
- Customize a presentation.
- Click the customize icon next to the tab header you wish to show or hide.
- Check or clear the Hide checkbox.
Customized presentations, may be personal or system type. You specify this type when saving (SAVE AS) a new customized presentation.
Personal – Owned by and available only to the user who created it.
System - Owned by the creator but may be shared with other users and/or groups.
The available presentation for a particular object type are presented when selecting a presentation.
The available presentations are listed in two groups, System and Personal, each then in alphabetical order.
If no presentation is manually selected then the first (alphabetically) SYSTEM presentation will be used, and it will be the Default (Built-in) if no system level presentations have been shared with this user.
Steps
- Perform the same steps as in creating a presentation.
- Click SAVE AS to save the updated and specify System as the type of presentation when saving and specify whom to share it with. These users (and members of any groups selected) will be presented with this new choice.

Example
In this example we will share a simplified business user presentation as the default for users in the group Business Users.
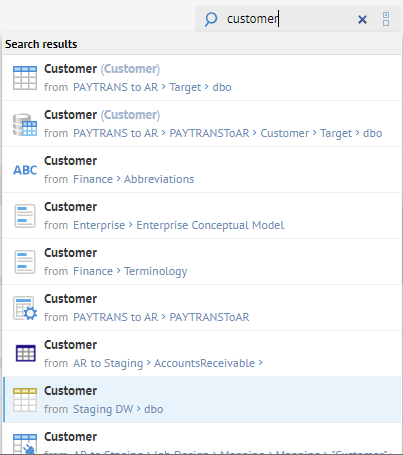
Sign in as the user Administrator And search for Customer. Select Staging DW > dbo > Customer.
You are presented with the Overview tab. Thus, we will be customizing the Overview tab presentation for any table (object category).
Go to the Preferences menu in the upper right and select the Presentation > Customize.

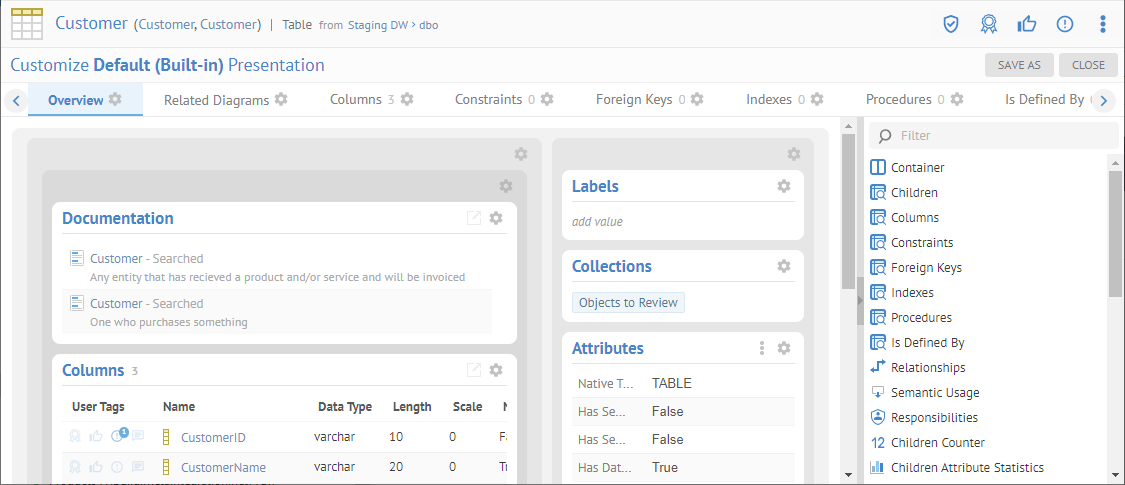
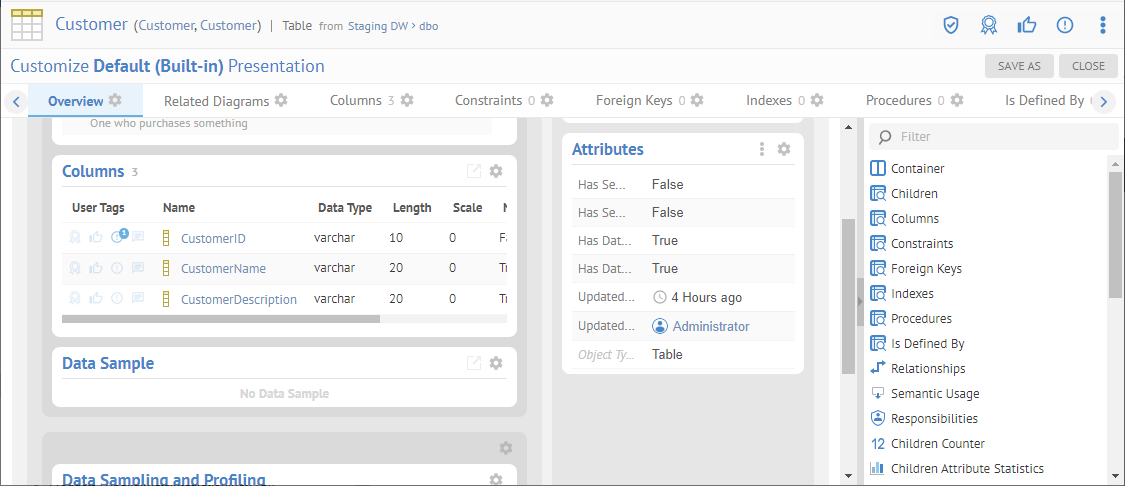
Configure the Attributes section and remove the following attributes from this customized presentation:
- Native Type
- Color
- Object Id
- Object Stable Id
- Object Type Id
- Object System Type

Click OK and note the simplified Overview tab view.
Click SAVE AS.

Enter the NAME, TYPE, SHARE WITH and DESCRIPTION fields as above. Click OK.
Now, sign in as the user named Bob. Search for Invoice and select the table with that name in the Staging DW.
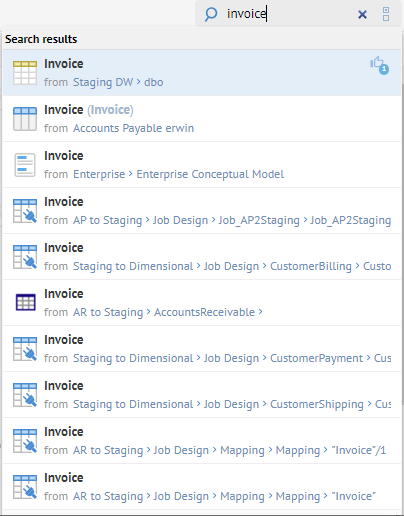

The same customized overview is shown. This will be true until you pick another one. Note, it is now the default without Bob having to specify it.
Manage Default Presentations
You may manage your presentation which are of type System and may be shared and thus become default presentations by going to MANAGE > Default Presentations.
Did this page help you?
If you find any issues with this page or its content – a typo, a missing step, or a technical error – let us know how we can improve!