
Edit User Account Details
Steps
- Sign in as a user with at least the Security Administratorcapability global role assignment.
- Go to MANAGE > Users in the banner.
- Select the user from the list.
Example
Sign in as an Administrator.
Go to MANAGE > Users in the top banner.

Click on the user to edit, Stu.
Click on the Properties tab.
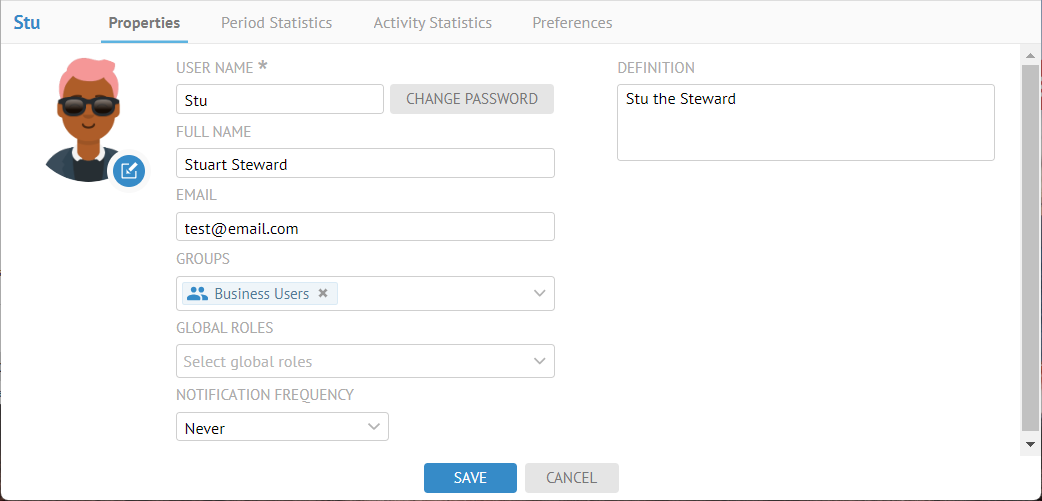
Here you may edit:
- USER NAME and CHANGE PASSWORD. If the user is a native user then these fields may be edited.
If the user is managed outside of Talend Data Catalog (e.g., LDAP, OAuth or SAML) then the USER NAME will not be editable and CHANGE PASSWORD will not be displayed)
- DEFINITION. Information about the user.
- FULL NAME. Full name of the user.
- EMAIL. Email address of the user.
The DEFINITION, FULL NAME and EMAIL of the user may be already be populated at login if the user is managed outside of Talend Data Catalog (e.g., LDAP, OAuth or SAML). You may update this information manually here.
- GROUPS. Pick list of groups which a user may be assigned to.
The group assignments you make here to the user will be replaced at login if the user is managed outside of Talend Data Catalog (e.g., LDAP, OAuth or SAML) and you are using automatic group assignment.
- GLOBAL ROLES. Pick list of global roles which a user may be assigned to.
Click the “x” next to an assigned global role name to remove the assignment.
- NOTIFICATION FREQUENCY to set how often you are notified of changes, which can be either:
- Never
- Daily
- Near Real Time
- Weekly (Day of week)
With Daily notification, there is a scheduled job named Send scheduled notifications and the time of day when the notification occurs may be set there.
With Near Real Time notification, the frequency is based upon the batch time specified by the administrators.
Review User Statistics
Detailed user session statistics may be downloaded.
Steps
- Sign in as a user with at least theSecurity Administratorcapability global role assignment.
- Go to MANAGE > Users in the banner.
- Select the user from the list.
- Click the Period Statistics tab and specify any PERIOD to report statistics for that user.
- Click the Activity Statistics tab to see statistics on the activities of this user (e.g., Certified Objects, etc.).,
Example
Sign in as an Administrator and go to MANAGE > Users in the top banner.
Click on the Administrator user and click the Period Statistics tab.

- Period: Specify the period of time over which the statistics will be presented.

- PERIOD SESSION COUNT: Number of logged in sessions for that user during that period.
- PERIOD SESSION TIME: Total time of logged in sessions for that user during that period.
- PERIOD OPERATION COUNT: Total number of operations executed by that user during that period.
- PERIOD OPERATION TIME: Total time of operations executed by that user during that period.
Click the Activity Statistics tab.

Edit User Preferences
One may clear user preference settings (impacting the UI) using the Preference tab when managing a user. You may wish to clear these out when encountering UI issues.
Steps
- Sign in as a user with at least the Security Administratorcapability global role assignment.
- Go to MANAGE > Users in the banner.
- Click a user.
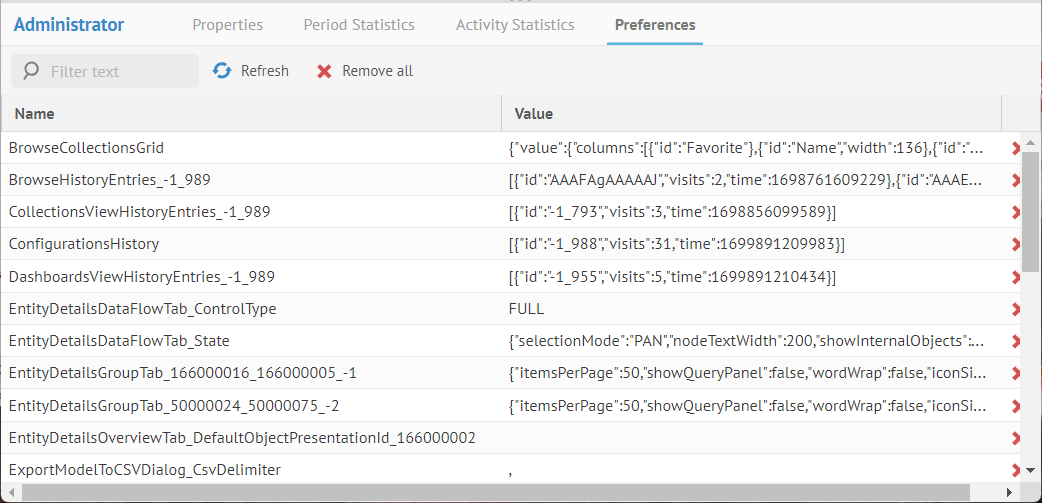
- Go to the Preferences tab.
- Use Deleteto clear one of the preferences.
- Use Remove allat the top of the list to delete all the current preferences.
Edit User Custom Attributes
You may define and associate values for custom attributes on users. The process is identical to assigning custom attributes on any other object in the repository.
One may clear user preference settings (impacting the UI) using the Preference tab when managing a user. You may wish to clear these out when encountering UI issues.
Steps
- If not already defined, create a new custom attribute on the User class type.
- Sign in as a user with at least the Metadata Editingcapability object role assignment.
- Go to the object page for the data element.
- Go to the Overview tab.
- Click on the More actions icon next to Attributes and select Add custom attribute(s).
- Select the custom attribute(s) to include.
- Edit their values in place.
Unlike labels and comments, custom attributes may only be assigned or edited with the proper permissions on the model that contains the object.
You may also edit custom attributes using the context menu when you see an element in a list or do so in bulk.
Example
Create the User Address custom attribute as in the example in add a new custom attribute.
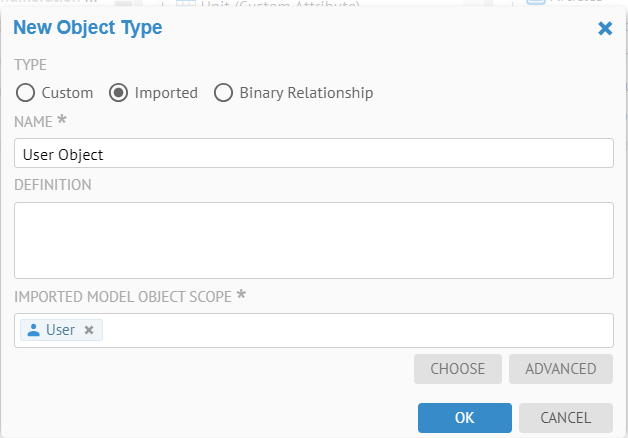
Select User as the Scope

Create the new User Address attribute type.

Assign it to the User Object.

Go to MANAGE > Users, refresh the browser and select the user named Bob. Enter a new USER ADDRESS. Click SAVE.

You may also edit this information in the user profile page for that user.

Did this page help you?
If you find any issues with this page or its content – a typo, a missing step, or a technical error – let us know how we can improve!